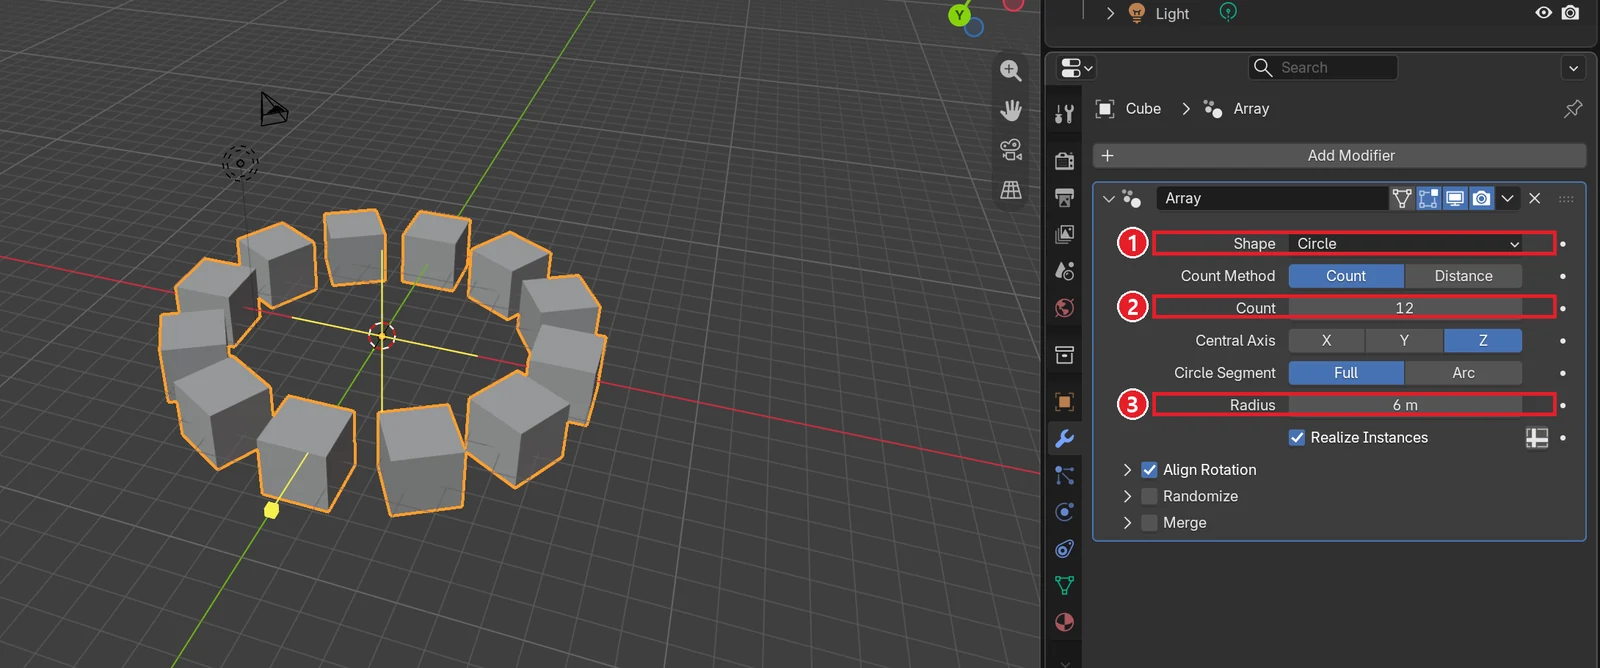
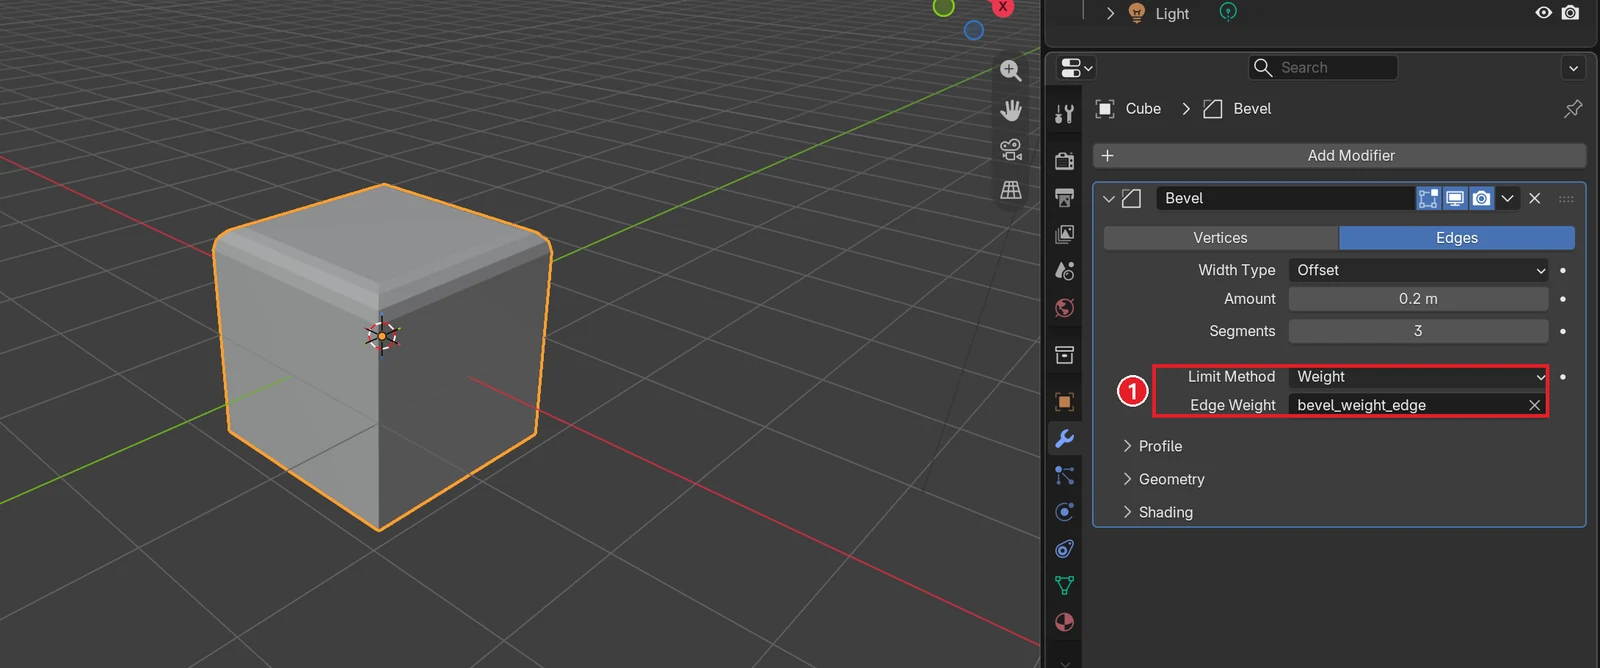
Every Blender modifier in one list: what each Add Modifier group does
Open the Add Modifier menu in Blender 5.2 group by group, see what Edit, Generate, Deform, Normals, Physics and the node groups contain, learn the one-line job of each modifier, add one by typing its name, and find the series posts that cover each one in detail.
한국어English
ON THIS PAGE
- 011. The big picture: nine groups
- 022. Generate: adds faces or rebuilds the mesh
- 033. Deform: moves points without changing the mesh
- 044. Normals, Physics and the node groups
- 055. Add by name: type in the menu
- 066. One at a time: the 10-part modifier series
- 077. Practice
- 088. Common mistakes and fixes
- 09Summary in one line
- 10References
Based on: Blender 5.2 LTS (screenshots from 5.2.1, English interface, default shortcuts). Checked in November 2026. All pictures are real Blender screenshots. The red numbers and boxes were added to explain them. In most pictures the Properties editor was dragged wider.
Click Add Modifier in the Modifiers tab and you get dozens of names. It is normal not to know where to start. This post opens that menu one group at a time and gives each modifier a one-line job. Think of it as a map.
A modifier changes how an object looks without touching the original shape. It works like a filter in a photo app: turn it off and the original comes back. The idea, the stack order and Apply are covered in What is a modifier. A first hands-on try is in Blender beginner chapter 7: modifiers. This post is the next step. It answers "what is everything else in that menu?"
After this post you can:
- Tell the nine groups of the Add Modifier menu apart.
- Pick common Generate and Deform modifiers by name.
- Add a modifier by opening the menu and typing.
- Find the series post that covers the modifier you need.
Before you start: Select the default cube in a new file (File ‣ New ‣ General) and open the Modifiers tab (wrench icon) in the Properties editor on the right. The menu items change a little with the object type (mesh, curve, text and so on). This post uses the default cube, which is a mesh.
1. The big picture: nine groups
Follow along: Click the Add Modifier button at the top of the Modifiers tab. When the menu opens, move the mouse over Edit.
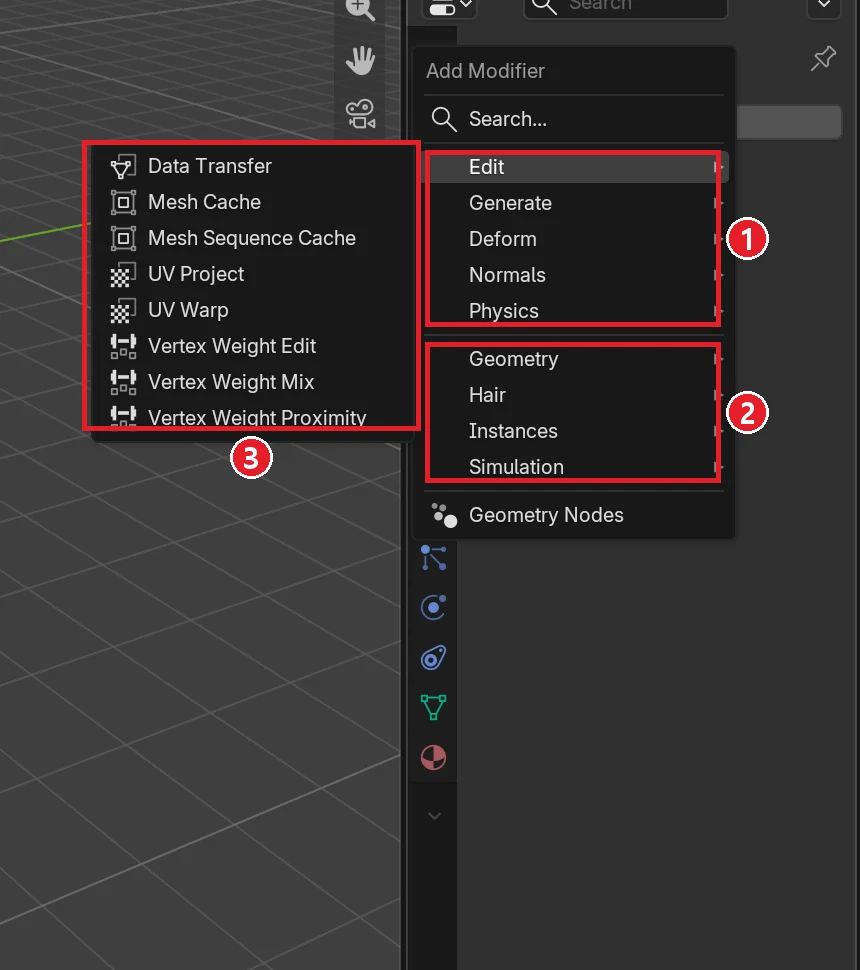 Figure 1. The Add Modifier menu: ① the five groups of standard modifiers ② four groups of modifiers built with nodes ③ the list that opens when the mouse is over Edit (Blender screenshot)
Lines split the menu into four blocks.
| Block | Groups | What is inside |
|---|---|---|
| Top | Search... | Find by name (section 5) |
| Upper middle | Edit, Generate, Deform, Normals, Physics | The standard modifiers Blender has had for a long time |
| Lower middle | Geometry, Hair, Instances, Simulation | Modifiers made with Geometry Nodes that ship with Blender |
| Bottom | Geometry Nodes | An empty Geometry Nodes modifier, where you build your own nodes |
The lower-middle groups are ready-made tools built from nodes, which snap together like Lego bricks. Nodes are covered in Geometry Nodes for beginners. At first, the five upper groups are all you need.
1-1. Edit: changes data rather than shape
The Edit list is ③ in Figure 1. These modifiers change information attached to points (UV coordinates, point weights) more than point positions. Many of them show no visible change, so you can skip them at first.
| Modifier | Job in one line |
|---|---|
| Data Transfer | Copy data (normals, UVs and so on) from another object to nearby points |
| Mesh Cache / Mesh Sequence Cache | Play back motion baked in another program |
| UV Project | Make UV coordinates as if projected from another object (often a camera or an empty) |
| UV Warp | Move, rotate or stretch UV coordinates |
| Vertex Weight Edit / Mix / Proximity | Change, mix or set by distance the weights in a vertex group |
2. Generate: adds faces or rebuilds the mesh
This is the group you will use most. These modifiers add, remove or rebuild points and faces.
Follow along: Move the mouse over Generate.
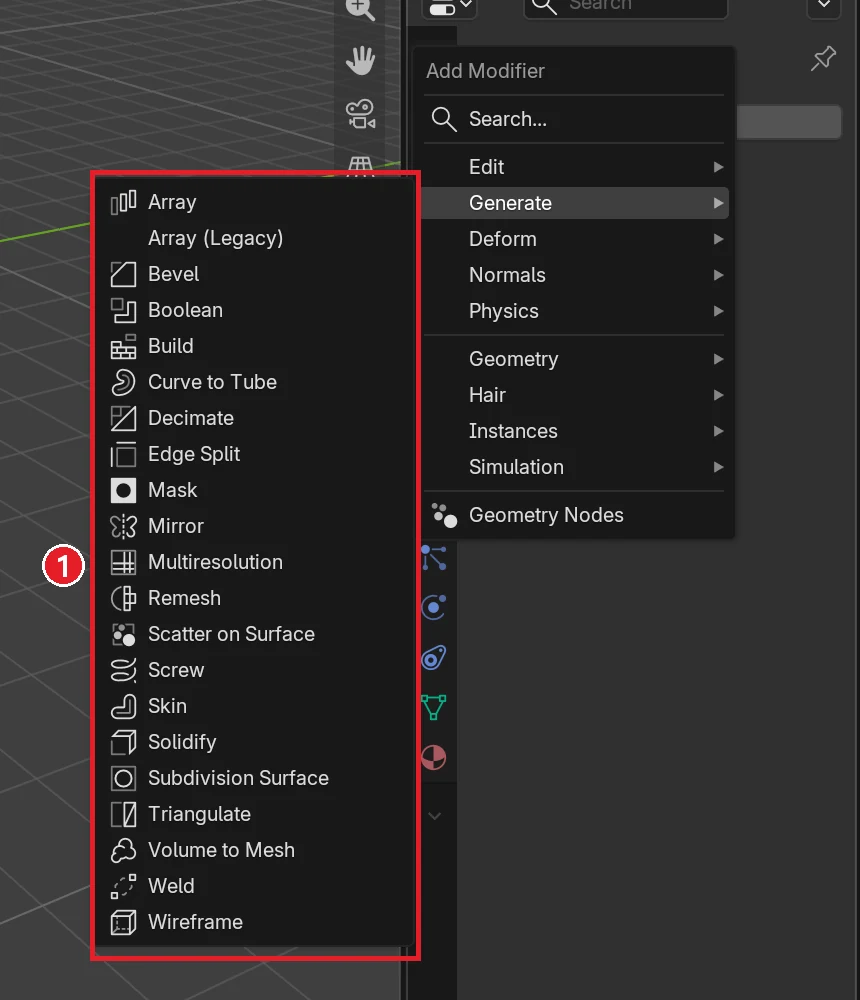 Figure 2. ① The Generate list. Array and Array (Legacy) are separate items at the top (Blender screenshot)
| Modifier | Job in one line | Use it for |
|---|---|---|
| Array | Copy the shape many times along a line, circle or curve (the new version since 5.0) | Fences, stairs, a ring of pillars |
| Array (Legacy) | The old array. Old tutorials show this one | Opening older files |
| Bevel | Cut corners to round them | Softening razor-sharp edges |
| Boolean | Join, subtract or keep only the overlap with another object | A window hole in a wall |
| Build | Faces appear or disappear one by one over time | A shape that builds itself up |
| Curve to Tube | Give a curve a tube-shaped body | Cables, pipes |
| Decimate | Lower the face count while keeping the shape close | Lightening a heavy model |
| Edge Split | Split faces at sharp edges so the edges look crisp | Sharp edges on a smooth-shaded model |
| Mask | Show only the part in a vertex group | Working on part of a big model |
| Mirror | Mirror the shape across the object's origin | Faces, cars, anything with matching sides |
| Multiresolution | Add levels for sculpting fine detail | Sculpting |
| Remesh | Rebuild the surface as an even grid | Cleaning a messy mesh |
| Scatter on Surface | Scatter small objects over a surface | Grass, pebbles |
| Screw | Spin a profile around an axis | Bottles, screws, cups |
| Skin | Grow a thick body around points and edges | Branches, quick character bases |
| Solidify | Give thin faces a thickness | Cup walls, paper, clothes |
| Subdivision Surface | Split faces to make the shape smooth | Rounded characters and products |
| Triangulate | Turn every face into triangles | Checking before export to a game engine |
| Volume to Mesh | Turn volume data (like smoke) into a mesh | Making a volume solid |
| Weld | Merge points that are very close | Closing a split seam |
| Wireframe | Turn edges into bars | Steel frames, lattice decoration |
The seven in bold each get their own post in this series (section 6).
3. Deform: moves points without changing the mesh
Deform modifiers keep the number of points and their connections. They only move the points. The net stays the same; you just pull it.
Follow along: Move the mouse over Deform.
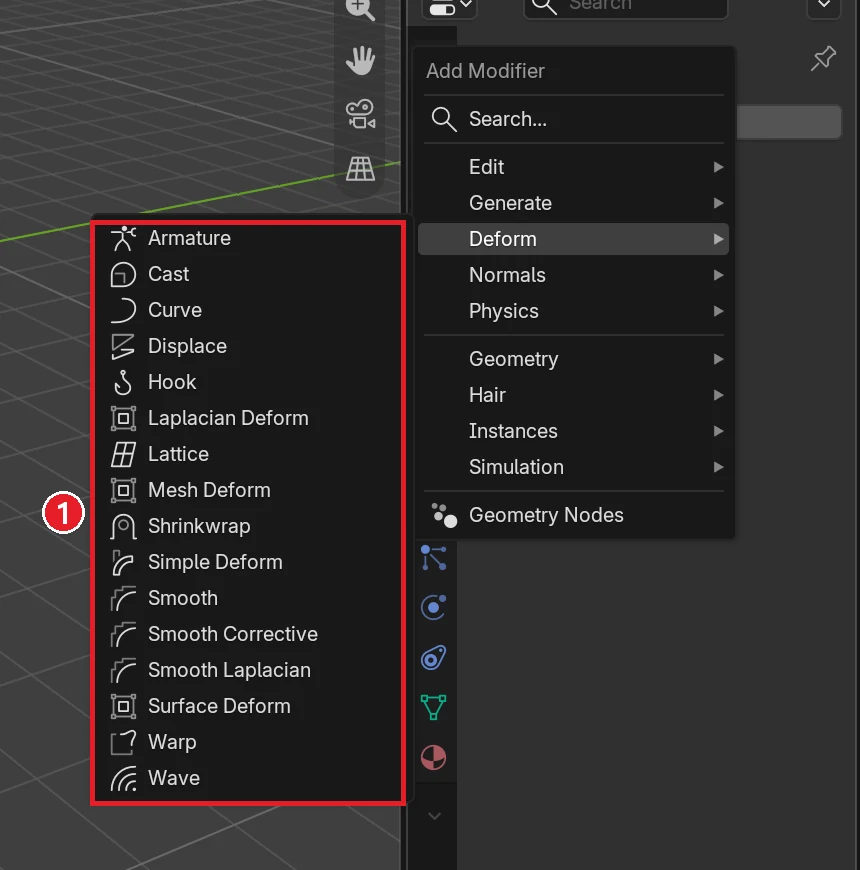 Figure 3. ① The 16 Deform modifiers (Blender screenshot)
| Modifier | Job in one line |
|---|---|
| Armature | Move the mesh with a skeleton (armature). The base of character animation |
| Cast | Pull the shape toward a sphere, cylinder or box |
| Curve | Bend along a curve (with Array: chains, rails) |
| Displace | Push the surface out by a texture's brightness (terrain, bumpy walls) |
| Hook | Hang some points on another object and drag them around |
| Laplacian Deform | Move a few anchor points and let the rest follow while keeping its shape |
| Lattice | Bend the mesh inside a lattice cage by moving the cage |
| Mesh Deform | Bend the mesh with another mesh wrapped around it |
| Shrinkwrap | Make the mesh stick to another object's surface |
| Simple Deform | Twist, bend, taper or stretch |
| Smooth / Smooth Corrective / Smooth Laplacian | Even out point positions to smooth the shape (in slightly different ways) |
| Surface Deform | Follow another surface as it moves |
| Warp | Bend as if pulled between two points |
| Wave | Make a ripple |
4. Normals, Physics and the node groups
Follow along: Move the mouse over Normals, then over Physics.
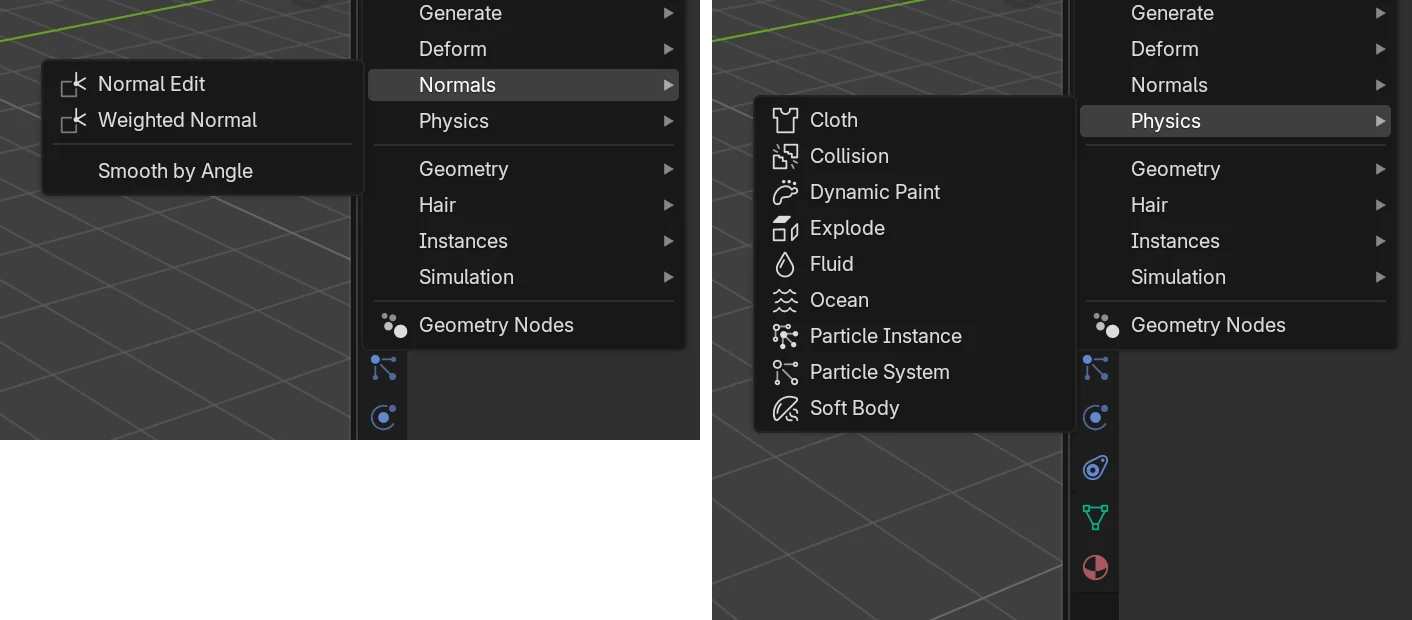 Figure 4. Left: Normals. Right: Physics (Blender screenshot)
A normal is the direction a face points. It decides how light hits that face. The Normals group keeps the shape and only adjusts these directions, which changes the shading.
| Group | Modifier | Job in one line |
|---|---|---|
| Normals | Normal Edit | Tilt normals toward a point or a direction |
| Normals | Weighted Normal | Match normals to large faces so flat areas look clean |
| Normals | Smooth by Angle | Smooth only where the surface bends less than a set angle |
| Physics | Cloth, Collision, Soft Body | Cloth, collisions, soft objects |
| Physics | Fluid, Ocean | Flowing liquid, an ocean surface |
| Physics | Dynamic Paint, Explode | Paint where things touch, break faces apart |
| Physics | Particle System, Particle Instance | Emit particles, put a mesh at each particle |
You usually turn physics on in the Physics tab rather than in this menu. Turning on Cloth in the Physics tab also puts a Cloth modifier in the stack. That is why the same names show up here.
Now open the four node groups in the lower part.
Follow along: Move the mouse over Geometry, Hair and Simulation in turn.
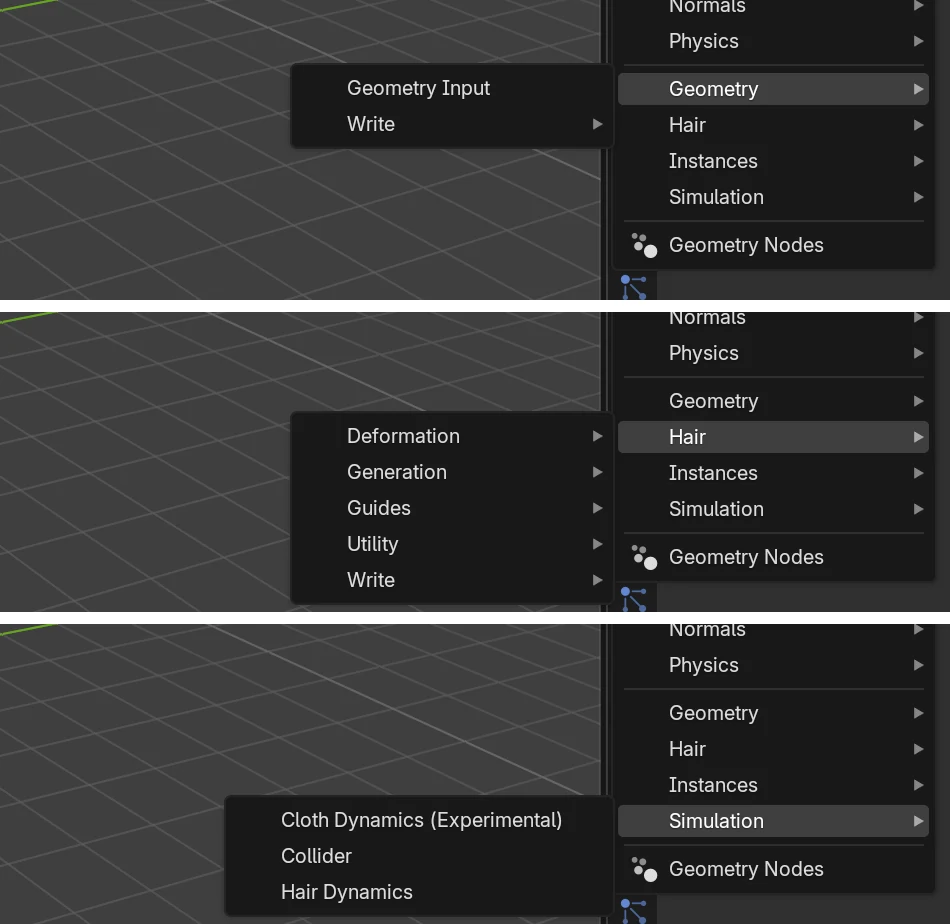 Figure 5. From the top: the Geometry, Hair and Simulation groups (Blender screenshot)
| Group | What is inside |
|---|---|
| Geometry | Geometry Input, Write (submenus for reading and writing attributes) |
| Hair | Deformation, Generation, Guides, Utility, Write (submenus for hair curves) |
| Instances | Instance on Elements, Randomize Transforms |
| Simulation | Cloth Dynamics (Experimental), Collider, Hair Dynamics |
Most of these go with hair curves or node work. While you are learning mesh modeling, just remember that ready-made node tools live here.
5. Add by name: type in the menu
If scrolling through lists is slow, type. When the Add Modifier menu is open, pressing a letter turns it into a search.
Follow along:
- Click Add Modifier to open the menu.
- Without clicking anything, type
BEV. - When Generate ▸ Bevel is highlighted at the top, press
Enter.
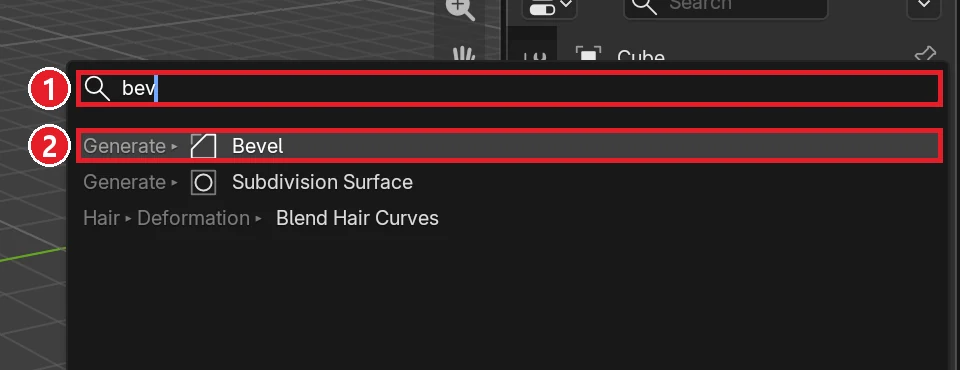 Figure 6. ① bev in the search field ② the first result, Generate ▸ Bevel. Each result shows which group it belongs to (Blender screenshot)
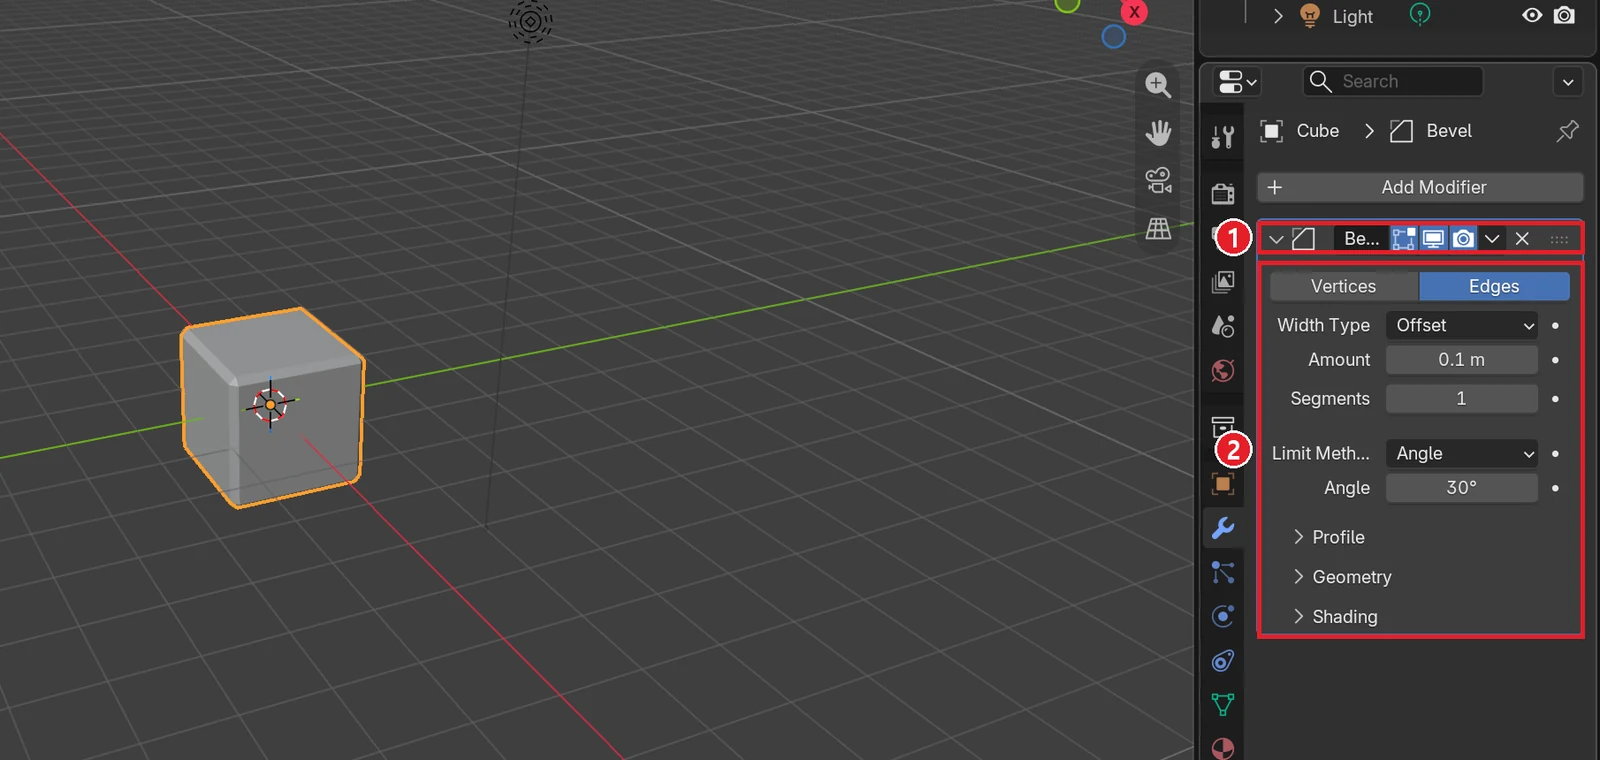 Figure 7. After
Enter: ① a Bevel panel appears ② defaults are Amount 0.1 m, Segments 1, Limit Method Angle (30°) (Blender screenshot)
The search also lists other names below the top one. Enter adds the highlighted top line, so check that it is the one you want first. The "Generate ▸" text in front of each result also teaches you where that modifier sits in the menu. To remove the Bevel, click the X at the right end of the panel header.
6. One at a time: the 10-part modifier series
If this post is the map, the posts below are walks through each neighborhood. They all use the same setup: Blender 5.2, starting from a new file, real screenshots.
| No. | Post | What it covers |
|---|---|---|
| 1 | This post | Map of the whole menu |
| 2 | Mirror modifier | Build half, mirror the rest, keep the center seam closed |
| 3 | Array modifier | Rows, stairs, circles (the new Array) |
| 4 | Bevel modifier | Round edges, only where you want by angle or weight |
| 5 | Subdivision Surface modifier | Smooth shapes, keep corners with support loops and creases |
| 6 | Boolean modifier | Cut holes, join shapes |
| 7 | Solidify modifier | Give thin faces thickness |
| 8 | Screw modifier | Spin a profile into bottles and screws |
| 9 | Curve modifier with Array | Bend along a curve, with Array |
| 10 | Displace and Shrinkwrap modifiers | Push surfaces out, stick to other surfaces |
To let an AI build a modifier stack, continue with Let AI build a modifier stack.
7. Practice
- Open the Add Modifier menu and count the items in Generate and Deform. Check that they match the tables here.
- With the menu open, type
SOLand write down the first result. - Add a Bevel to the default cube, then turn on Cloth in the Physics tab. See what new item appears in the Modifiers tab. Undo with
Ctrl+Zafterwards. - Instead of the cube, add a curve with Add ‣ Curve ‣ Bezier and open the Add Modifier menu. Find what is different from a mesh.
8. Common mistakes and fixes
| Symptom | Cause | Fix |
|---|---|---|
| I can't see the Add Modifier button | Another tab is open | Click the wrench icon in the vertical tab column of the Properties editor |
| The menu has fewer items than this post | The selected object is not a mesh (curve, text and so on) | The menu changes with object type. Select a mesh and open it again |
| My Array panel looks different from an old tutorial | Since 5.0, Array is the new one; old tutorials use Array (Legacy) | Pick Array (Legacy) when following an old tutorial |
| Typing in the menu doesn't search | The mouse left the menu and it closed | Open the menu again and type with the mouse over it |
| Blender got very slow right after adding something | High Subdivision Surface level or a large Array count | Lower the level or count, or turn off the monitor icon in the panel header for a moment |
| I added Cloth and nothing happens | Physics is calculated when the timeline plays | Go back to the first frame and play the timeline |
Summary in one line
Add Modifier = five standard groups (Edit, Generate, Deform, Normals, Physics) + four node groups. Generate makes new shape; Deform only bends. Open the menu and type to search. The next post covers the Mirror modifier, the first one worth getting used to.
Next: Mirror modifier · Whole series: this post
References
- Blender 5.2 Manual: Modifiers (contents)
- Blender 5.2 Manual: Modifiers Introduction
- Blender 5.2 Manual: Common Modifier Options
- Shortcuts: Blender 5.2.1 default (Blender) keymap
- Image license: screenshots of Blender taken by AZTechnology. Blender license: blender.org/about/license