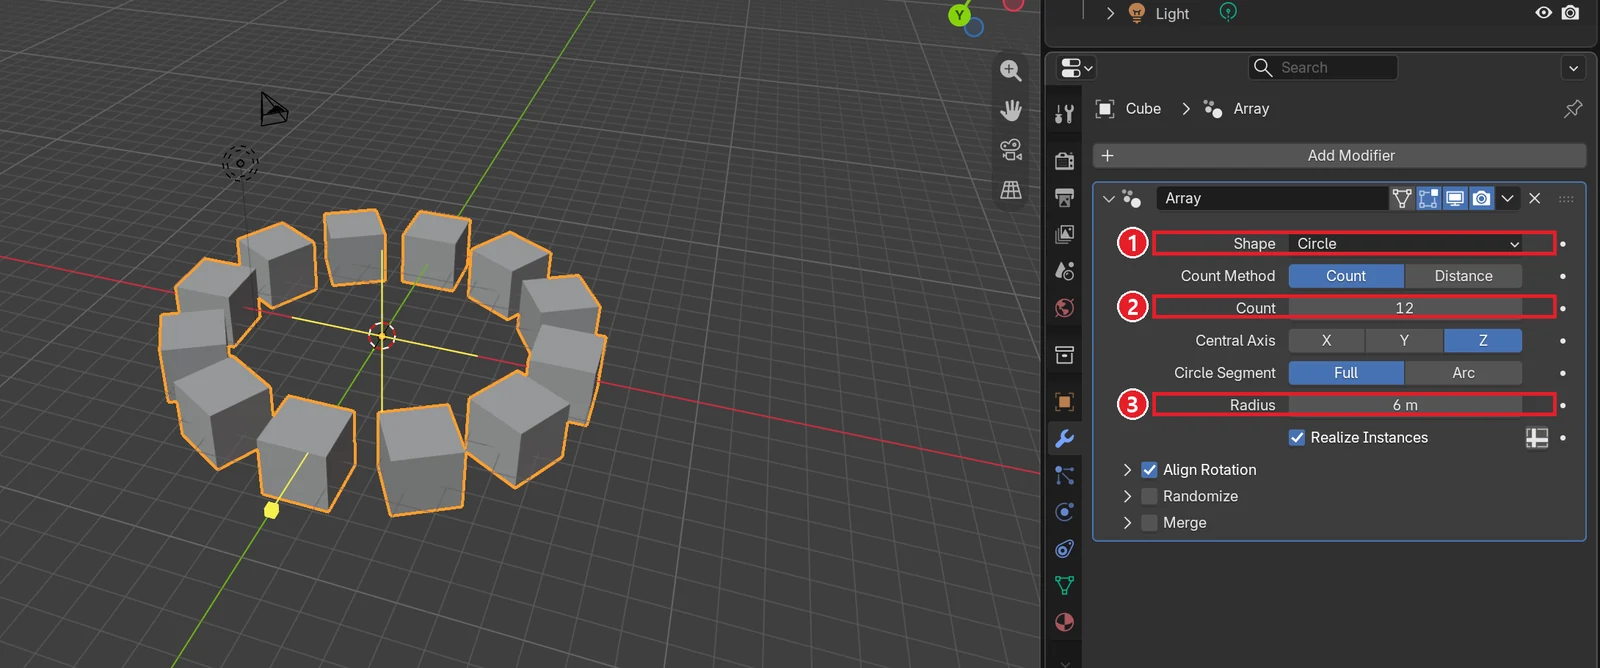
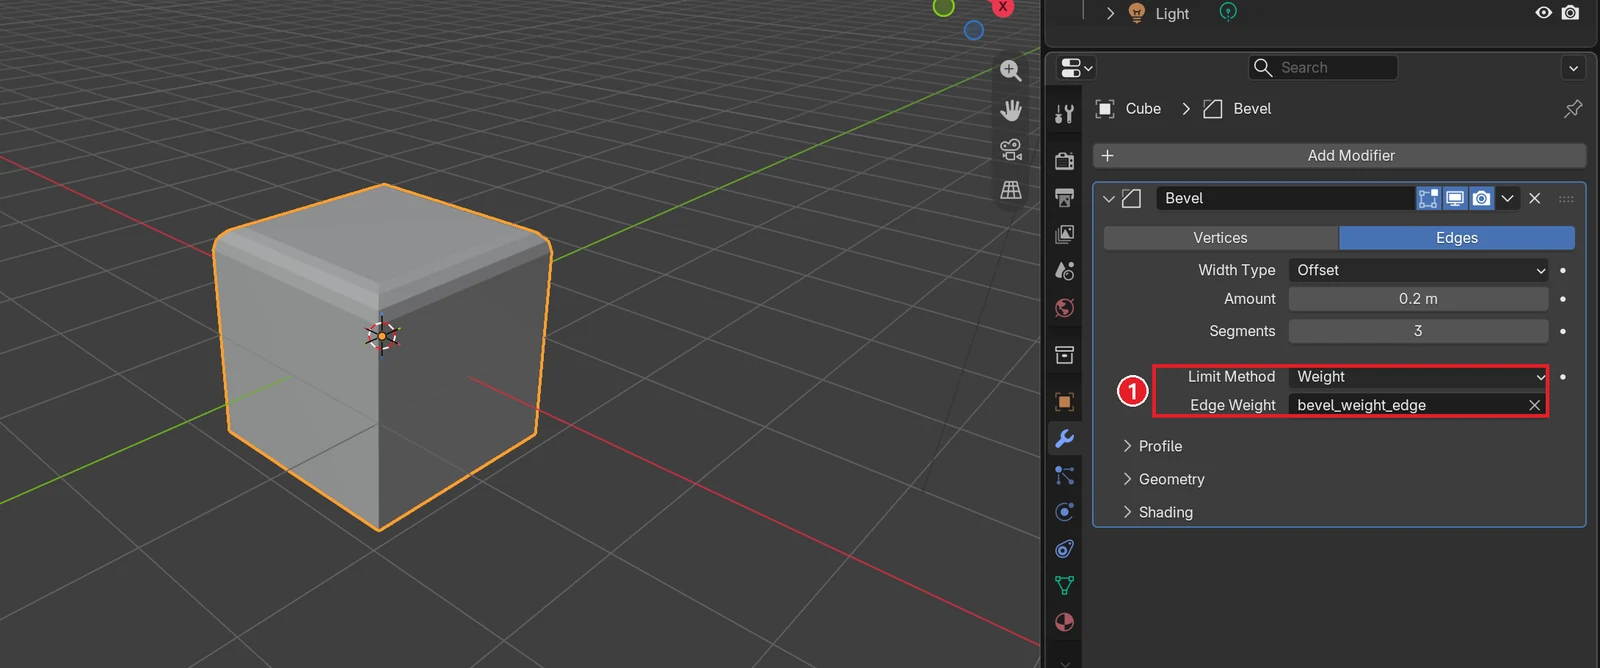
Solidify modifier: giving thin faces thickness (including wall thickness for 3D printing)
Add the Solidify modifier to a box with its top removed, then change Thickness, Offset, Even Thickness, and Rim ‣ Fill one at a time to see on real screens where the thickness goes and how much. It also covers uneven walls caused by unapplied scale, and what to check when you set wall thickness for 3D printing.
한국어English
ON THIS PAGE
- 011. Make a box without a top
- 022. Add Solidify and set the thickness
- 033. Offset: which side the thickness goes on
- 044. Even Thickness: walls that get thinner at corners
- 055. Rim ‣ Fill: an edge that looks empty
- 066. Unapplied scale makes walls uneven
- 077. When you need Complex mode
- 088. Setting thickness for 3D printing
- 09Practice
- 10Common mistakes and fixes
- 11Summary
- 12References
Based on: Blender 5.2 LTS (screenshots from 5.2.1, English interface, default shortcuts). Checked in November 2026. All images are real Blender screens. Red numbers, boxes, and the labels on comparison images were added for explanation. The Properties editor was widened so the text is easier to read.
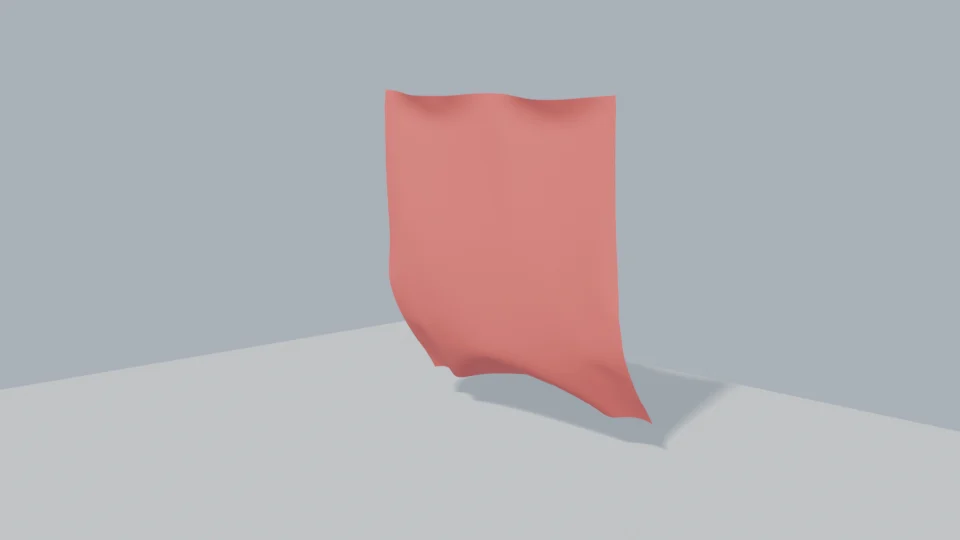
In Blender, a single face is a sheet of paper with zero thickness. To make things with walls, like cups, pots, or boxes, you need to give that paper some thickness. The Solidify modifier makes a second layer of the faces and joins the two layers. It turns thin paper into thick cardboard.
Blender beginner chapter 7, section 4-4 added Solidify and changed Thickness. This guide picks up from there. Other modifiers are in Every Blender modifier in one list. We look at whether the thickness goes outside or inside, why walls get thinner at corners, why the edge looks empty, and why walls become uneven on an object you scaled.
When you finish this guide, you will be able to do the following.
- Set the thickness with Thickness and the side it goes on with Offset.
- Use Even Thickness to keep walls even at corners.
- Recognize the open edge you get when Rim ‣ Fill is off.
- Fix uneven walls caused by unapplied scale with
Ctrl+A. - List what to check when you set thickness for 3D printing.
1. Make a box without a top
Starting point: the default cube in a new file (File > New > General).
Follow along:
- Select the cube and press
Tabto enter Edit Mode. - Press
3for face select and click the top face.
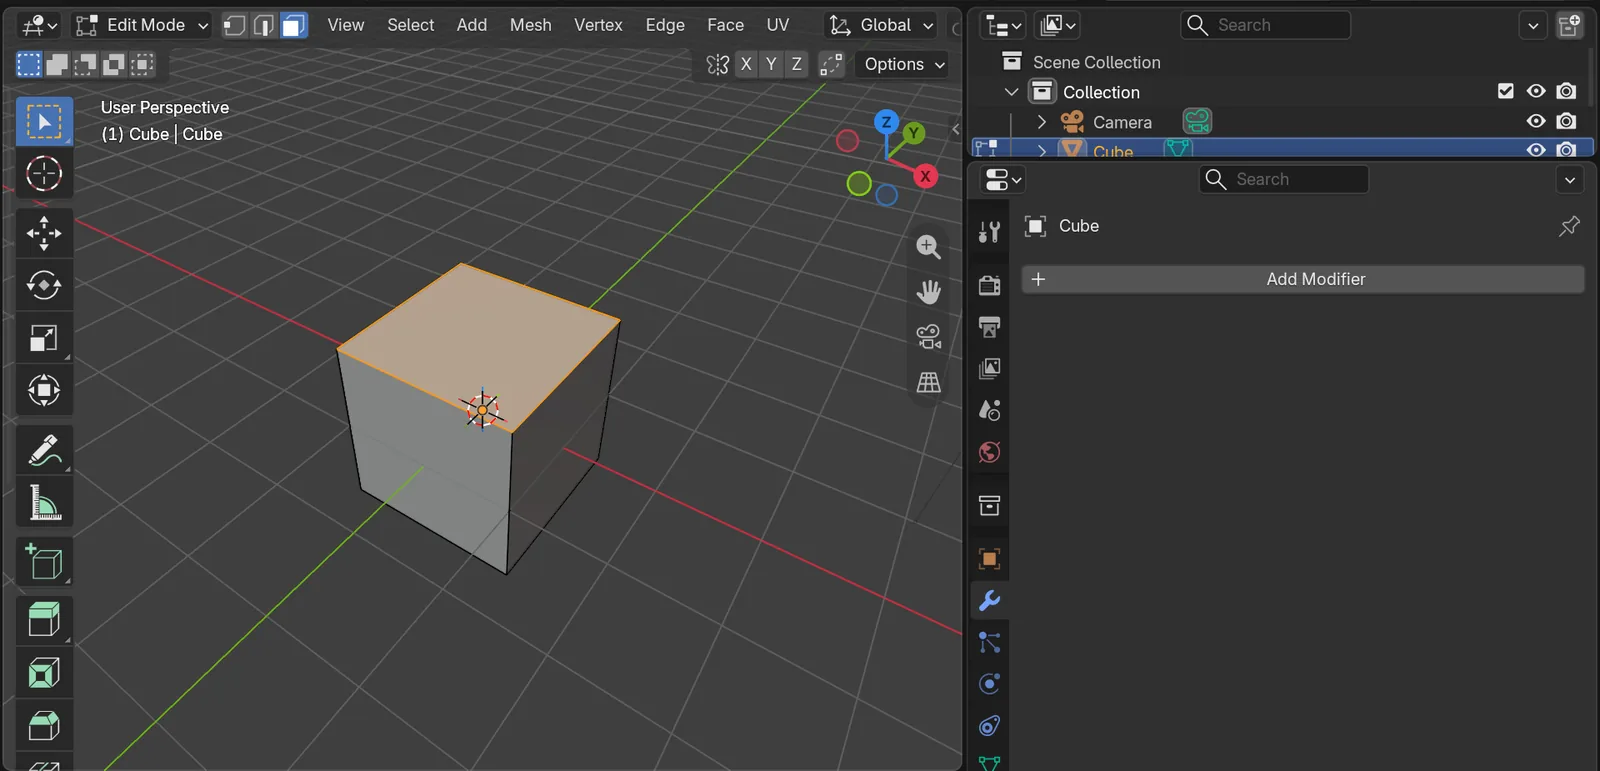 Figure 1. The cube in Edit Mode with only the top face selected (Blender screenshot)
- Press
X> Faces to delete the top face, then pressTabto go back to Object Mode.
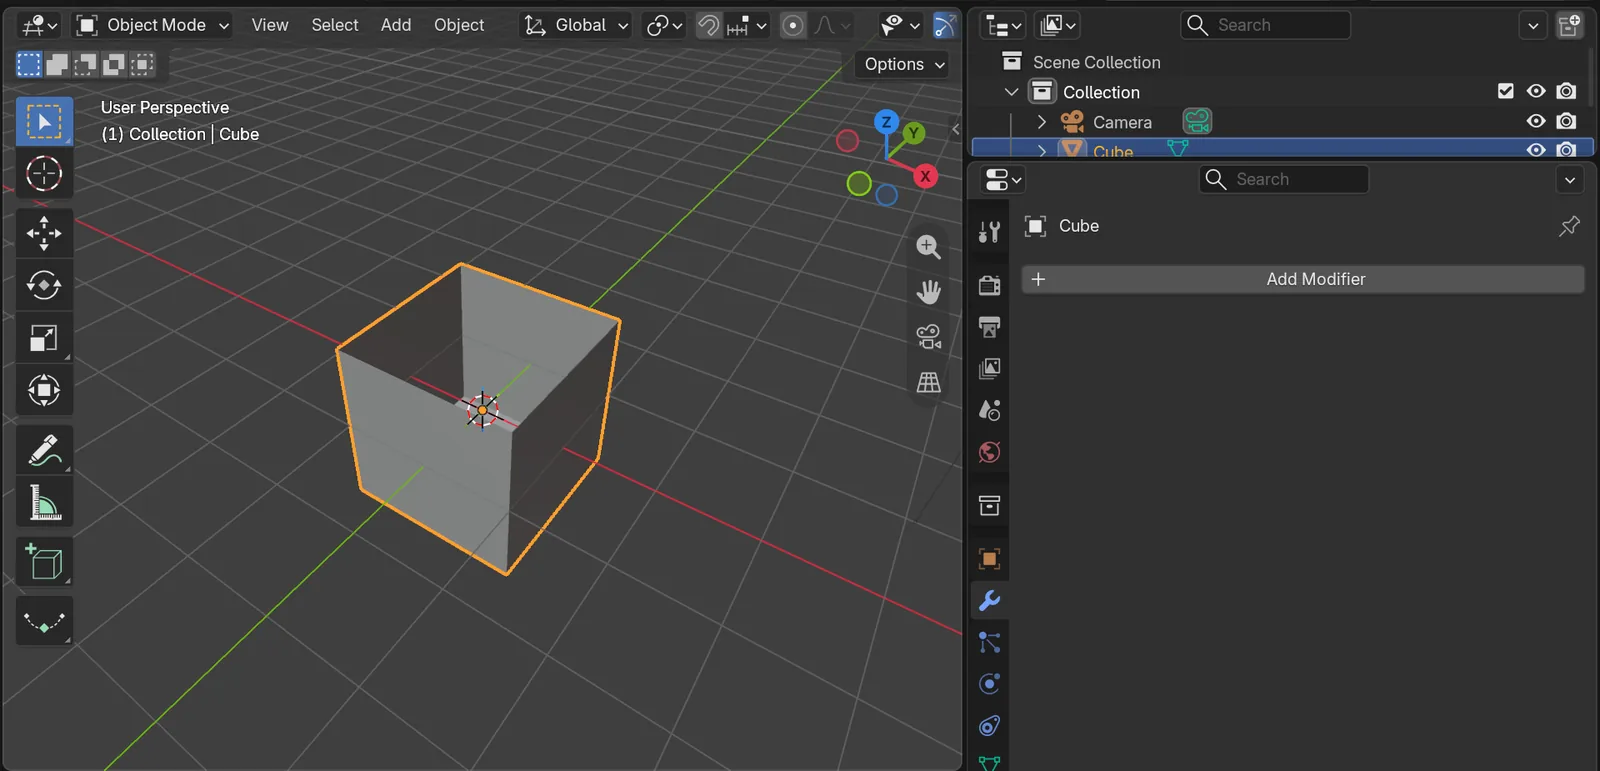 Figure 2. The box with its top removed. The walls have no thickness (Blender screenshot)
Without the top, the walls look like paper. You cannot 3D print this, and in a close render the wall edge shows as a single line.
2. Add Solidify and set the thickness
Starting point: the open box from the previous section, selected in Object Mode.
Follow along:
- In the Properties editor, open the Modifiers tab (wrench icon) and choose Add Modifier > Generate > Solidify.
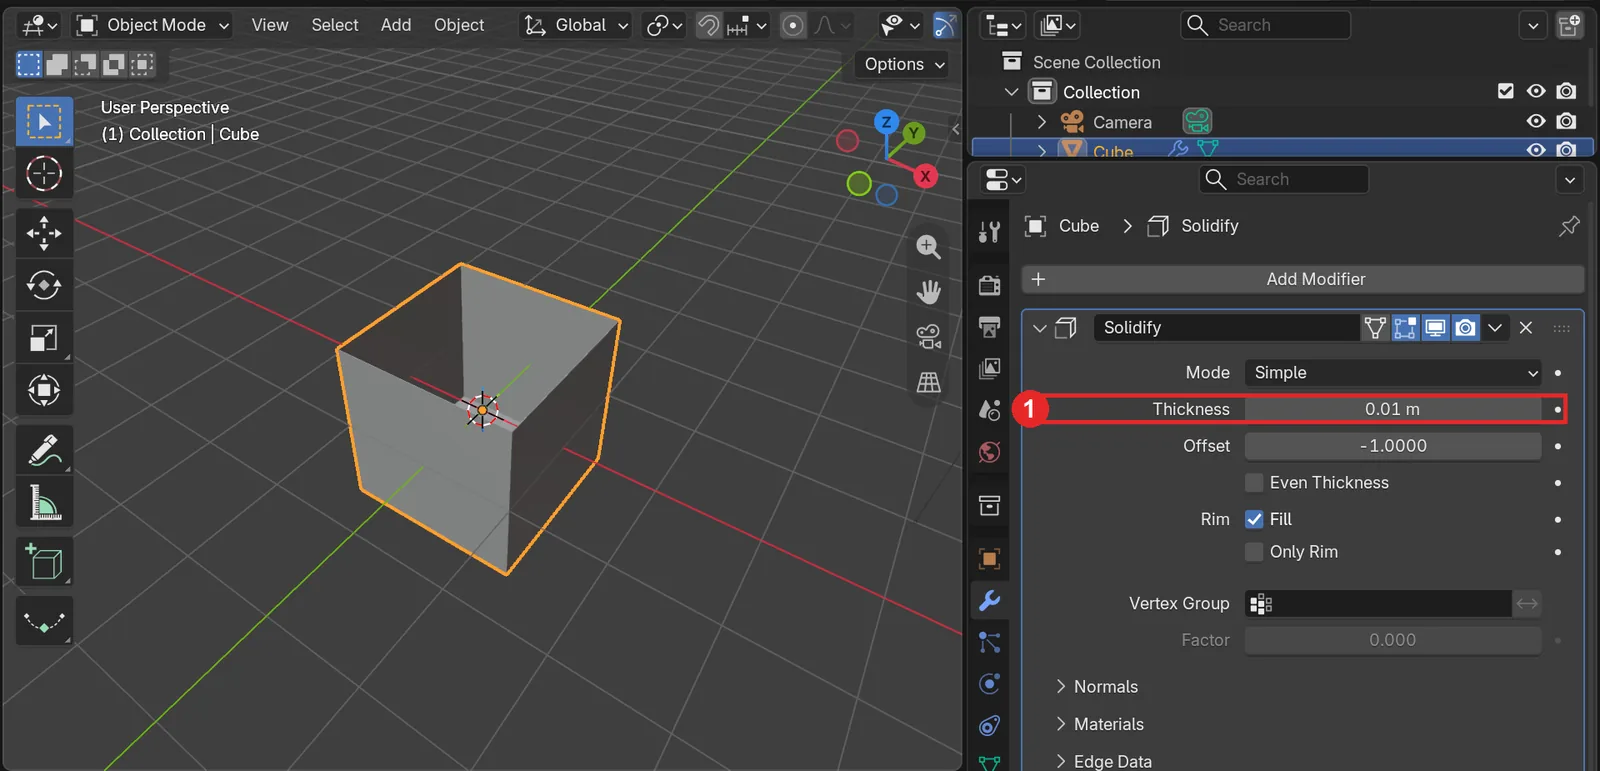 Figure 3. Solidify just added. 1: the default Thickness of 0.01 m (Blender screenshot)
The default thickness is 0.01 m, which is 1 cm. On a box with 2 m sides you can barely see it. That is why it is easy to think "I added it and nothing happened".
- Change Thickness to
0.2.
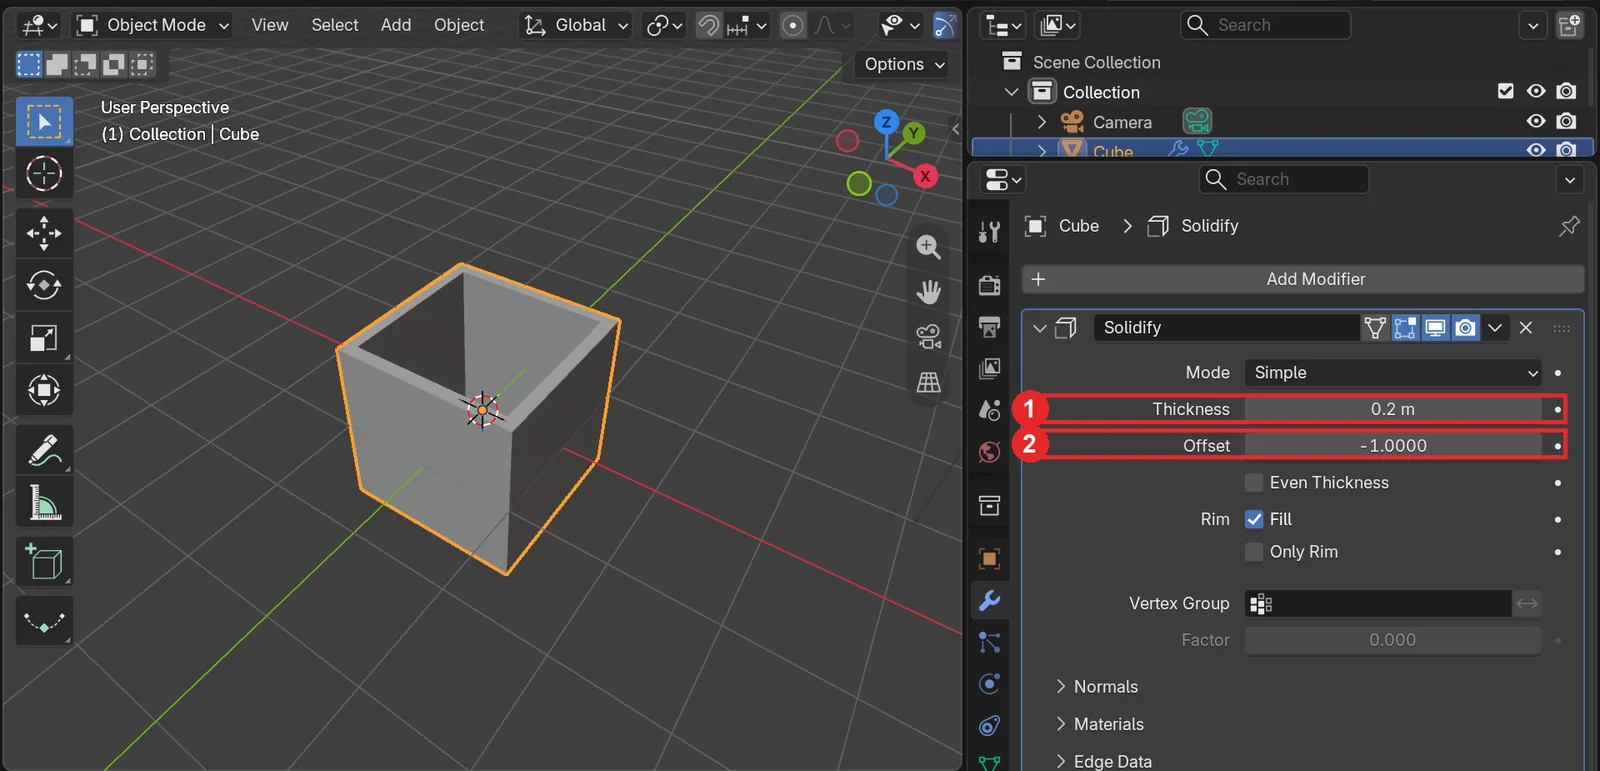 Figure 4. 1: Thickness 0.2 m 2: Offset -1 (Blender screenshot)
Now you can see a thick rim along the top of the walls. The fields in the panel are:
| Field | Default | Meaning |
|---|---|---|
| Mode | Simple | How it is calculated. Usually Simple, Complex for difficult shapes (section 7) |
| Thickness | 0.01 m | The thickness |
| Offset | -1 | Which side the thickness goes on (section 3) |
| Even Thickness | Off | Keeps the thickness even at corners (section 4) |
| Rim ‣ Fill | On | Closes the edge between the inner and outer layers with faces (section 5) |
| Only Rim | Off | Removes the original faces and keeps the pushed-out faces and the edge strip (Simple mode) |
3. Offset: which side the thickness goes on
Starting point: the box with Thickness 0.2 from the previous section.
Offset decides where the thickness is added, measured from the original faces. It goes from -1 to 1.
| Offset | Where the thickness goes | Outer size |
|---|---|---|
| -1 (default) | Inside the original faces | Stays the same |
| 0 | Half on each side of the original faces | Each side grows by half the thickness (the total width grows by the thickness) |
| 1 | Outside the original faces | Each side grows by the thickness (the total width grows by twice the thickness) |
These sizes are measured square to the wall. On a boxy shape with Even Thickness off, the corners grow less than this, as section 4 shows.
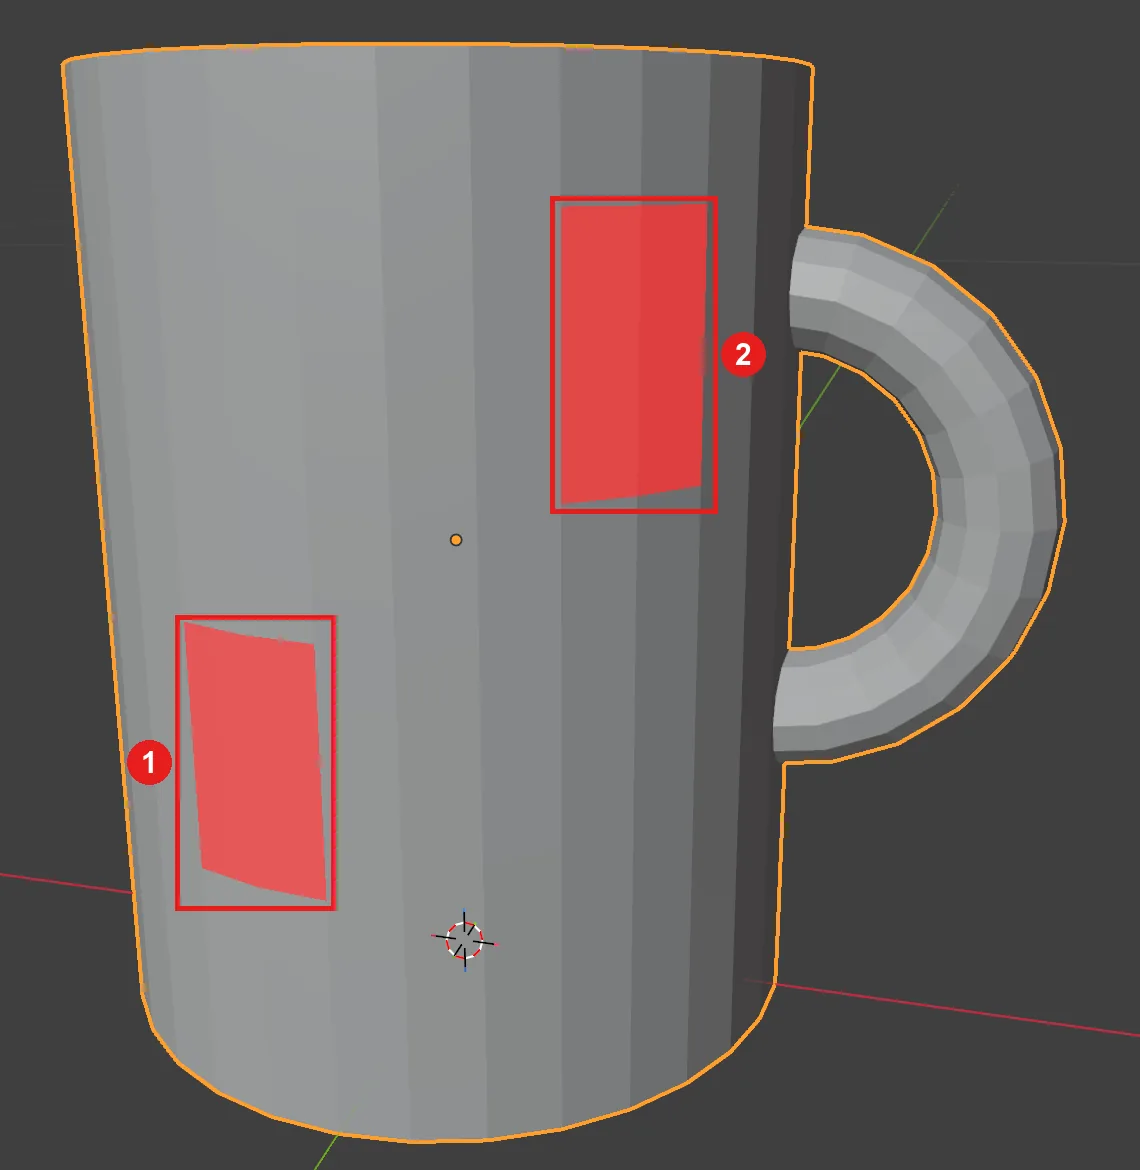
"Inside" and "outside" here come from the direction each face points to, called its normal. Like the skin of a balloon facing outward, every face has a front side.
Follow along:
- Press
Tabto enter Edit Mode and pressAlt+Ato deselect everything. In Edit Mode, the lines of the original faces are drawn in black and serve as a reference. - In the shading buttons at the top right of the 3D Viewport, click Wireframe (the first button), then press numpad
7to look from above. - Change Offset to
-1,0, and1and watch how the lines move.
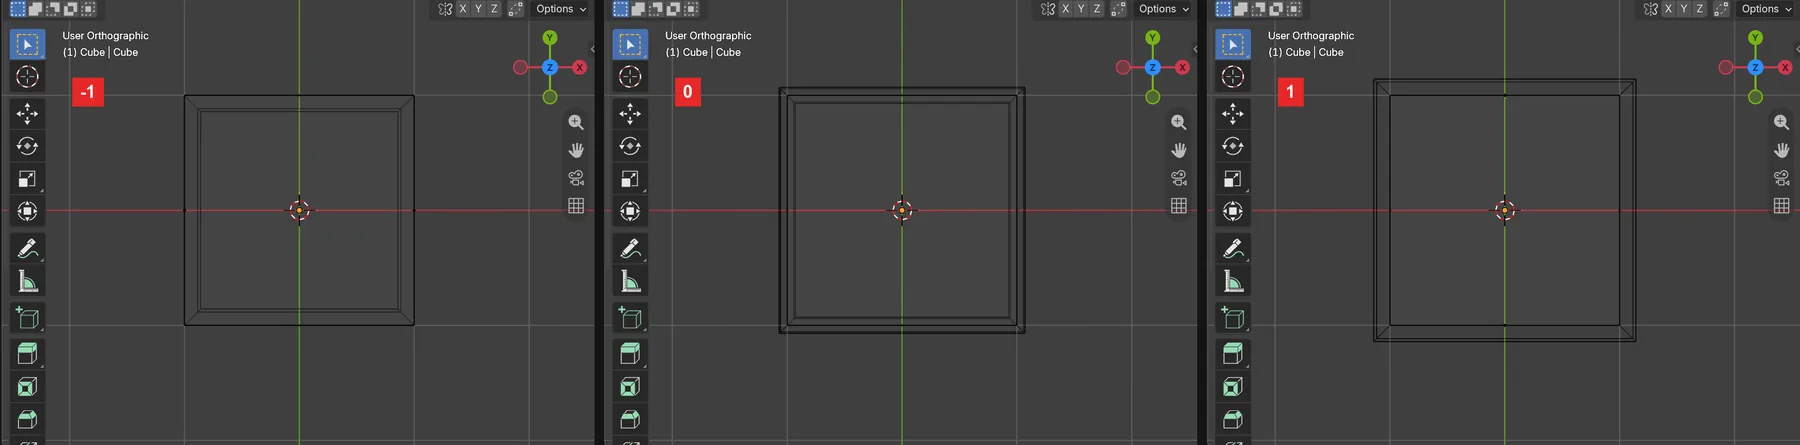 Figure 5. The box seen from above. From left: Offset -1, 0, 1 (Blender screenshot)
Use -1 when you must keep the outer size (for example, a cup 80 mm across). Use 1 when you must keep the inner size (for example, a case a phone has to fit into). If the result is the opposite of what you expect, the faces are flipped. You can check face direction with Face Orientation, as shown in Boolean modifier, section 5.
When you are done, set Offset back to -1 and press Tab to return to Object Mode.
4. Even Thickness: walls that get thinner at corners
Starting point: the box from the previous section (Thickness 0.2, Offset -1) in Object Mode, Wireframe, seen from above.
Look at Figure 5 again. The inner line sits quite close to the original square. We set 0.2 m, but the wall looks thinner. Simple mode pushes each point by the thickness along "the average direction of the faces around that point". A corner point of the box is pushed diagonally, between the two walls, so the thickness measured straight across a wall is less than Thickness. All 8 points of this box are corners, so every wall got thinner.
Follow along: turn on Even Thickness in the Solidify panel.
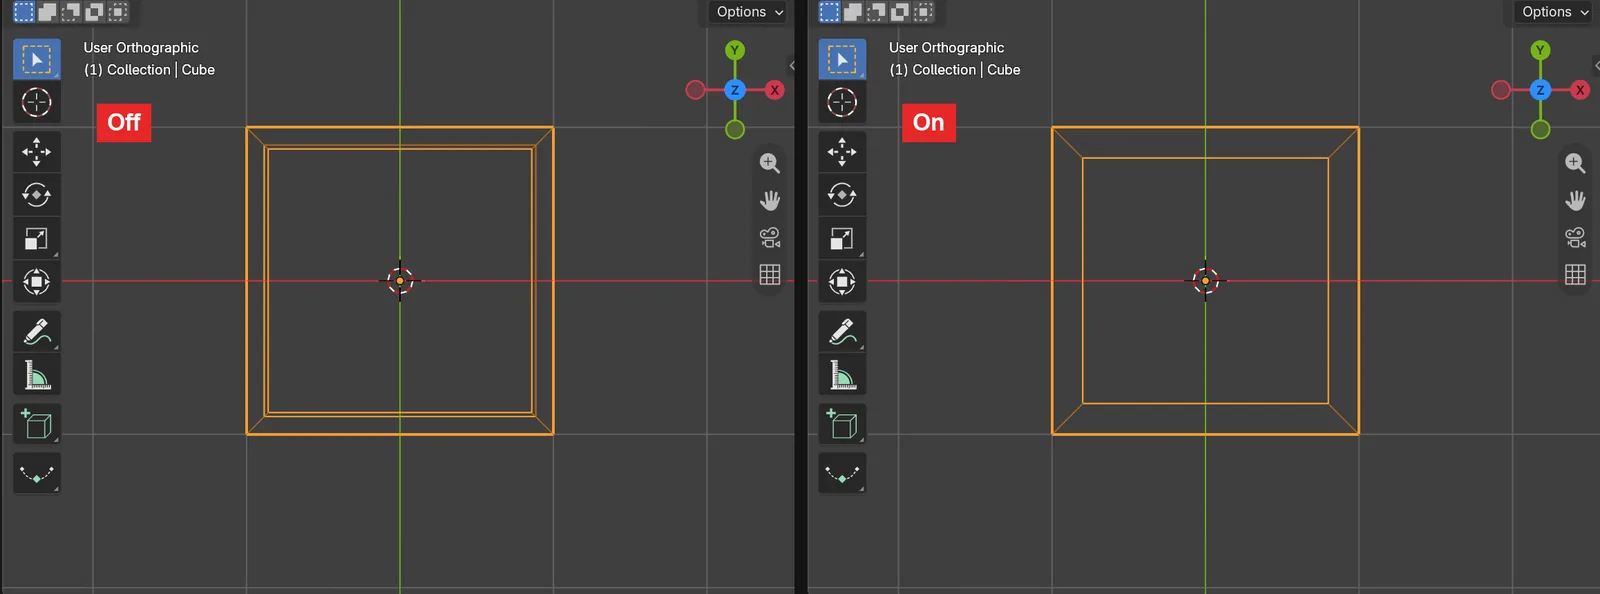 Figure 6. Even Thickness. Left off, right on. Thickness is 0.2 m in both (Blender screenshot)
When it is on, Blender looks at the corner angle and pushes the points farther, so the wall thickness gets close to the Thickness value. It is a little slower to calculate, but it is worth keeping on for boxy objects. Where the corner angle is gentle, the difference is smaller.
5. Rim ‣ Fill: an edge that looks empty
Starting point: the box from the previous section. Switch back to Solid shading (the second button), and drag with the middle mouse button to tilt the view so the top edge is visible.
Follow along: turn Rim ‣ Fill off and then on again.
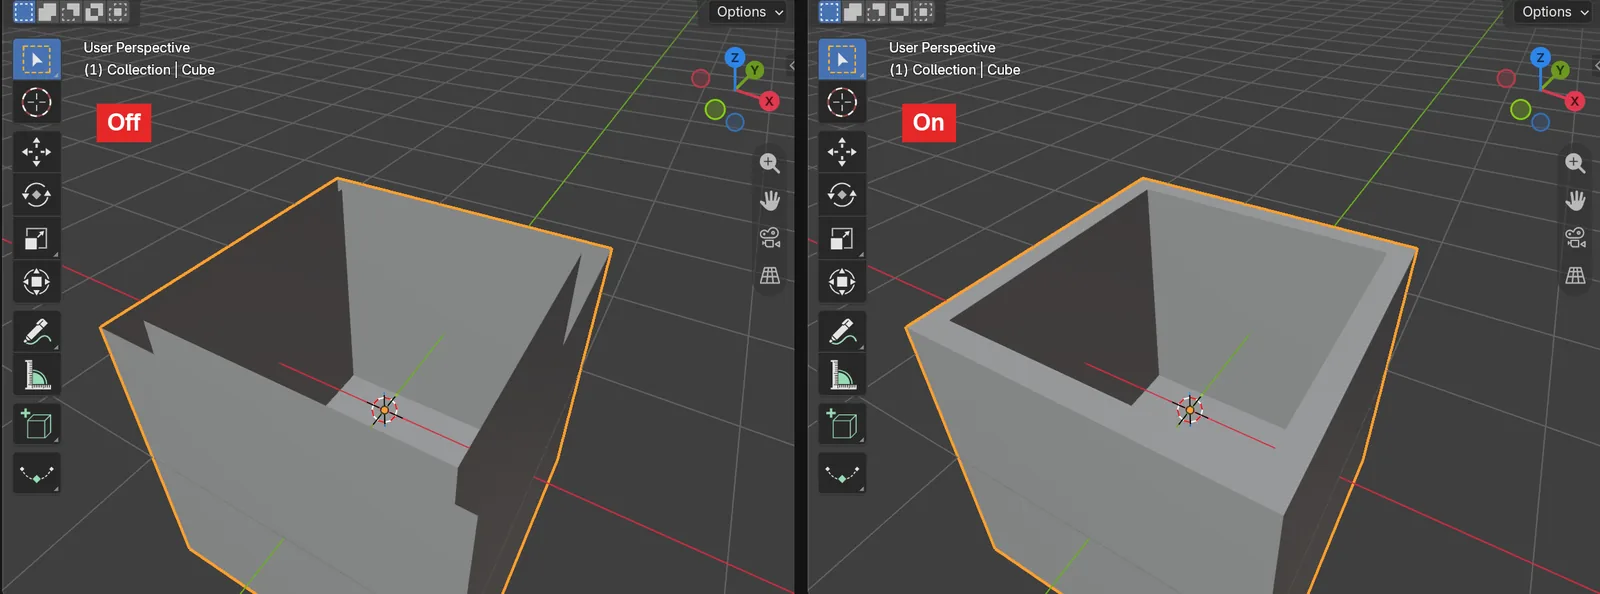 Figure 7. Rim ‣ Fill. Left off, right on (Blender screenshot)
Solidify makes two layers, the original faces and the new ones. Fill closes the edge (rim) where the two layers end with a strip of faces. Turn it off and, as on the left of Figure 7, the gap between the layers is open and looks empty. Always keep it on for models you will 3D print. A model with an open edge is like a container that leaks, and the printing software cannot tell inside from outside.
Only Rim removes the original faces and keeps the pushed-out faces and the edge strip. To keep only the strip, set Mode to Complex. Use it for shapes where you only need a thin border, like a picture frame.
6. Unapplied scale makes walls uneven
Starting point: the box from the previous section (Fill on). Switch to Wireframe again and press numpad 7 to look from above.
Follow along (break it): in Object Mode, press S > X > 3 > Enter to stretch the box to three times its width on X.
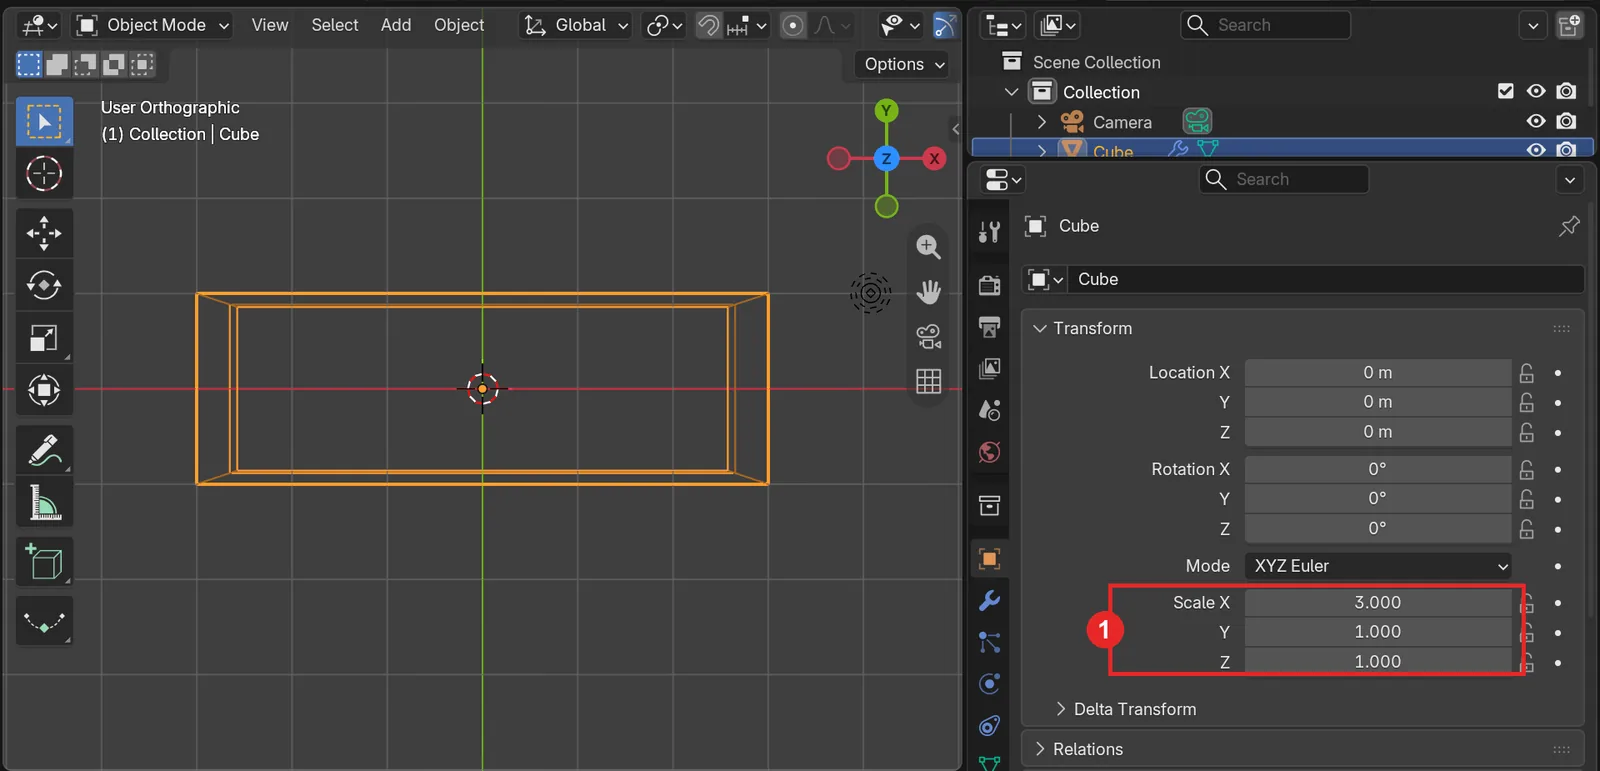 Figure 8. The box stretched three times on X in Object Mode. 1: Scale X 3 in the Object tab (Blender screenshot)
Only the left and right walls got three times thicker. Solidify calculates the thickness in the object's original size (local coordinates), and then the scale you set in Object Mode is applied on top. So the walls on X stretch along with the object. It is like drawing on a rubber sheet and then pulling the sheet in one direction: the lines get thicker only in that direction.
Follow along (fix it): with the mouse over the 3D Viewport, press Ctrl+A > Scale.
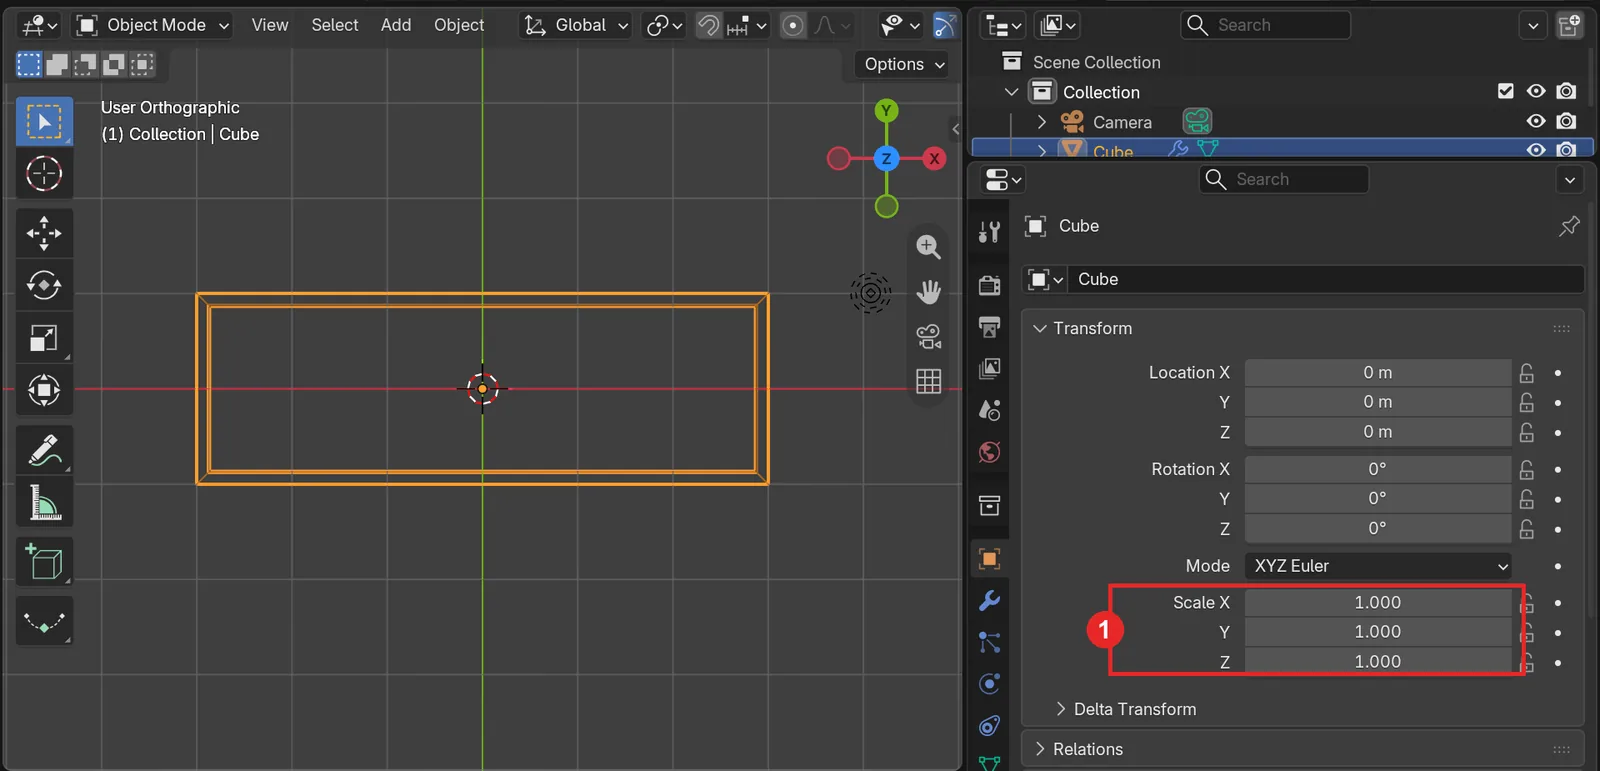 Figure 9. After applying scale. 1: Scale becomes 1 on all axes and the four walls are even (Blender screenshot)
Apply Scale means "treat the size you see now as the original size". The box's shape and size stay the same. Only the Scale fields change to 1. This is the same cause as a Bevel modifier that comes out squashed on one side (beginner chapter 7, section 7).
If you changed the size while modeling, press Ctrl+A > Scale before you judge the Solidify result. Scaling in Edit Mode does not change the Scale fields, so it does not cause this problem.
7. When you need Complex mode
Simple mode is fast, but it cannot properly thicken shapes where three or more faces meet at one edge (for example, walls meeting in a T in a floor plan). It also cannot join areas where neighboring faces point in different directions. In those cases, change Mode to Complex.
| Item | Simple | Complex |
|---|---|---|
| Speed | Fast | Slow |
| Walls meeting in a T, shapes like a Möbius strip | Cannot | Can |
| Keeping thickness even | Even Thickness, High Quality Normals | Thickness Mode: Fixed, Even, Constraints |
Unless the shape is special, keep Simple. In Complex, the Constraints thickness mode tries hardest to keep walls even, but even it does not guarantee an exact thickness in every case. If thickness really matters, check the result separately, as in the next section.
8. Setting thickness for 3D printing
When you use Solidify on a model you will 3D print, check the following.
- Units. Set up units first (how to do it is in From Blender to a 3D printer).
- Offset. Decide first whether to keep the outer size (-1) or the inner size (1).
- Even Thickness on, Rim ‣ Fill on. This stops walls from getting thinner at corners and edges from staying open.
- Apply scale. Use
Ctrl+A> Scale so Scale is 1. - Check thickness with color, not by eye. After applying Solidify, use Mesh Analysis (Thickness) in the Edit Mode overlays to find thin spots.
The right wall thickness depends on the printer, the nozzle, and the material. Follow your slicer's guidance and check in its preview that the walls are not broken. From setting units to Mesh Analysis and checking in the slicer, you can follow it all with a pencil holder in From Blender to a 3D printer.
Practice
- Add
Shift+A> Mesh > UV Sphere, delete a few rows of faces at the top in Edit Mode, and make a bowl with Solidify. Check whether turning Even Thickness on and off makes less difference than on the box. - On the box from section 1, set Offset to
0and Thickness to0.4. Write down how much bigger the outer square looks from above. - Turn on Only Rim and change Thickness. See what shape remains. Then switch Mode to Complex and write down what disappears.
Common mistakes and fixes
| Symptom | Cause | Fix |
|---|---|---|
| Nothing changes after adding Solidify | The default 0.01 m is too small for the object | Raise Thickness to suit the object's size |
| The thickness went outside and the object got bigger | Offset 1, or flipped faces | Offset -1, and check face direction with Face Orientation |
| Walls are thinner than expected near corners | Even Thickness is off | Turn on Even Thickness (section 4) |
| The edge looks empty | Rim ‣ Fill is off | Turn on Rim ‣ Fill (section 5) |
| Each wall has a different thickness | Scale set in Object Mode was not applied | Ctrl+A > Scale (section 6) |
| Walls meeting in a T look wrong | Limit of Simple mode | Change Mode to Complex (section 7) |
Summary
Thickness is the thickness, Offset is the side (-1 is inside), use Even Thickness on boxy shapes, keep Rim ‣ Fill on, and if you changed the size, apply scale with Ctrl+A → Scale first.
In the next guide, Screw modifier, you spin one side-view line into a vase and give it thickness with Solidify too.
Previous: Boolean modifier · Next: Screw modifier · Whole series: Every Blender modifier in one list
References
- Blender 5.2 Manual: Solidify Modifier
- Blender 5.2 Manual: Modifiers Introduction
- Read next: Blender beginner chapter 7: Modifiers, What is a modifier?, From Blender to a 3D printer
- Shortcuts: Blender 5.2.1 default (Blender) keymap
- Image license: screenshots of Blender taken by AZTechnology. Blender license: blender.org/about/license