Letting AI set up lights and materials: three-point lighting and PBR over MCP, compared in renders
Through the official Blender MCP, hand the three-point lighting and the gold metal and matte floor materials of a monkey head scene to AI, read the real result in the panels, and compare three EEVEE renders (default light, the AI's result, and a hand-tuned version) to learn why metal looks dull and which values are worth changing by hand.
한국어English
ON THIS PAGE
- 01Before you start
- 021. Rendering with the default light first
- 032. The question sent to the AI
- 043. Reading the result: what to check in the panels
- 054. Tuning by hand: metal reflects its surroundings
- 065. Splitting the work with AI
- 07Practice
- 08Common mistakes and fixes
- 09Summary
- 10Further reading
- 11References
Based on: Blender 5.2 LTS (screenshots from 5.2.1, English interface, default shortcuts), the EEVEE render engine, the Blender Lab official MCP server and add-on 1.0.3, and Claude Code as the AI app. Checked in November 2026. All images are real Blender screens and real renders. Red numbers and boxes were added for explanation.
Lights and materials are a good job to hand to AI. There are many values, and the basic recipe is fairly well known. But the last step should be decided by a person looking at the render. This guide compares three renders of one monkey head scene: the default light, the AI's three-point lighting and PBR materials, and a version with a few values tuned by hand.
Three-point lighting is the basic setup of a photo studio. The brightest key light shapes the object, a weaker fill light on the other side keeps shadows from going black, and a rim light from behind makes the edges glow and separates the object from the background. A PBR material sets a surface with real physical values, such as whether it is metal (Metallic) and how rough it is (Roughness). For the details, see Blender beginner chapter 9: lights and PBR materials.
When you finish this guide, you will be able to do the following.
- Write one question that hands three-point lighting and PBR materials to AI.
- Read the AI's light values in the Light tab and material values in the Material tab.
- Tell why metal looks dull in the render, and refine it by putting an HDRI in the World.
- Pick the values to change as numbers and hand them back to AI.
Before you start
You need: an AI app connected to the official MCP, and Blender 5.1 or later with the server running. If you have not connected yet, see Connecting the official Blender MCP to Claude Code. To pick an AI app, see Choosing an AI tool for Blender MCP.
- Open a new file with File > New > General, select the default cube, and delete it with
X> Delete. - In the 3D Viewport header, choose Add > Mesh > Monkey. In the Object tab, set Location Z to
0.98and Rotation Z to-20. - With the monkey selected, add Add Modifier > Generate > Subdivision Surface in the Modifiers tab (wrench icon) and set Levels Viewport and Render to
2. Then choose Object > Shade Smooth. - Add Add > Mesh > Plane and set Scale X and Y to
5(a 10 m plane) in the Object tab. Leave Location Z at0. The tip of the monkey's chin almost touches the floor. - Select Camera in the Outliner and enter Location X
0, Y-7.5, Z1.9and Rotation X83, Y0, Z0in the Object tab. This looks at the monkey from the front, slightly from above. - Check that Render Engine in the Render tab is EEVEE. Set the resolution to
960×540in the Output tab.
Why the floor height matters: with Subdivision Surface, the lowest point of the monkey is about 0.03 m when Location Z is 1. If the floor sits higher than that, the chin sinks into the floor and looks cut off like a neck. With Location Z 0.98, the chin sits right on the floor.
1. Rendering with the default light first
Starting point: the scene after step 6 of Before you start. The only light is the Point light (1000 W) that came with the new file.
Do this: press F12 to render.
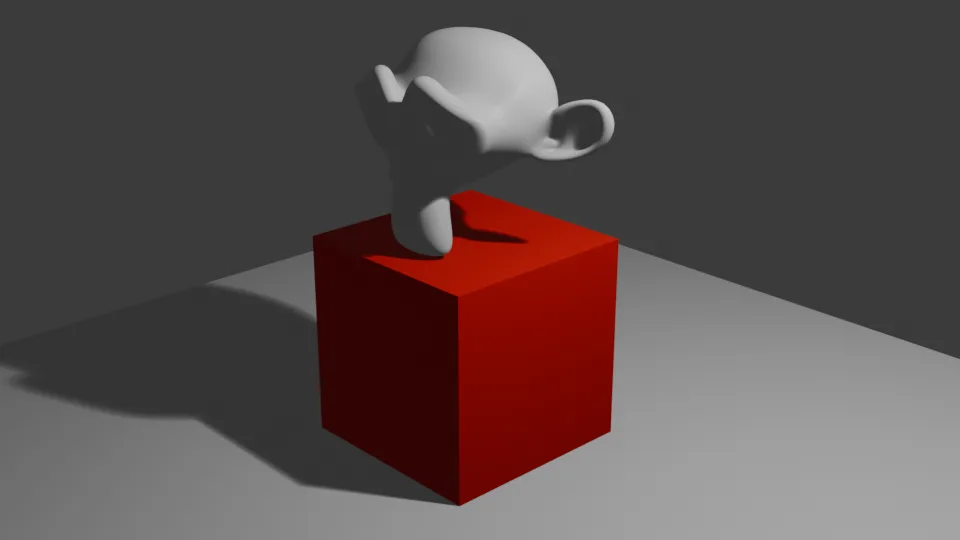
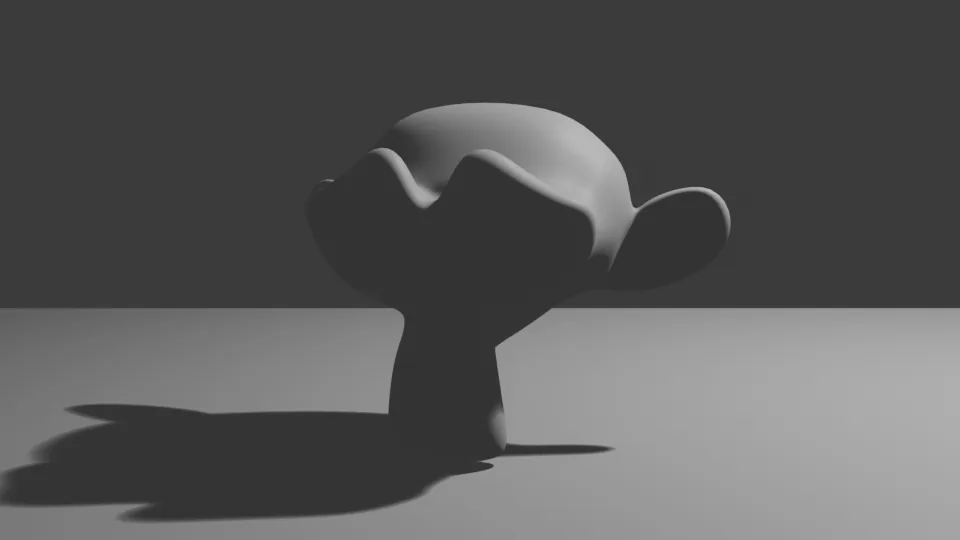 Figure 1. The default light as it is. The light is behind, so the face is dark (Blender render)
Seen from the camera, the new file's Point light is behind the monkey, up and to the right. The face falls on the shadow side and looks almost black, and the shadow stretches toward the camera. With no material, the monkey looks like grey plastic.
2. The question sent to the AI
Starting point: continue from the scene in section 1.
Do this: send the following to your AI app.
Add three-point lighting to the scene. Key light front-left of the camera and up high, fill light on the right and weak, rim light from behind and above the monkey. Turn off the original Point light for rendering. Make the monkey gold metal (Metallic 1, Roughness 0.3) and the floor matte grey (Roughness 0.8) with PBR materials.
The directions are given in words and the materials in numbers. Numbers for the directions would be more exact, but at first it is easier to learn by letting the AI decide and reading the result.
When this question was sent to Claude Code, the AI made the values below. All three are Area lights, which give off light from a wide panel, and all are turned to face the middle of the monkey head (0, 0, 1). The lights went into the Collection where the other objects were, and the original Point light was not deleted, only turned off for rendering.
| Light | Position (m) | Power | Size | Color |
|---|---|---|---|---|
| Key | (−4, −5, 5) | 800 W | 2 m | slightly warm white |
| Fill | (5, −3.5, 1.8) | 150 W | 3 m | slightly cool white |
| Rim | (0, 4.5, 4.5) | 600 W | 1.5 m | white |
| Material | Base Color (R, G, B) | Metallic | Roughness |
|---|---|---|---|
| Gold_Metal (monkey) | 1.0, 0.766, 0.336 | 1.0 | 0.3 |
| Floor_Matte (floor) | 0.18, 0.18, 0.18 | 0.0 | 0.8 |
At the end, the AI did one test render. Its answer had two notes. First, the render was saved in a Blender temp folder, not in the folder the AI chose. The official MCP render tool saves that way, so to use the image you take it from the path in the answer. Second, the AI could not look at the render itself, so it measured the average brightness of screen areas as numbers, and warned that the floor comes out quite bright.
Do this: press F12 to render the same scene yourself.
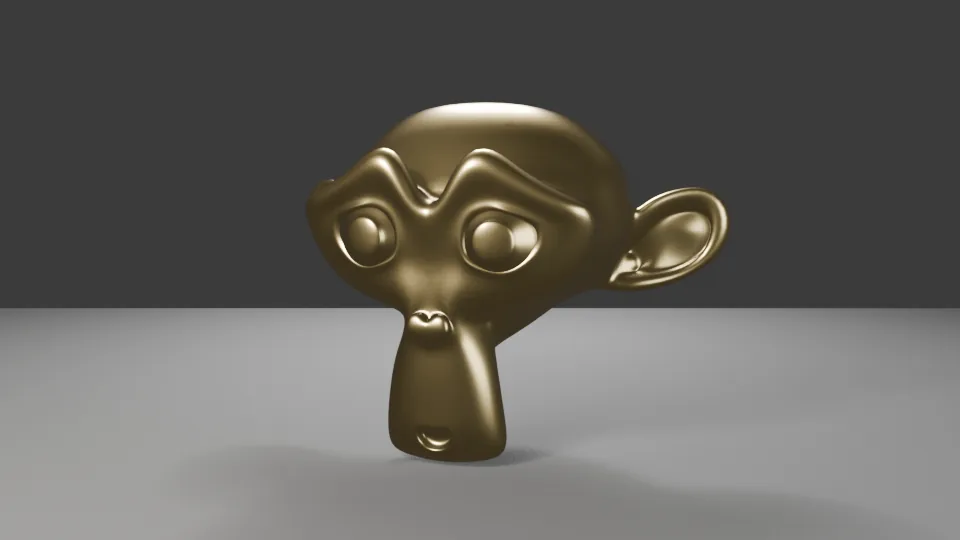 Figure 2. The AI's three-point lighting and PBR materials. The face is lit, but the gold is dull (Blender render)
The face is visible and it reads as metal. It is much better than section 1. Still, the gold is close to olive brown, and the floor is bright, as the AI warned.
3. Reading the result: what to check in the panels
Starting point: continue from the scene in section 2.
Do this:
- Click Key_Light in the Outliner.
- Open the Light tab (green bulb icon) in the Properties editor.
- Check that the type is Area, and that Power and Size match the table.
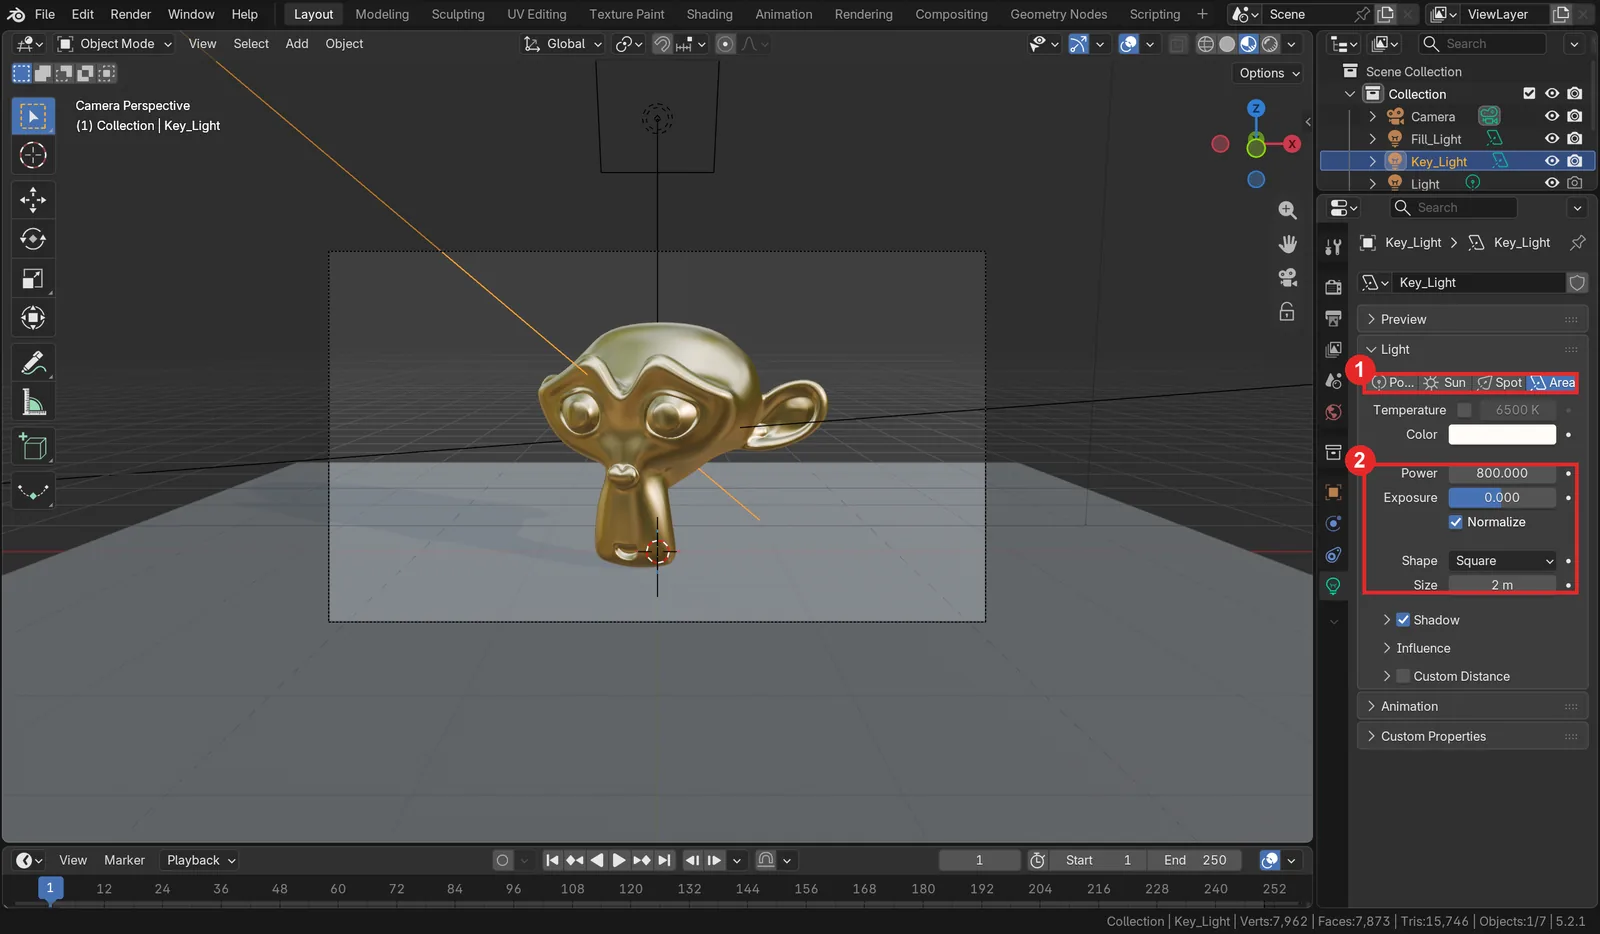 Figure 3. The key light panel: 1) light type Area, 2) Power 800 and Size 2 m (Blender screenshot)
- Now click the monkey (Suzanne) and open the Material tab (red ball icon). Under Surface, read Base Color, Metallic, and Roughness.
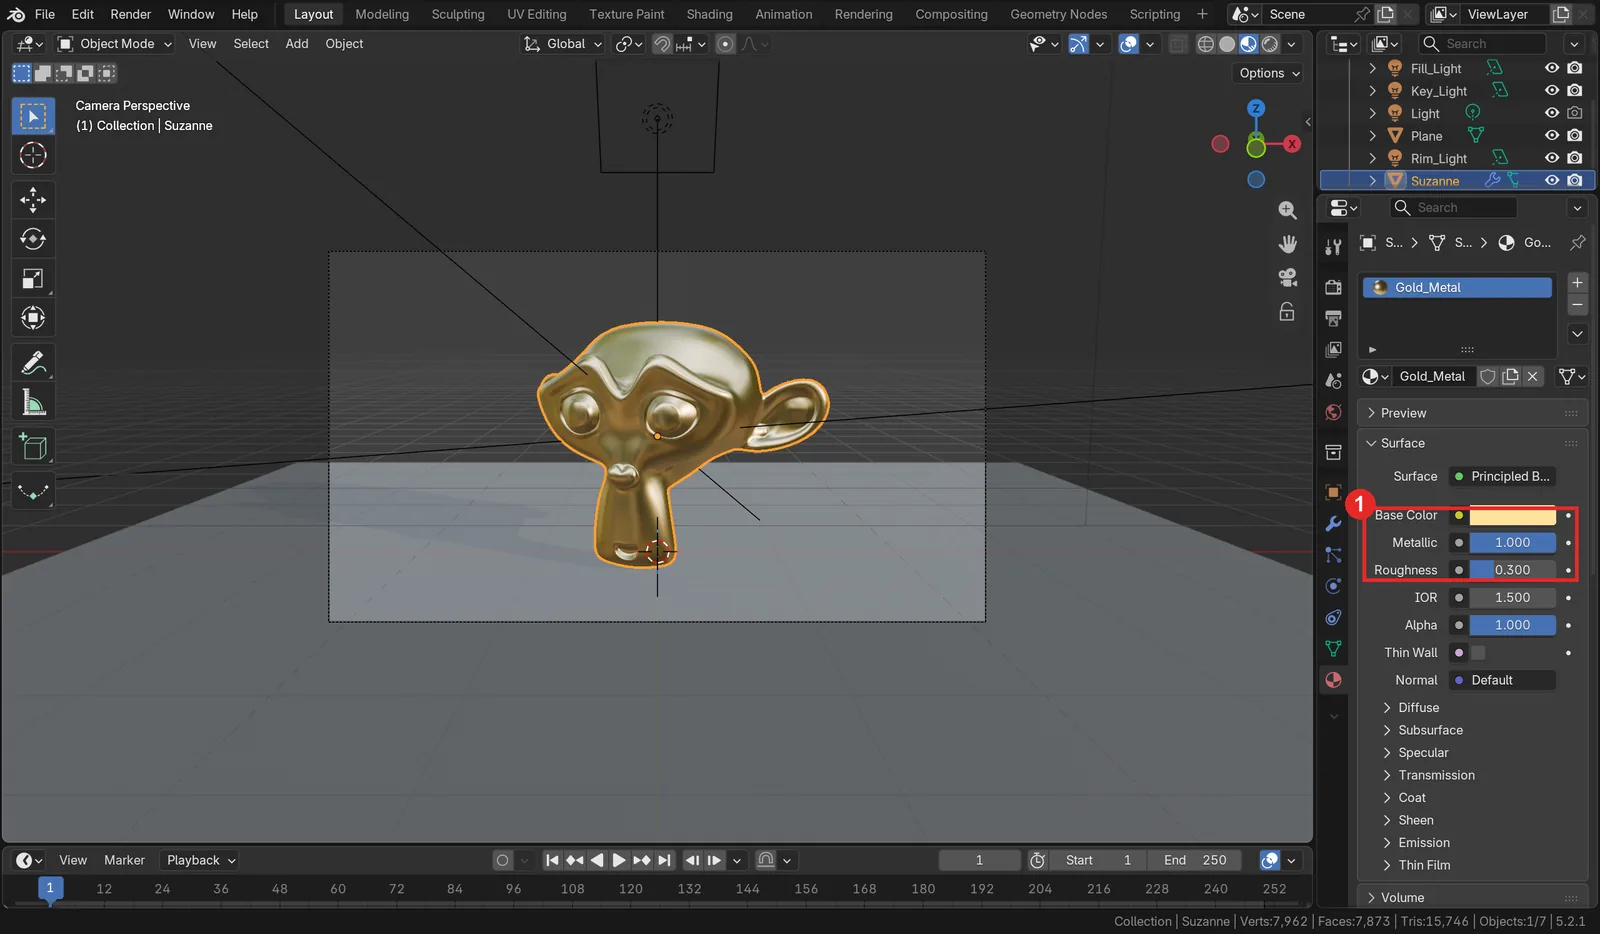 Figure 4. Gold_Metal in the Material tab: 1) Base Color, Metallic, Roughness (Blender screenshot)
Why the gold differs between the viewport and the render: the viewport in Figure 4 is in Material Preview, so the monkey looks bright gold. The same material looks dull in the render in Figure 2. By default, Material Preview lights the scene with a studio lighting photo (HDRI) built into Blender. An F12 render uses the scene's World color. Metal gets its color by reflecting its surroundings, so the same material looks different when the surroundings differ. Check the render result in Rendered view or with F12.
The Base Color field looks pale yellow because of how the interface shows colors. It renders as gold.
4. Tuning by hand: metal reflects its surroundings
Starting point: continue from the scene in section 3.
Metal gets its color less from itself and more from reflecting its surroundings like a mirror. A spoon looks dark in a dark room and shiny by a bright window. The main reason the gold in Figure 2 is dull is that there is almost nothing to reflect. The new file's World (background) is a single very dark grey (0.051). So put a photo of surroundings (HDRI) in the World to give the metal something to reflect. An HDRI is a photo taken in every direction around a room or outdoor place, with a wide range of brightness. Blender ships with eight free (CC0) HDRIs, so you do not need to download one.
Do this:
- Open the World tab (red globe icon).
- Under Surface, click the small round button left of the Color field and choose Environment Texture.
- Click the new Open button and open
5.2\datafiles\studiolights\world\interior.exrin the Blender install folder. With a default install it is underC:\Program Files\Blender Foundation\Blender 5.2\. Leave Strength at1. - In the monkey's Gold_Metal material, lower Roughness from
0.3to0.2. - Render with
F12.
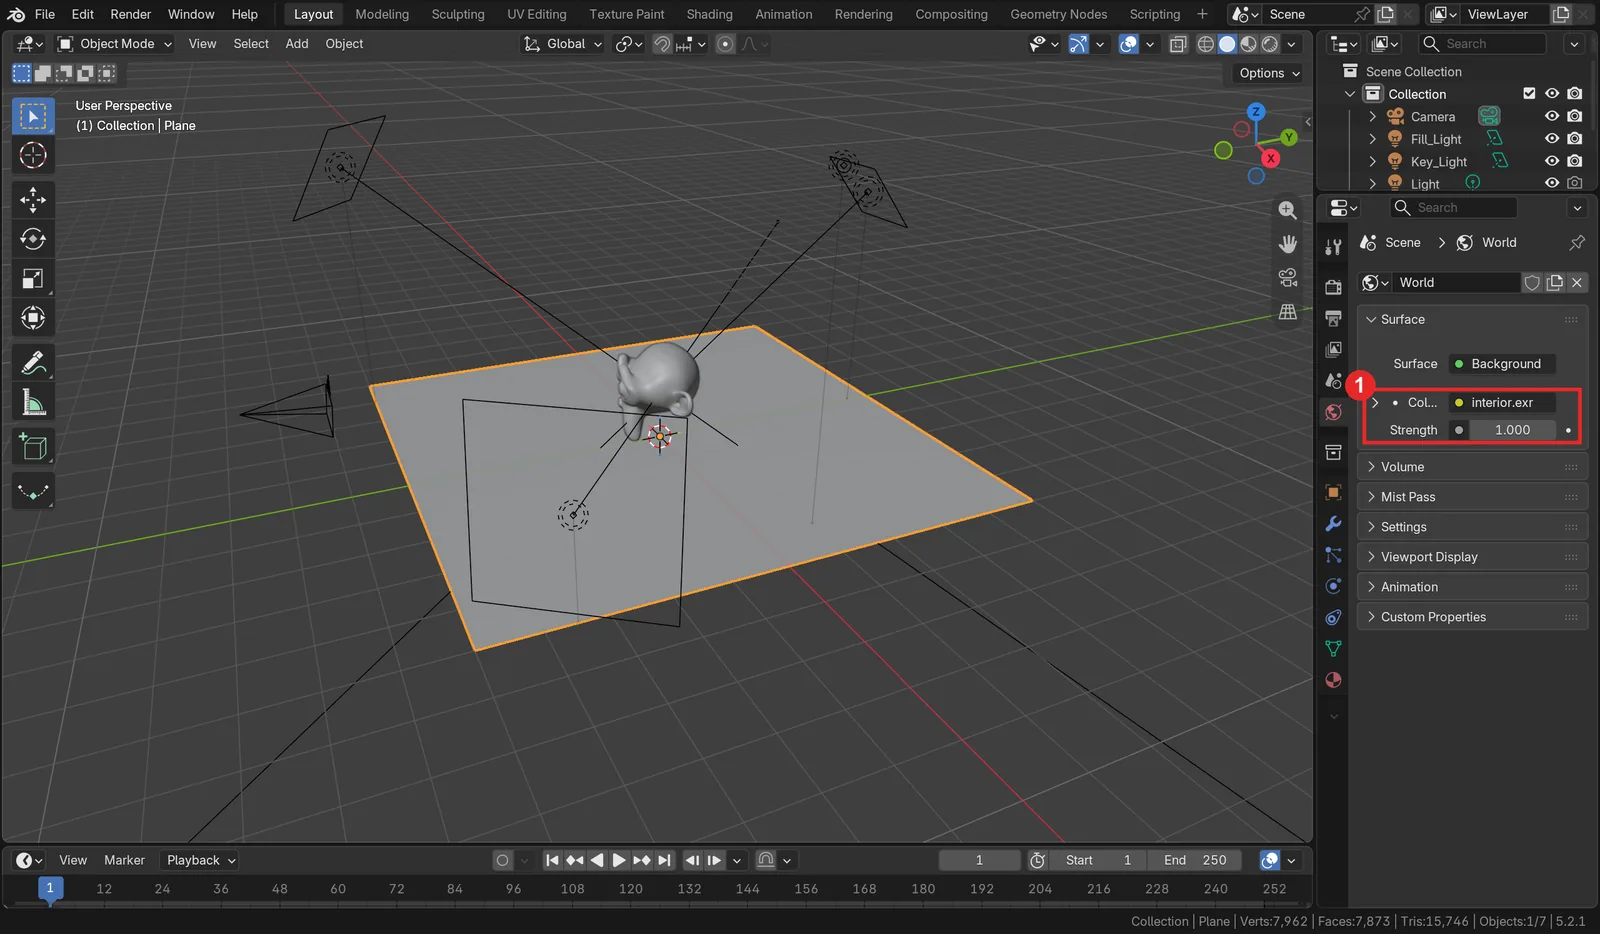 Figure 5. The World tab: 1) interior.exr in Color and Strength 1 (Blender screenshot)
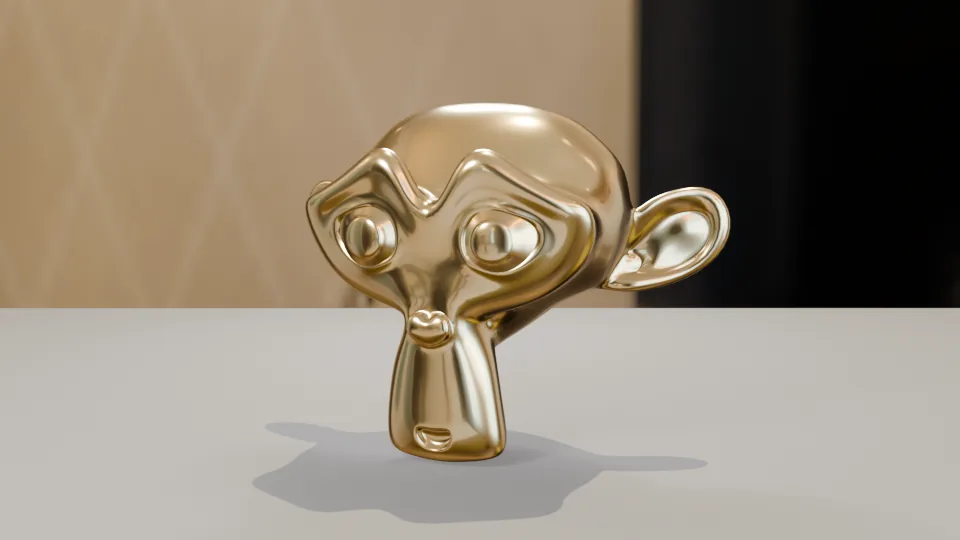 Figure 6. The result of adding an HDRI to the World and lowering Roughness to 0.2 (Blender render)
Crop the face and put it next to the AI result, and the difference is clear.
 Figure 7. A close-up comparison of the face: 1) the AI result (Figure 2), 2) the result with the HDRI (Figure 6) (Blender render)
| Value changed | Before | New value | What changed in the render |
|---|---|---|---|
| World Color | 0.051 grey (new-file default; the AI did not change it) | interior.exr (HDRI) | The gold goes from olive to bright gold, and an interior photo shows in the background |
| Gold Roughness | 0.3 (AI value) | 0.2 | Tighter, sharper reflections on the brows and eyeballs |
The background photo shows: an HDRI is not only something to reflect; it also shows as the background. The wallpaper and window in Figure 6 are the interior photo of interior.exr. For a different mood, try another file in the same folder, such as studio.exr or city.exr.
When only color values are changed: tuning the World with a color alone, without a photo, had little effect. A render with the World Color raised slightly to 0.08, 0.09, 0.11, the rim light at 1200 W, the fill light at 80 W, Roughness 0.2, and the floor at 0.08 only tightened the reflections a little, and the face actually came out darker and muddier. Raising the World Color further to 0.2, 0.22, 0.26 made the gold brighter but removed the contrast and made it look flat. To bring out metal, the surroundings it reflects matter far more than light strength or color.
The floor stays bright: the floor is still bright after adding the HDRI. The key light (800 W) lights the front of the floor widely. Lowering the Base Color of Floor_Matte from 0.18 to 0.08 made the rendered floor only slightly darker. To make the floor darker, changing the key light's Power or direction works better (practice 1).
5. Splitting the work with AI
| Good to hand to AI | What a person checks |
|---|---|
| Making three lights and aiming them | Deciding the brightness balance from the render |
| Building material nodes and entering numbers | Deciding the World by seeing what the metal reflects |
| Putting the same value on many objects | Judging whether the shadows and reflections look right |
| Exact edits such as "Gold_Metal Roughness to 0.2" | Choosing which value to change |
AI sometimes cannot see the render and checks only with numbers. A numeric warning such as "the floor is bright" in section 2 is useful, but whether the gold looks good is for a person to decide. When you hand the next edit to AI, say the values as numbers. "Put the interior.exr HDRI in the World and set Gold_Metal Roughness to 0.2" gets the result right in one go, unlike "make it prettier."
Practice
- Lower the key light Power from
800to400, render, and see whether the face or the floor gets darker. - Change Metallic in the Gold_Metal material to
0and compare how it looks with Figure 6. - Switch the 3D Viewport between Material Preview and Rendered view and see how the gold differs.
- Save this scene. In the next guide, Turntable renders with AI, you spin the same monkey.
Common mistakes and fixes
| Symptom | Cause | Fix |
|---|---|---|
| Metal looks dull brown or grey | Almost nothing around it (World, lights) to reflect | Put an HDRI (Environment Texture) in the World |
| It looks good in the viewport but dull in the render | Material Preview uses a built-in studio light, the render uses the scene World | Check in Rendered view or with F12 |
| The render is blown out white | The World or the lights are too bright | Lower World Strength and reduce key light Power |
| The floor stays bright after darkening its color | The key light hits the floor strongly | Reduce key light Power or change its direction |
| The original Point light still shines | It was not turned off for rendering | Turn off the camera icon of Light in the Outliner |
| The render is not in the folder you named | The official MCP render tool saves in a Blender temp folder | Take it from the path in the answer |
| The bottom of the monkey looks cut by the floor | The floor is higher than the monkey's lowest point | Lower the floor's Location Z or raise the monkey |
Summary
Render with the default light → ask for "three-point lighting + PBR given as numbers" → read the notes in the answer and the panel values → check the gold in a render → add an HDRI to the World and tune roughness → give the next values as numbers. In the next guide, Building a low-poly room with Blender MCP, you build a small room scene with several questions.
Further reading
- Choosing an AI tool for Blender MCP
- Ten first prompts for Blender MCP
- Blender beginner chapter 9: lights
- PBR materials
- Letting AI build a modifier stack
- Trying the 26 tools of the official Blender MCP
References
- Blender 5.2 Manual, Light Objects: https://docs.blender.org/manual/en/5.2/render/lights/light_object.html
- Blender 5.2 Manual, Principled BSDF: https://docs.blender.org/manual/en/5.2/render/shader_nodes/shader/principled.html
- Blender 5.2 Manual, World: https://docs.blender.org/manual/en/5.2/render/lights/world.html
- Blender 5.2 Manual, Viewport Shading: https://docs.blender.org/manual/en/5.2/editors/3dview/display/shading.html
- Blender Lab, MCP Server: https://www.blender.org/lab/mcp-server/
- Shortcuts: render
F12, deleteX - Images: real Blender 5.2.1 screens and Blender renders (EEVEE). The background in Figures 6 and 7 is interior.exr, an HDRI included with Blender (CC0, original from Poly Haven)