Building a low-poly room with Blender MCP: the order of questions and what to fix by hand
Send five questions in one conversation through the official Blender MCP to build a low-poly room with walls, a window, furniture, props, and lights, then use the AI's notes, a check that does not change the scene, and the first render to fix the bookshelf direction, the default light left on, and a dim desk lamp by hand.
한국어English
ON THIS PAGE
- 01Before you start
- 021. Question 1: floor and walls
- 032. Question 2: the window
- 043. Question 3: large furniture
- 054. Question 4: props, lights, and camera
- 065. Question 5: a check that does not change the scene
- 076. What to fix by hand
- 087. Writing better questions next time
- 09Practice
- 10Common mistakes and fixes
- 11Summary
- 12Further reading
- 13References
Based on: Blender 5.2 LTS (screenshots from 5.2.1, English interface, default shortcuts), the EEVEE render engine, the Blender Lab official MCP server and add-on 1.0.3, and Claude Code as the AI app. Checked in November 2026. All images are real Blender screens and real renders.
If you ask AI to "make a room" in one go, everything to check lands on you at once. Split the job into five questions, and you can look at the screen and correct course at each step. This guide records building a low-poly room with two walls by sending five questions in one conversation through the official MCP. It covers the order of the questions, the screen and the AI's answer at each step, the problems seen in the first render, and the values fixed by hand.
Low-poly is a style that uses few faces to make things simple, like toy blocks. Furniture made from a few boxes and posts does not look out of place, so it is a good job for AI. If the term is new, see What is the low-poly style? first.
When you finish this guide, you will be able to do the following.
- Split one room into five questions for AI.
- Decide what to check at each step.
- Ask AI for a "check" that does not change the scene.
- Use the first render and the AI's notes to pick what to fix, and fix it with panel values.
Before you start
You need: an AI app connected to the official MCP, and Blender 5.1 or later with the server running. If you have not connected yet, see Connecting the official Blender MCP to Claude Code. To pick an AI app, see Choosing an AI tool for Blender MCP.
- Open a new file with File > New > General.
- Put the 3D Viewport in Solid view. You check each step in this view.
- Send the five questions in turn in one conversation. The AI needs to remember the names and positions from earlier questions for the next one to follow on.
- Save with
Ctrl+Safter each question. If the next question goes wrong, you can go back to the saved file.
Why split the questions: if you ask for everything at once, it is hard to find where it went wrong. It is like checking a house in order: foundation, walls, windows, furniture.
1. Question 1: floor and walls
Starting point: the default cube in a new file (File > New > General).
Do this: send this to your AI app.
Delete the default cube and make only the floor and two walls, back and left, of a room 4 m wide, 4 m deep, and 2.6 m high. Walls 0.1 m thick, flat single-color materials for a low-poly look. Put the objects in a Room collection.
Making only two walls lets the camera look into the room. It is open at the front and right, like a dollhouse.
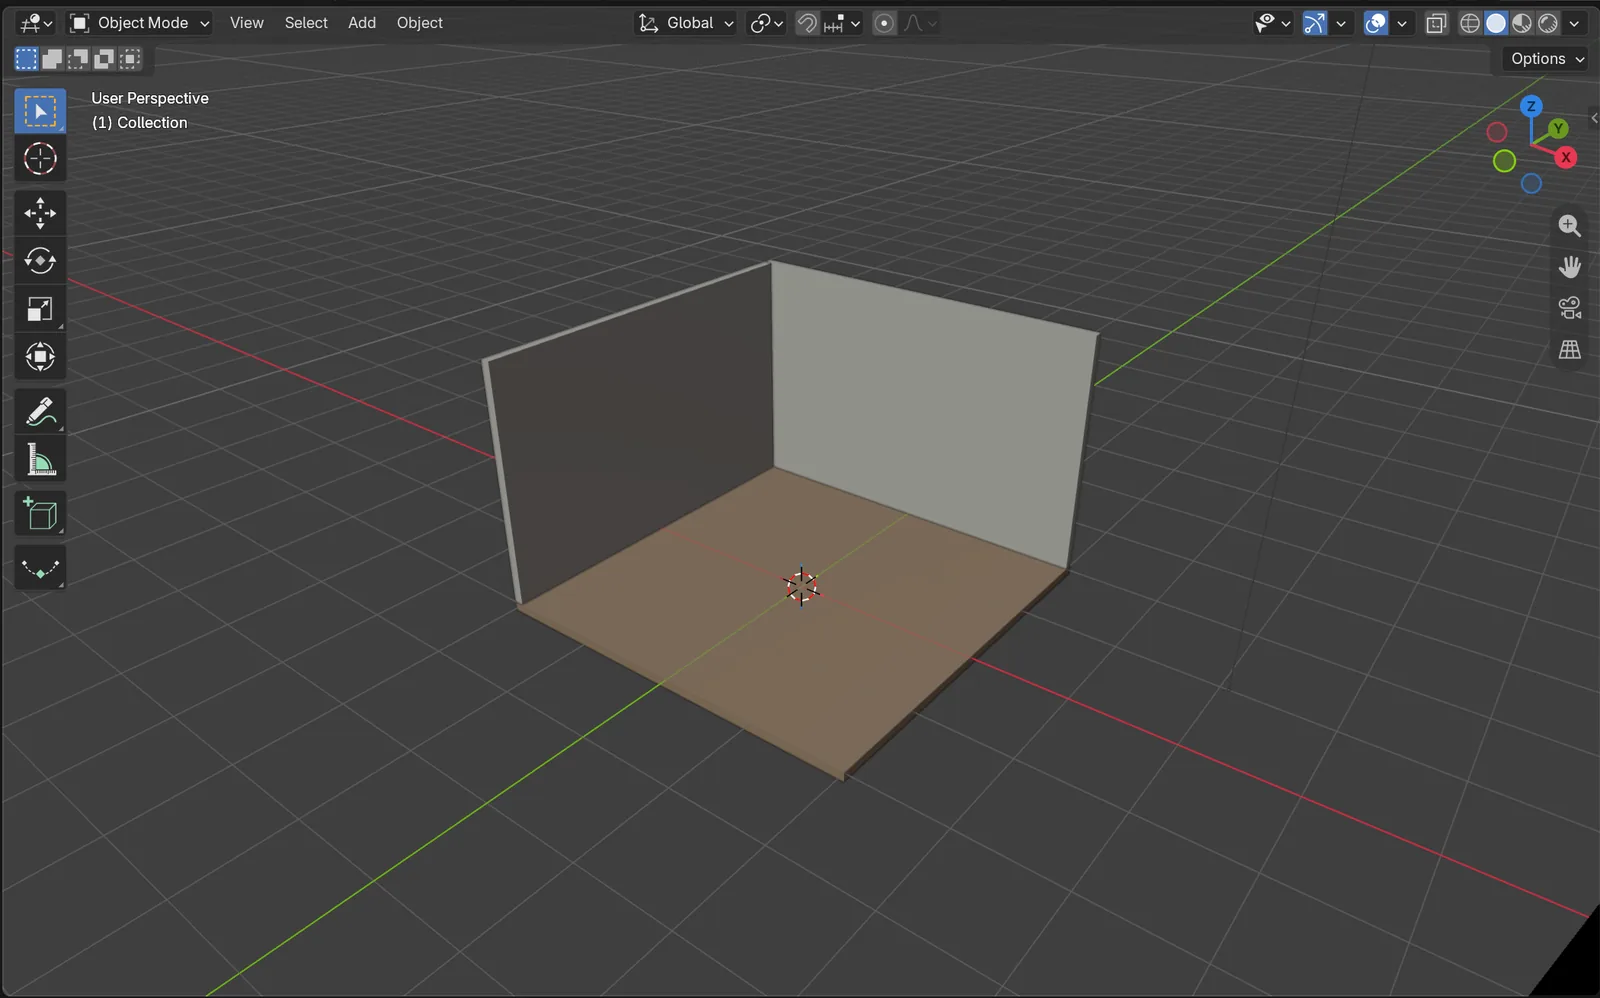 Figure 1. The result of question 1: one floor and two walls (Blender screenshot)
The AI made the floor (Floor), back wall (Wall_Back), and left wall (Wall_Left) as one box each. Its answer said it put the 0.1 m wall thickness on the outside of the room so the inside is exactly 4 × 4 m. That makes the floor and back wall 4.1 m long on one side.
What to check: see that a Room collection appears in the Outliner with Floor, Wall_Back, and Wall_Left inside. Also check that the bottom of each wall meets the top of the floor (height 0).
2. Question 2: the window
Starting point: continue from the scene in section 1.
Do this: send this.
Cut a window hole in the back wall (1.2 m wide, 1 m high, 1 m above the floor) and add a window frame.
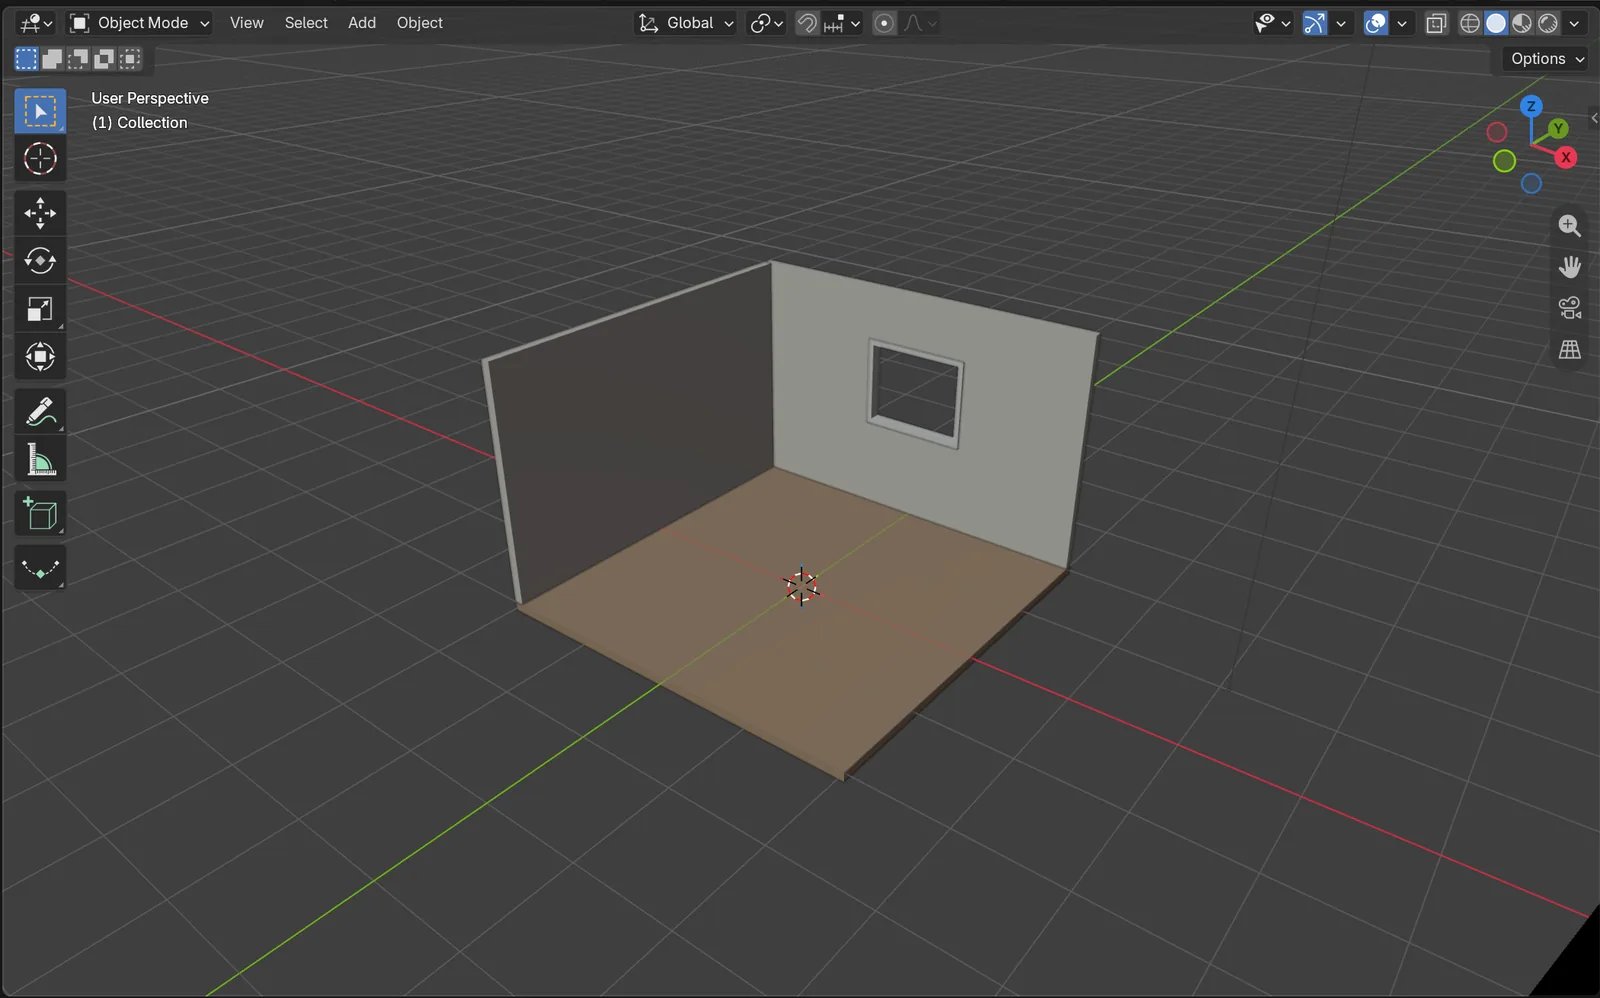 Figure 2. The result of question 2: a hole and a frame in the back wall (Blender screenshot)
There are two ways to cut a hole. One is a Boolean modifier, which carves the wall in the shape of a box, like a cookie cutter pressed into dough. The other is to rebuild the wall's faces around the hole. This time the AI chose the second way. Its answer said it "rebuilt the wall mesh with quad faces instead of a Boolean." The frame (Window_Frame) is four 6 cm bars joined into one object.
The AI added one more note. 1.2 × 1.0 m is the size of the hole in the wall; because the frame sits inside it, the open part you see is about 1.08 × 0.88 m.
What to check: select the back wall and open the Modifiers tab (wrench icon). If it is empty, as here, the hole is part of the wall's shape. If there is a Boolean, do not delete the cutter box in its Object field. Deleting the cutter removes the hole too.
3. Question 3: large furniture
Starting point: continue from the scene in section 2.
Do this: send this.
Put a bed (1 x 2 m) against the left wall, a desk and chair under the window, and a bookshelf at the front right. Use only a few boxes for each.
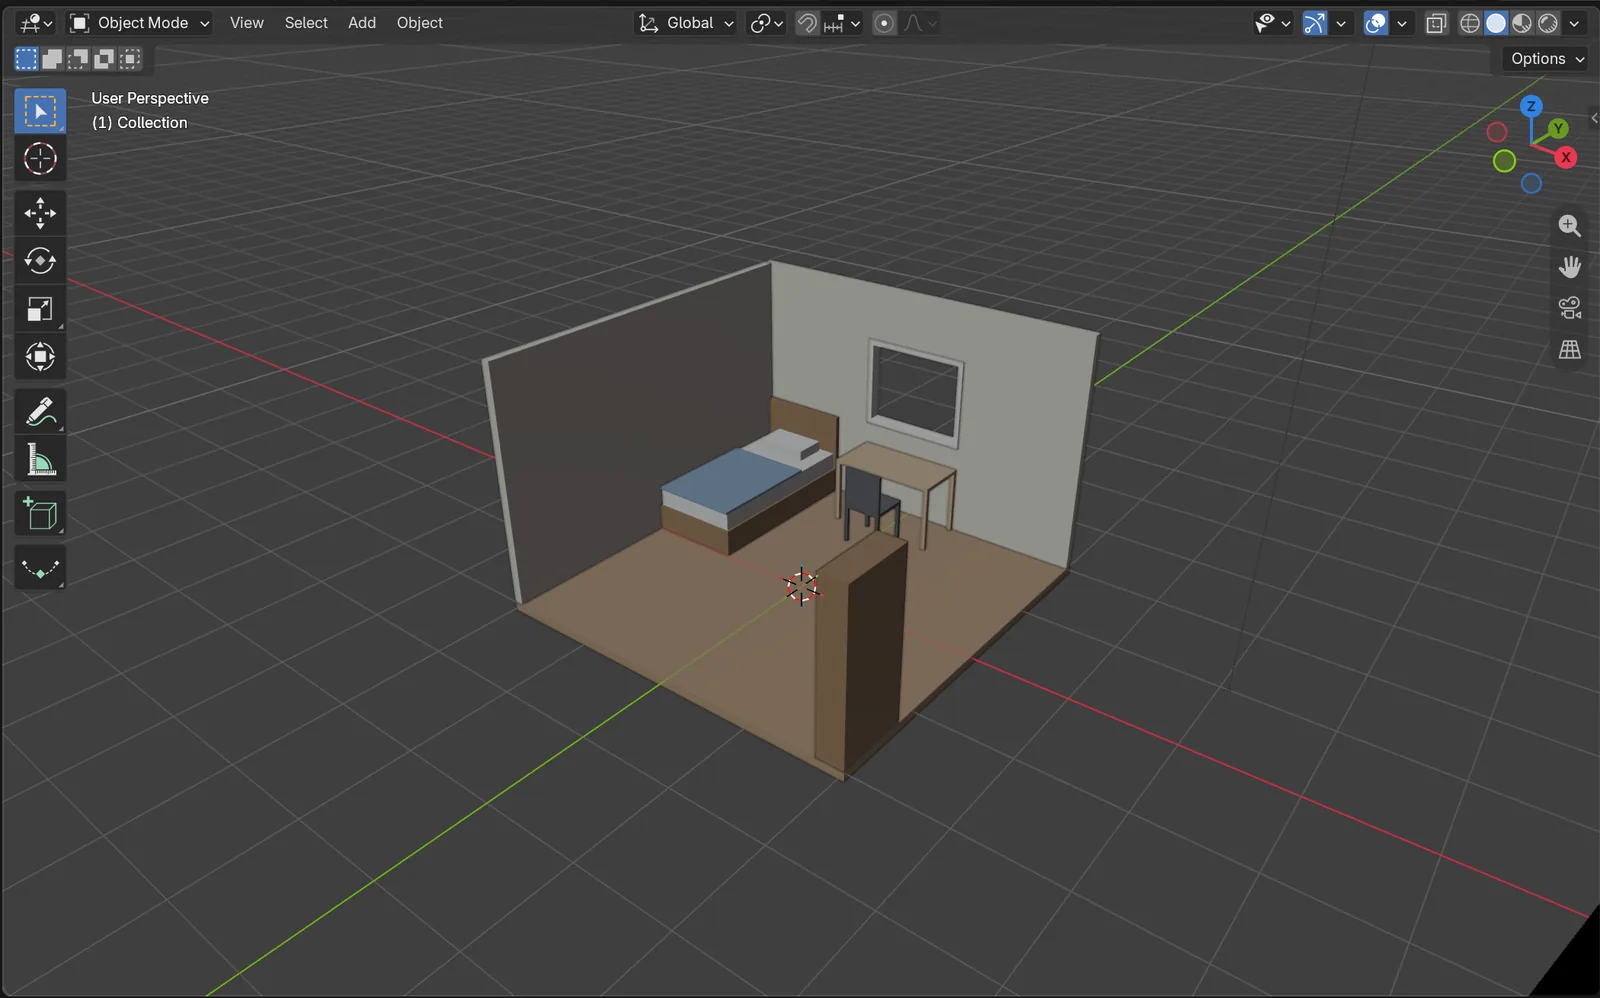 Figure 3. The result of question 3: bed, desk, chair, and bookshelf made of boxes (Blender screenshot)
The AI joined several boxes into one object for each piece of furniture. The bed (Bed) has five: base, mattress, blanket, pillow, and headboard. The bookshelf (Bookshelf) has eight: sides, back, and shelves. The bookshelf sits at the front right corner of the room (X 1.85, Y −1.6), with its shelves facing into the room. Figure 3 looks straight at that corner, so the bookshelf seems to be at the front middle.
What to check: check with the position numbers too that each piece went where you asked. Select the bookshelf and read Location in the Object tab. Also check that the chair back is on the side away from the desk. If the back faces the desk, the chair is turned the wrong way. In this result it is right.
4. Question 4: props, lights, and camera
Starting point: continue from the scene in section 3.
Do this: send this.
Add a rug, a desk lamp, a potted plant, and a few books, plus sunlight coming in through the window and a room light. Point the camera into the room from the front right, up high.
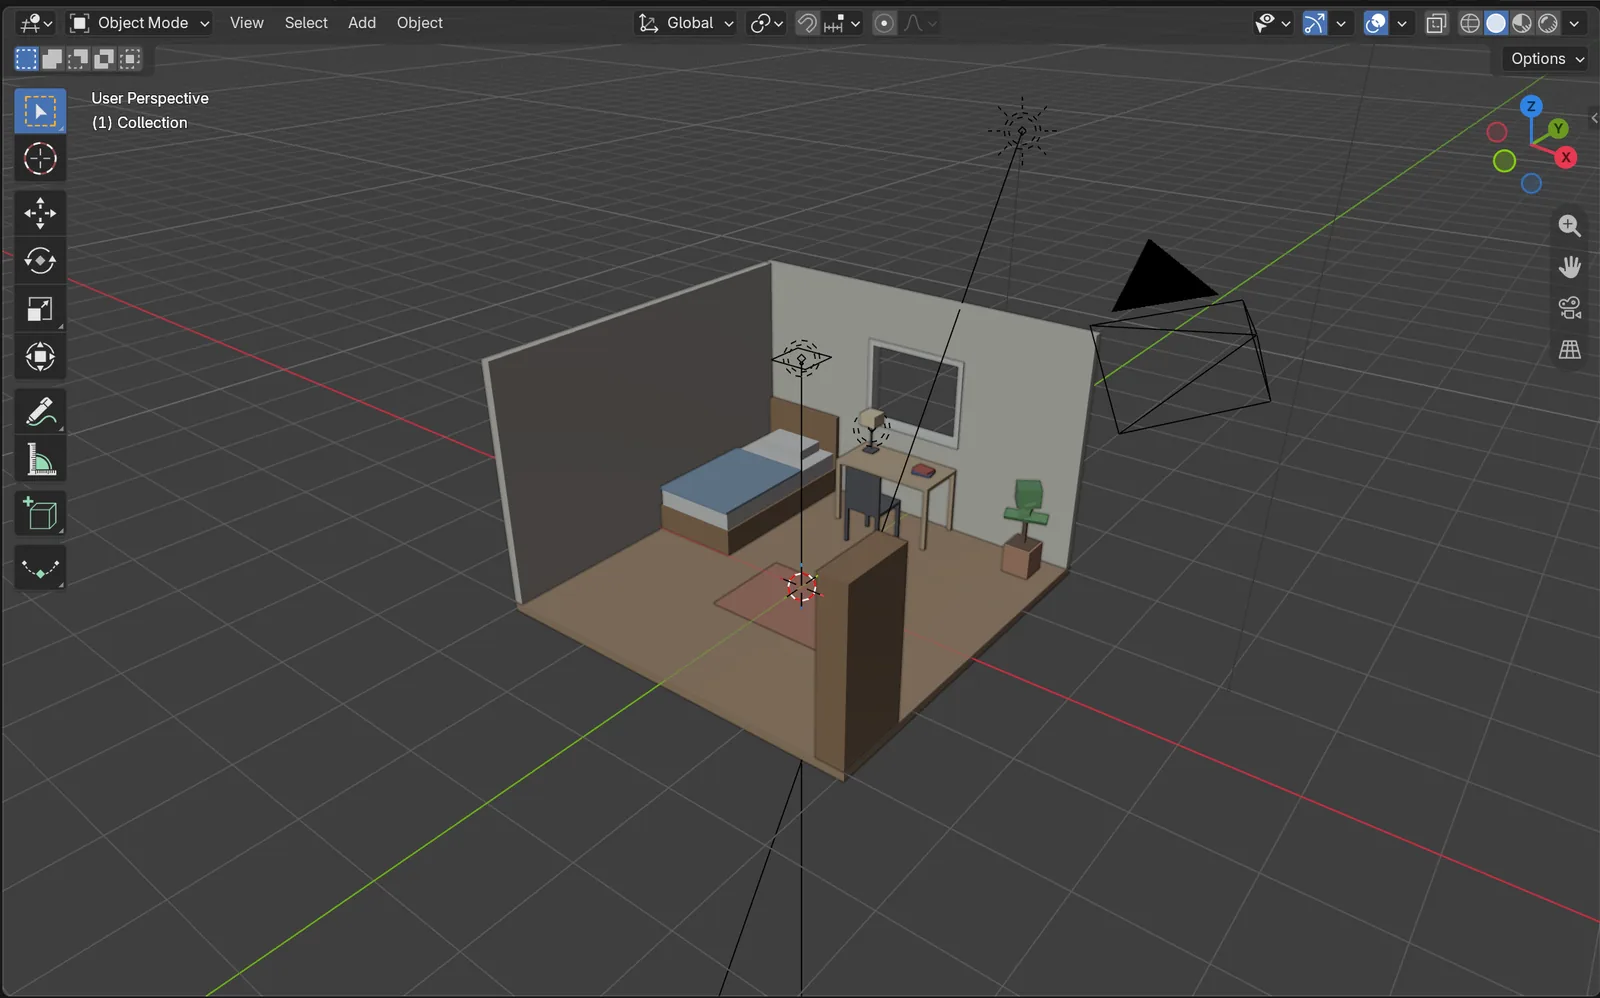 Figure 4. The result of question 4: props, lights, and the camera (Blender screenshot)
The AI added the following.
| What | What the AI made |
|---|---|
| Props | rug (Rug) 1.4 × 1.0 m, desk lamp (Desk_Lamp, with a softly glowing shade), plant (Plant), books (Books): 16 on the shelf + 2 on the desk |
| Sunlight | Sun light (Sun_Window), strength 4, shining from beyond the back wall |
| Room light | Area light (Ceiling_Light) 120 W at ceiling height 2.5 m |
| Lamp light | Point light (Desk_Lamp_Light) 15 W, just under the shade |
| Camera | the existing Camera moved to (4.6, −2.4, 4.4), 19 mm lens |
The end of the AI's answer had three notes.
- The Point light that came with the new file (Light, 1000 W) is still on, so the room may look flatly bright.
- From this camera angle, the back of the bookshelf faces the camera, so the books inside cannot be seen.
- There is no ceiling, so it did not make a lamp shade object for the room light.
Do this: check the camera view with numpad 0, then press F12 for the first render.
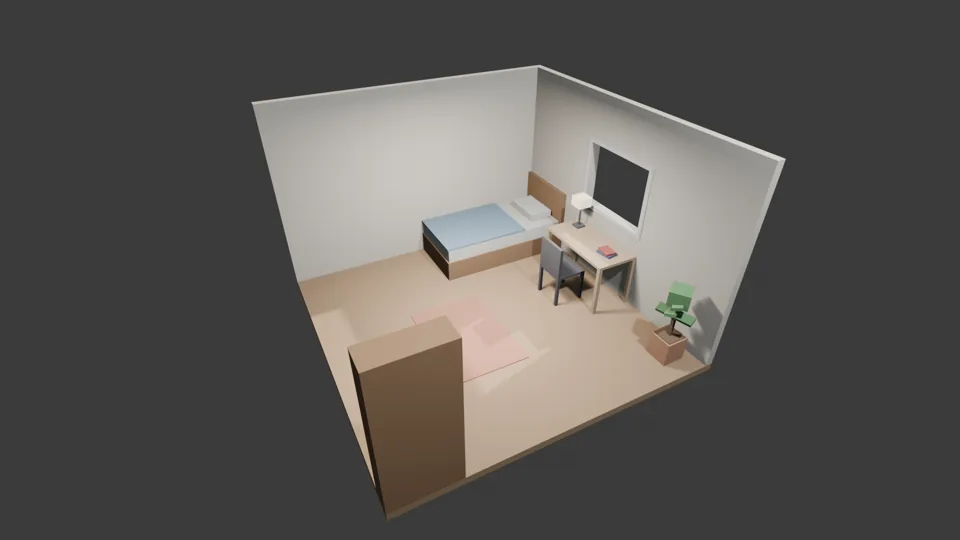 Figure 5. The first render. The back of the bookshelf blocks the front, and the lamp light is barely visible (Blender render)
The render matches the AI's notes. Only the back of the bookshelf shows, and it hides part of the rug. The room is bright but flat, because one default light shines evenly from above, and the lamp light is barely visible. Also, the render resolution was still the new file's default (1920 × 1080). If the question does not mention resolution, the AI does not change it either.
5. Question 5: a check that does not change the scene
Starting point: continue from the scene in section 4.
Besides obvious problems, objects may cut into each other or float. These are hard to find on screen. Ask AI for a read-only check, and it finds them as numbers.
Do this: send this.
Give me a table of the bottom height of every object and the pairs whose bounding boxes overlap. Do not change the scene.
Always include "do not change the scene." If the AI fixes things on its own during a check, it is hard to know what changed.
The AI's first line said it "only read the scene and changed nothing." The result is summed up below. Everything standing on the floor started at height 0, and the lamp on the desk and the books on the shelves sat exactly on their surfaces. Five pairs had overlapping bounding boxes.
| Overlapping pair | AI's judgment |
|---|---|
| back wall and window frame | no cutting in. The wall's bounding box includes the window hole, so they look like they overlap |
| books and bookshelf | only touching. The books rest on the shelves |
| books and desk | only touching. Two books lie flat on the desktop |
| books and plant | apart. The 18 books are one object, so their bounding box is wide enough to cross the room |
| chair and desk | apart. The chair seat goes 9 cm under the desk, but below the top and between the legs |
The AI did not stop at comparing bounding boxes. It split each object into its box pieces, measured again, and concluded that no object actually cuts into another. A bounding-box check is looser than the real shape, so when it says "overlap," look again on screen before deciding.
6. What to fix by hand
Starting point: continue from the scene in section 5.
Based on the first render (Figure 5) and the AI's notes, fix five things with panel values.
Do this:
- Default light left on: in the Outliner, click the camera icon on the Light row to turn it off for rendering.
- Bookshelf showing its back: select Bookshelf and set Rotation Z to
180in the Object tab. The bookshelf turns in place so its shelves face the camera. Leave the books (Books) as they are. The bookshelf turns around its own center, so the books stay inside the shelves. - Dim desk lamp: select Desk_Lamp_Light and raise Power in the Light tab from
15to60. - Room now too dark: turning off the default light in step 1 makes the room clearly darker. In the World tab, raise Color to R
0.15, G0.17, B0.22(a light blue-grey). - Resolution: set the resolution to
960×540in the Output tab.
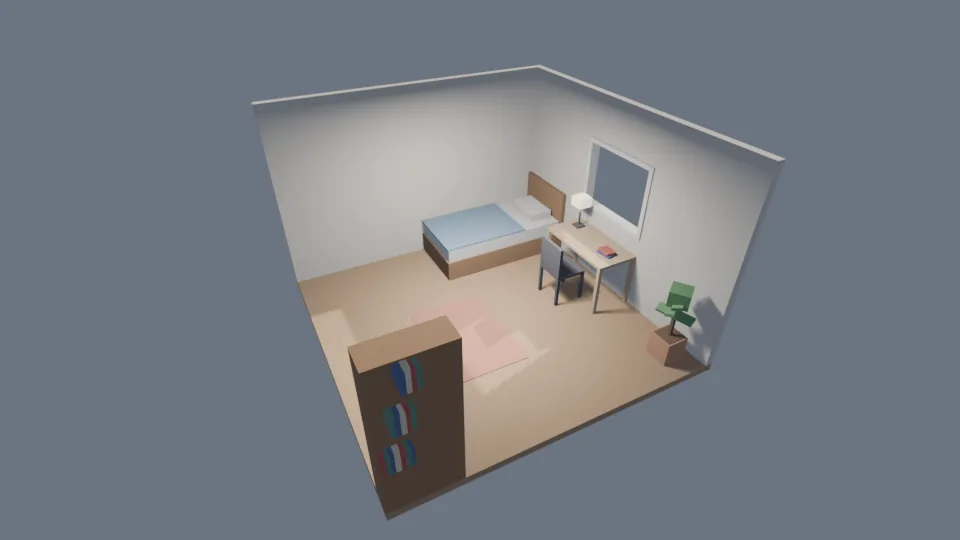 Figure 6. The render after fixing five things (Blender render)
The shelves and books are visible, and with the even default light gone, the sunlight patch on the rug and the plant's shadow are clearer. The background and the view through the window turn the light blue-grey of the World color. The lamp only brightens the desk under its shade a little; for a clearer glow, raise Power more or hand it to AI in the next question.
7. Writing better questions next time
| What came up this time | What to put in the question in advance (example) |
|---|---|
| The back of the bookshelf faces the camera | "Make the open side of furniture face the camera" |
| The default light was left on | "Turn off the Light that came with the new file for rendering" |
| The lamp light is weak | "Set the lamp strength so its light shows in the render" |
| The resolution stayed at the default | "Render resolution 960×540" |
| 18 books are one object | "Group the books on the shelf and on the desk separately" |
Rather than putting all of this in one question, splitting the steps as in this guide and adding a line or two at each step makes the result easier to check. And always read the last paragraph of the answer. This time the AI pointed out two of the things to fix first.
Practice
- Select the chair (Chair) and then the desk (Desk), read Location Y in the Object tab, and write down whether the chair is in front of the desk (smaller Y) or behind it.
- Send the check question from section 5 again and see whether it still reports "no object actually cuts into another" after turning the bookshelf.
- Ask AI to "hang a picture frame on the right wall." See how the AI handles the fact that there is no right wall.
- Save this room file. With the method in Turntable renders with AI, you can spin around the room.
Common mistakes and fixes
| Symptom | Cause | Fix |
|---|---|---|
| The window hole disappeared | With a Boolean, the cutter box was deleted | Undo with Ctrl+Z or go back to the saved file |
| Only the back of the furniture shows | The furniture faces into the room but the camera looks from outside | Turn the furniture's Rotation Z or move the camera |
| The render is flatly bright | The new file's default light is on | Turn Light off for rendering and set brightness with the World color |
| The render is too dark | After turning off the default light, there is not enough light to fill the room | Raise the World Color and Sun strength a little at a time |
| The check says they overlap but the screen looks fine | Bounding boxes are looser than the shape | Look closely on screen, or ask again "do they actually cut into each other" |
| The AI changed the scene during a check | "Do not change" was missing from the question | Go back to the saved file and send the question again |
Summary
Floor and walls → window → furniture → props, lights, and camera → a "do not change" check → fix with numbers after reading the AI's notes and the render. In the next guide, Turntable renders with AI, you turn the finished scene and take many images.
Further reading
- Choosing an AI tool for Blender MCP
- Ten first prompts for Blender MCP
- What is the low-poly style?
- Blender beginner chapter 13: a small finished piece
- Letting AI set up lights and materials
- Safety checks before handing Blender to AI
References
- Blender 5.2 Manual, Boolean Modifier: https://docs.blender.org/manual/en/5.2/modeling/modifiers/generate/booleans.html
- Blender 5.2 Manual, Light Objects: https://docs.blender.org/manual/en/5.2/render/lights/light_object.html
- Blender 5.2 Manual, World: https://docs.blender.org/manual/en/5.2/render/lights/world.html
- Blender Lab, MCP Server: https://www.blender.org/lab/mcp-server/
- Shortcuts: render
F12, camera view numpad0, saveCtrl+S, undoCtrl+Z - Images: real Blender 5.2.1 screens and Blender renders (EEVEE)