Trying the 26 tools of the official Blender MCP: scene summaries, screen capture, rendering, and doc search
Sort the 26 tools that Blender Lab's official MCP server gives AI into seven groups, call each one on the official Classroom demo file, and learn what each is for from the real results.
한국어English
ON THIS PAGE
- 01Before you start
- 021. Tool map: 26 tools in seven groups
- 032. File summary tools: a health checkup sheet
- 043. Object view tools: lists and details
- 054. Screen navigation and capture tools: the AI's eyes and fingers
- 065. Render tools: what is saved, and where
- 076. Doc search tools: a library inside the server
- 087. The code execution tool: the last resort
- 09Practice
- 10Common mistakes and fixes
- 11In one line
- 12Read next
- 13References
Based on: Blender 5.2 LTS (screenshots from 5.2.1, English interface, default shortcuts), the Blender Lab MCP server and add-on 1.0.3, and the guide in the official repository. Checked in October 2026. All images are real Blender screens, images returned by the official MCP tools, and Blender renders.
What AI can do in Blender is decided by the tools the MCP server hands it. Think of each tool as one tool in a toolbox placed in the AI's hands. Blender Lab's official MCP server 1.0.3 has 26 tools. The official website has no separate list of them; the list is only in a description file inside the repository.
In this guide, we sort the 26 tools into seven groups, open one official demo file, and actually call them. Once you see the results, you will feel less stuck on "I connected it, but what do I ask it to do?"
When you finish this guide, you will be able to do the following.
- Sort the 26 official MCP tools into seven groups.
- Check missing files, linked files, and usage with the file summary tools.
- Show the AI the object you want with the screen navigation and capture tools.
- Know what the render tools and doc search tools are for, and what to watch out for.
- Judge when to use the code execution tool.
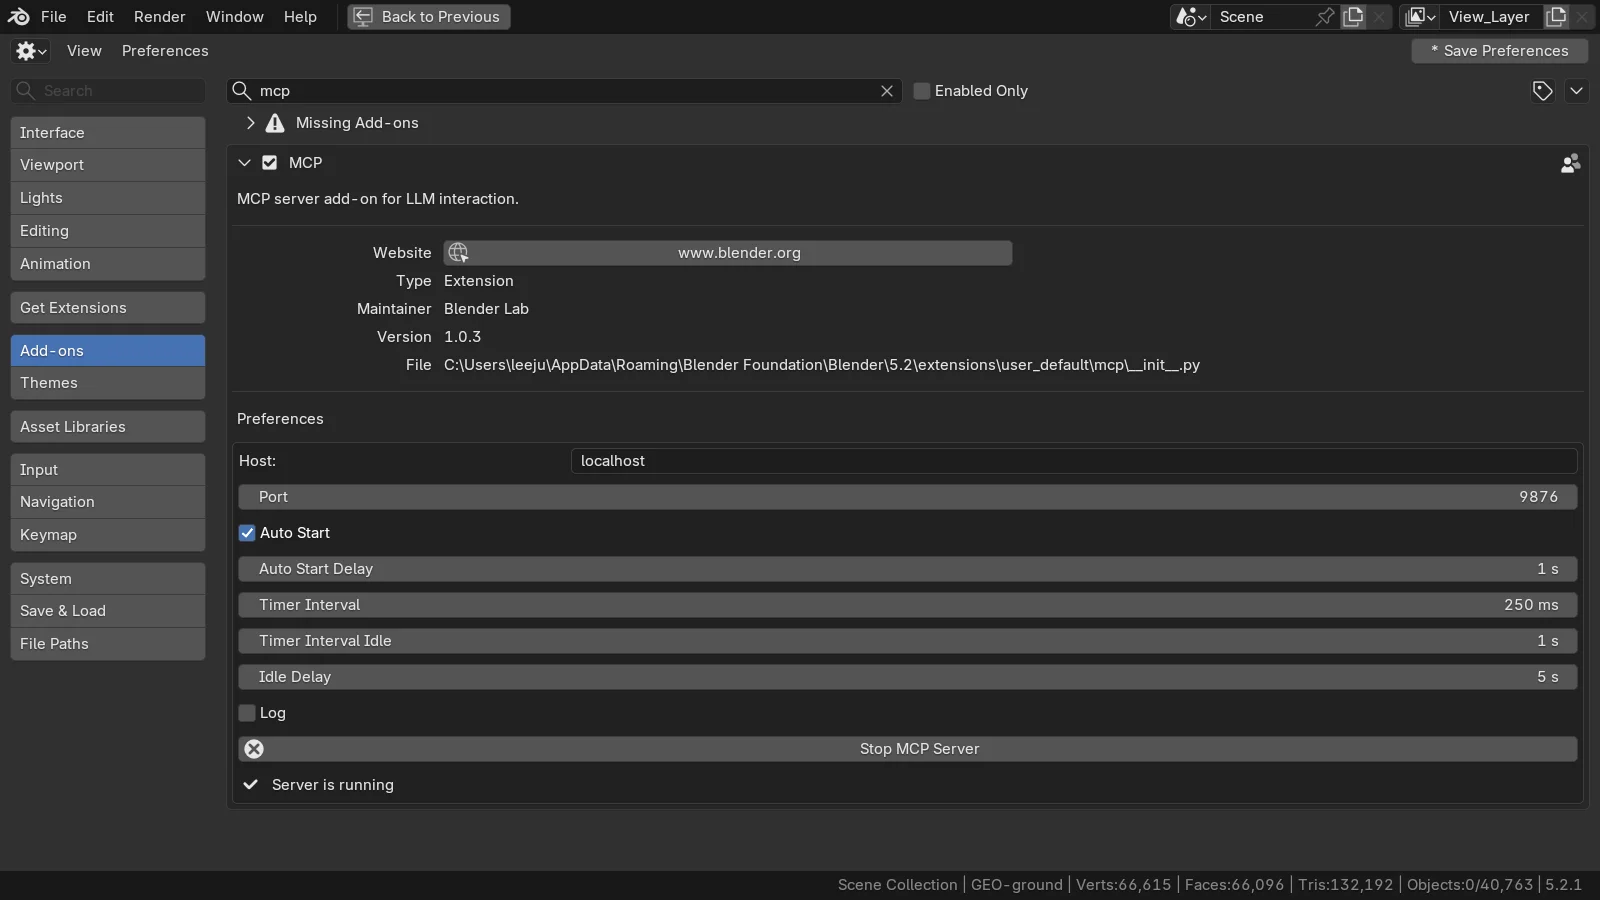
If you have not connected yet, see Installing the official Blender MCP and Connecting the official Blender MCP to Claude Code first.
Before you start
What you need: an AI app connected to the official MCP, and Blender 5.1 or later with Server is running.
- On the demo files page of blender.org, download Classroom (zip, about 70 MB). The demo page says the file was made by Christophe Seux and released under CC0 (free for anyone to use).
- Unzip it and open
classroom.blendinside theclassroomfolder with File ‣ Open. - This file's render engine is Cycles. To see the render in section 5 quickly, change Render Engine in the Render tab to EEVEE.
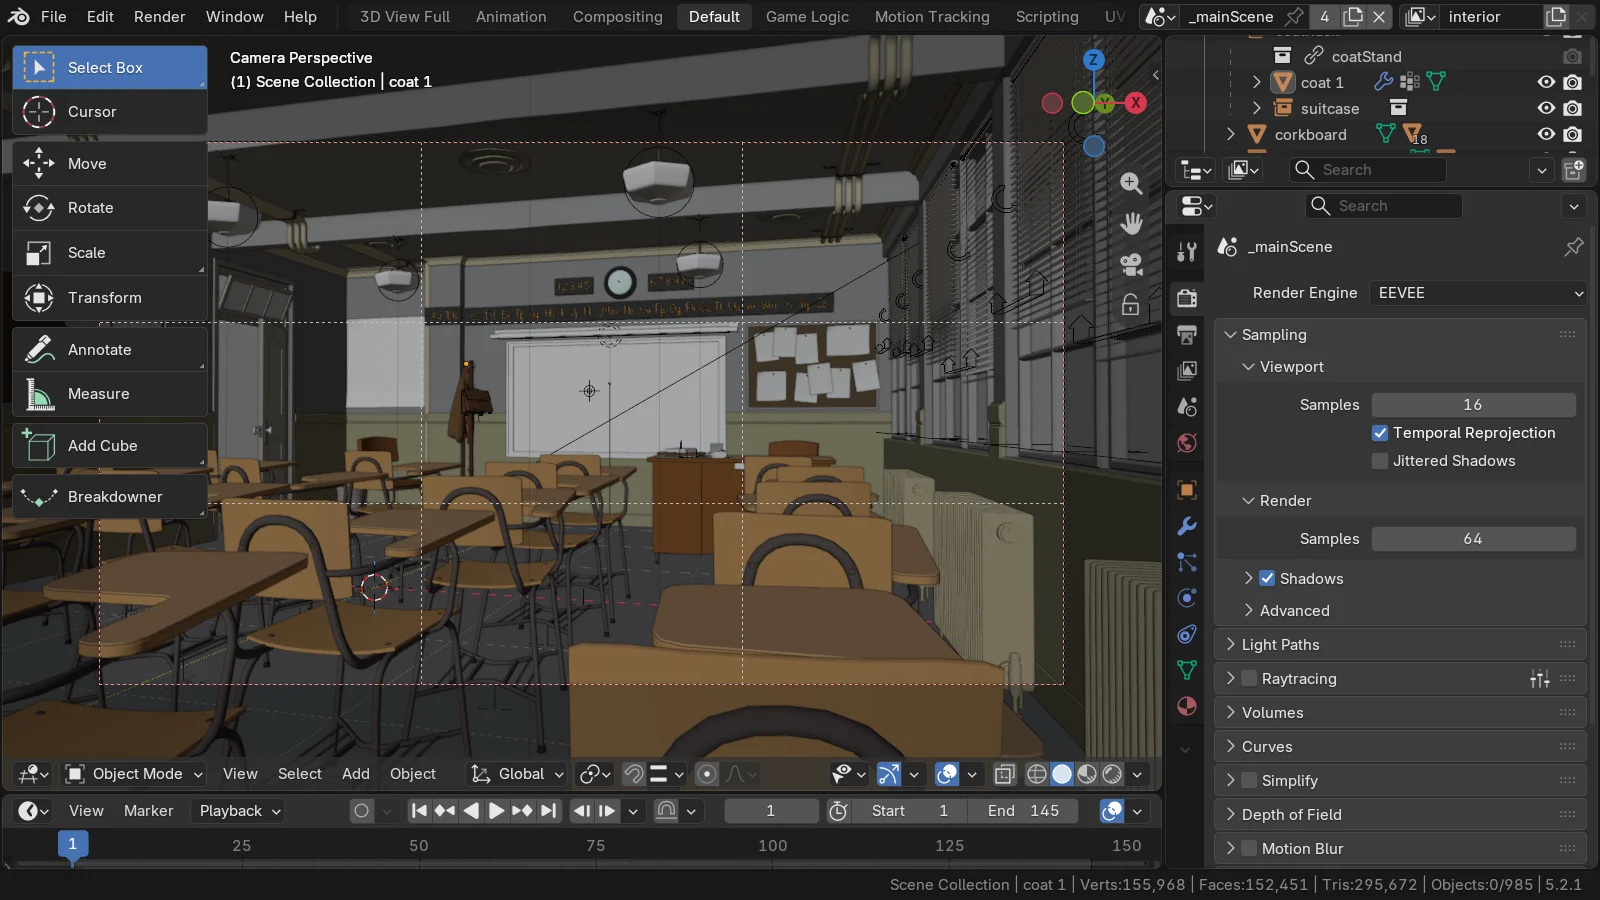 Figure 1. The Classroom demo open. It is a classroom scene with 985 objects. This image shows the screen after the render engine was changed to EEVEE (Blender screenshot)
How to get the AI to call a tool: usually you do not need to know the tool names. Say what you want, such as "Check whether any image files are missing in this file," and the AI picks a suitable tool. If you want it to use a specific tool, include the name, such as "with the get_blendfile_summary_missing_files tool." You can use the "What to say" examples in the tables below as they are.
1. Tool map: 26 tools in seven groups
| Group | Count | Tools | What they do |
|---|---|---|---|
| File summary | 10 | get_blendfile_summary_datablocks, _missing_files, _of_linked_libraries, _path_info, _usage_guess (each with a _for_cli pair) | Summarize the whole file in numbers and lists |
| Object view | 2 | get_objects_summary, get_object_detail_summary | Collection and object lists, detailed information on one object |
| Screen capture | 3 | get_screenshot_of_window_as_image, get_screenshot_of_area_as_image, get_screenshot_of_window_as_json | An image of the whole window, an image of one area, the window layout as text (JSON) |
| Screen navigation | 4 | jump_to_tab_by_name, jump_to_tab_by_space_type, jump_to_view3d_object_by_name, jump_to_view3d_object_data_by_name | Switch workspace tabs, move the viewport to an object |
| Render | 2 | render_thumbnail_to_path, render_viewport_to_path | A preview render, a render with the current settings |
| Doc search | 3 | search_manual_docs, search_api_docs, get_python_api_docs | Search the manual and Python API documentation inside the server |
| Code execution | 2 | execute_blender_code, execute_blender_code_for_cli | Run Python code in Blender |
Tools whose names end in _for_cli start a separate Blender without a screen, open the .blend file you name, and answer. Use them to inspect another file without touching the Blender you have open. They see only the saved file contents, so unsaved changes in the open Blender are not reflected. Tools without _for_cli ask the Blender you have open.
The tool list may change from version to version. This guide is based on 1.0.3, and the list I got by connecting to the server directly also had 26 tools.
2. File summary tools: a health checkup sheet
The file summary tools are like a health checkup sheet at a hospital. Without opening each part of the file, they show in numbers "what is empty and what there is a lot of." All five kinds only read, so they do not change the file.
Starting state: continue with the Classroom file after finishing step 3 of "Before you start."
| Tool | What to say | Result from Classroom |
|---|---|---|
get_blendfile_summary_datablocks | "Summarize this file" | Number of data-blocks, workspaces, render engine |
get_blendfile_summary_missing_files | "Check whether any external files are missing" | 33 missing file references (21 different names) |
get_blendfile_summary_of_linked_libraries | "List the linked library files" | 11 direct links, 0 indirect links |
get_blendfile_summary_path_info | "Tell me the file path and save state" | Path, saved (is_saved: true), no changes (is_dirty: false), size about 32 MB |
get_blendfile_summary_usage_guess | "Guess what this file is mainly used for" | Scores by category (0 to 100) and confidence |
Follow along:
- Send the AI "Check whether any external files are missing."
- In the list that comes back, look at the
pathof the rows whoseid_typeis Image.
Here is the first part of the result from Classroom (the start of each path is shortened).
{
  "missing_files": [
    { "id_type": "Object", "id_name": "DustParticules", "path": "...\\classroom\\blendcache_classroom\\" },
    { "id_type": "Image", "id_name": "base_bareMetal.png", "path": "...\\classroom\\..\\..\\textures\\_baseTextures\\base_bareMetal.png" },
    { "id_type": "Image", "id_name": "base_leather.jpg", "path": "...\\classroom\\..\\..\\textures\\_baseTextures\\base_leather.jpg" }
  ]
}
The missing image files all point to a folder named _baseTextures. The ReadMe inside the zip file also says "baseTextures must be put in the textures folder." Without this tool, you would only have noticed the problem after rendering, when you saw pink (the sign of a missing image). It is the first tool worth calling when you open a file someone else gave you.
The usage guess tool scored this file Scripting 100, Geometry Nodes 100, Modeling 100 (confidence 68), Animation 67, and Rendering 33. The scores are guesses from the data in the file, not the right answer. Use them to quickly get a sense of a file you are seeing for the first time.
3. Object view tools: lists and details
| Tool | What to say | Watch out |
|---|---|---|
get_objects_summary | "Show me the collection structure and the object list" | In a large scene, the result is very long |
get_object_detail_summary | "Tell me about the coat 1 object in detail" | You must give the exact object name |
In Classroom, the result of get_objects_summary was over 90,000 characters. That is because there are 985 objects. AI apps cut off long results or show a warning. In a large scene, it is better to narrow the question, such as "only the chairs" or "only the lights."
Follow along:
- Send the AI "Tell me about the coat 1 object in detail."
- Look at the
modifierspart of the result.
{
  "name": "coat 1",
  "type": "MESH",
  "dimensions": [0.853, 0.325, 0.235],
  "parent": "coatRack",
  "modifiers": [
    { "name": "Subsurf",   "type": "SUBSURF",   "show_viewport": true,  "show_render": true },
    { "name": "Solidify",  "type": "SOLIDIFY",  "show_viewport": false, "show_render": true }
  ],
  "materials": ["leatherCoat"]
}
(Decimals are shortened.) The Solidify modifier is off in the viewport and on only for rendering. A modifier is a feature that changes the shape while leaving the original as it is, like a photo filter. This difference is why the face count doubles in section 7.
4. Screen navigation and capture tools: the AI's eyes and fingers
This group is the tools that let the AI see the screen and move the view to where it wants.
4-1. Moving the viewport to an object and capturing only that area
Follow along:
- Send the AI "Move the viewport to the coat 1 object, then capture only the 3D view area and show it to me."
- The AI moves the viewport with
jump_to_view3d_object_by_nameand captures only the 3D Viewport withget_screenshot_of_area_as_image.
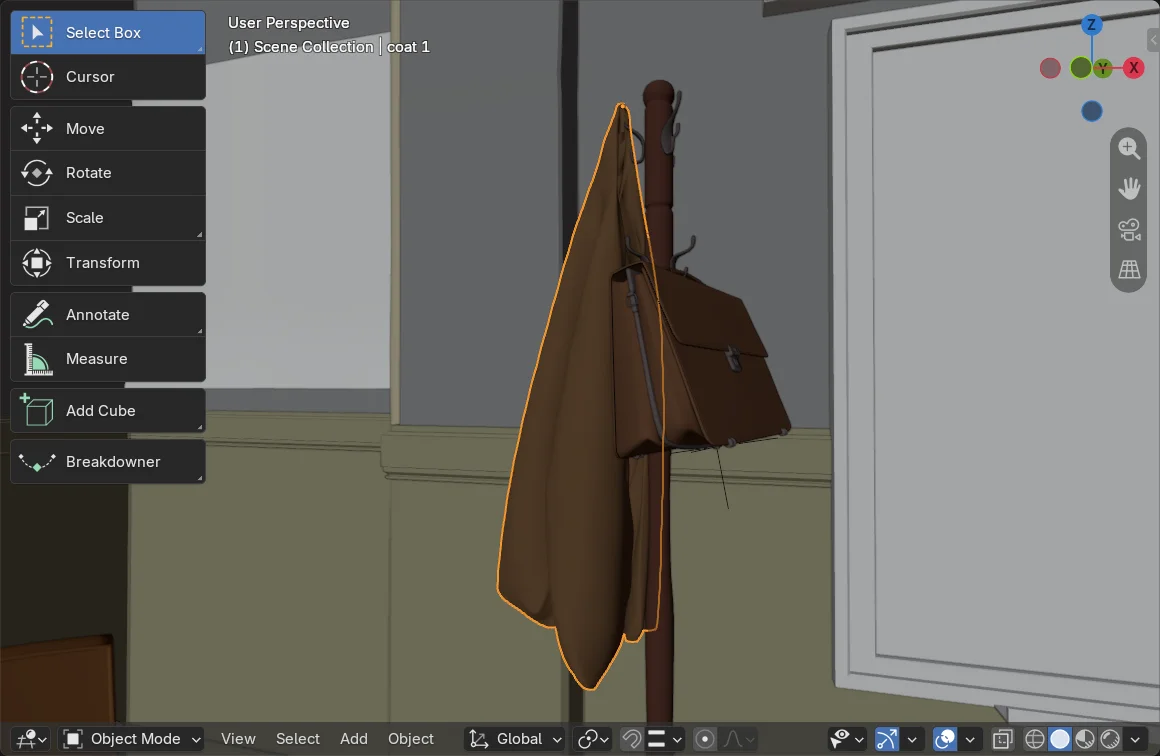 Figure 2. The image exactly as the area capture tool returned it.
coat 1 is selected (orange outline), and the view changed from the camera view to User Perspective (Blender screenshot, official MCP tool result)
As the image shows, this tool selects the object and changes the view. It does not change file data, but the screen state changes. To go back to the camera view, press numpad 0.
There is also an option called allow_edits. According to the official description, turning it on makes the tool show the object even if it has to unhide hidden objects or turn on disabled collections. Because that changes the scene, I recommend leaving it at its default (off).
4-2. Switching workspace tabs
Follow along:
- Send the AI "Switch to the Scripting tab."
- Check that the tab at the top of Blender has changed to Scripting.
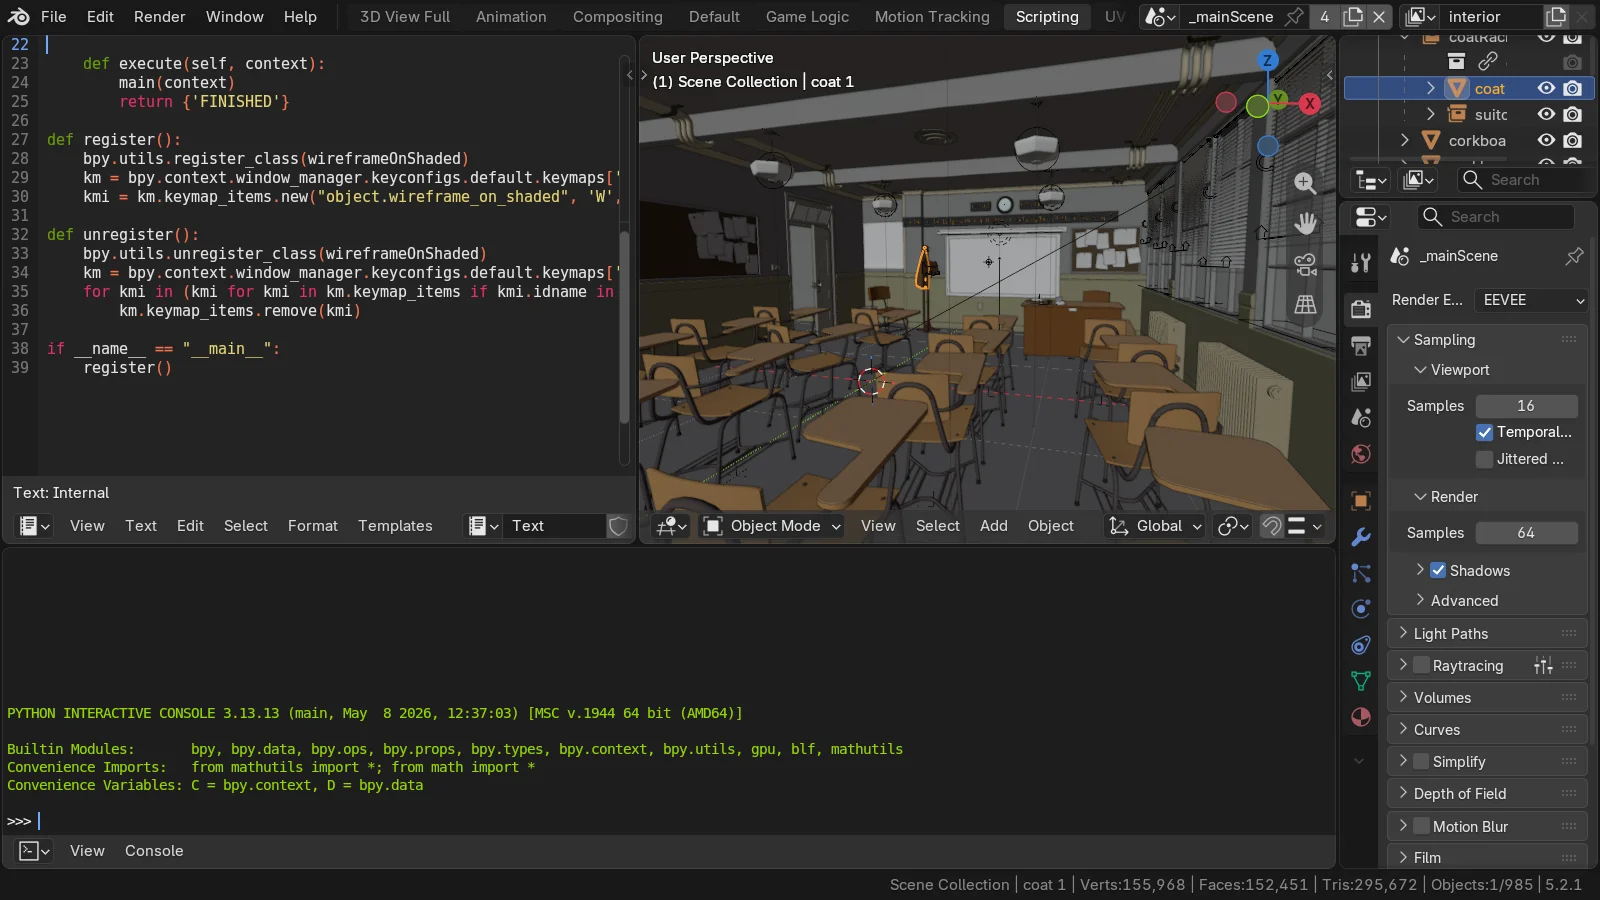 Figure 3. The screen after
jump_to_tab_by_name moved to the Scripting tab. The highlighted Scripting tab at the top, the Text Editor at the top left, and the Python Console at the bottom (Blender screenshot)
jump_to_tab_by_space_type searches by editor type instead of tab name. For example, it fits "Go to the tab where the node editor is large."
4-3. Seeing the window as an image or as text
| Tool | What it returns | Good for |
|---|---|---|
get_screenshot_of_window_as_image | An image of the whole window | Showing everything, as in "What does the screen look like now?" |
get_screenshot_of_area_as_image | An image of one area | Showing just the 3D view or node editor at a large size |
get_screenshot_of_window_as_json | The window layout as text (area types, positions, sizes, active object) | Describing the screen layout without an image |
On the Classroom screen, the window layout tool returned as text things like a window size of 1600×900, the Properties editor showing the Render (RENDER) tab, and the 3D Viewport being in camera view. It lets even AI models that cannot read images know the screen layout.
The screen capture tools were fixed in 1.0.3. The official release notes say it "fixed an old screen capture tool problem," so if captures look wrong, upgrade the server and the add-on to 1.0.3 or later.
5. Render tools: what is saved, and where
| Tool | Official description | What I actually saw |
|---|---|---|
render_viewport_to_path | Renders the scene with the current render settings | Despite the name, it is a full render, not a viewport image. In Classroom (EEVEE, 1920×1080), the tool call took about 40 seconds to finish on my PC |
render_thumbnail_to_path | Temporarily changes settings to make a small, low-quality preview render | The setting inside the tool is 320 pixels on the long side, but in a Blender with its window open, it came out at the scene's set size (section 7 of the Claude Code guide) |
Both tools save the result in the blender_mcp folder inside Blender's temporary folder. They use only the file name from the path you give. The actual saved path appears in filepath in the tool result, so also ask the AI to "tell me the path where it was saved."
Follow along:
- Check that you changed the render engine to EEVEE in step 3 of "Before you start."
- Send the AI "Render with the current settings, save it as classroom_full.png, and tell me the path."
- While the render runs, the Blender screen may look frozen. Wait until it finishes.
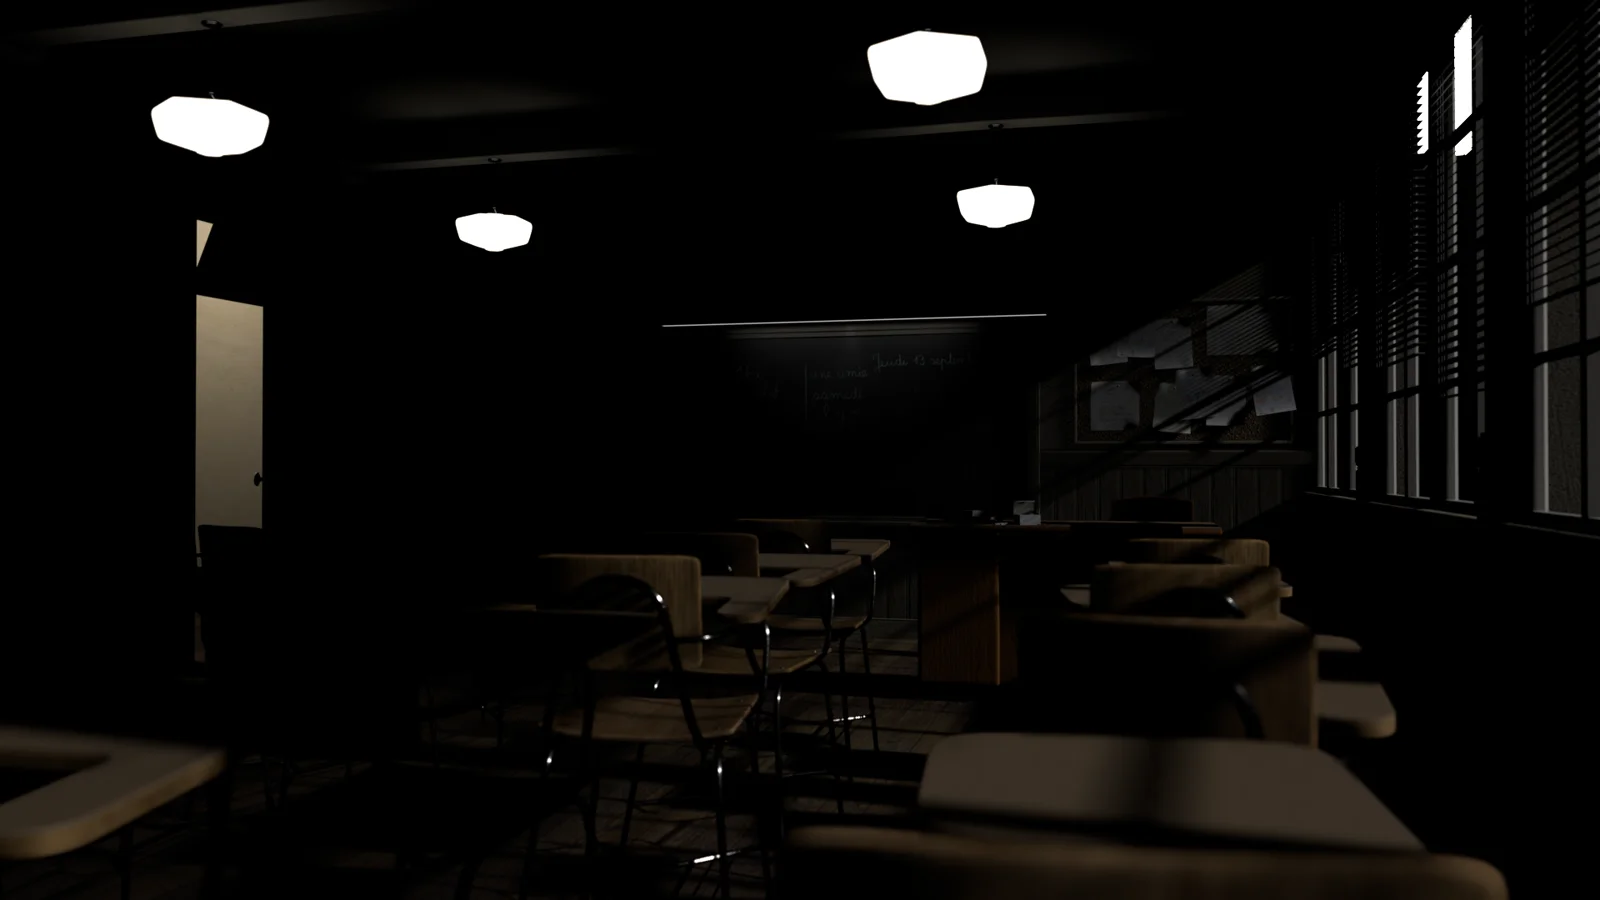 Figure 4. The render made with
render_viewport_to_path. This file's lighting was set up for Cycles, so it comes out dark in EEVEE (Blender render, EEVEE)
Rendering takes time and uses the computer heavily. In a large scene, lower the resolution % in the Output tab before asking. The difference between the engines is in EEVEE vs. Cycles.
6. Doc search tools: a library inside the server
The official server contains the Blender user manual and the Python API documentation. About 16 MB of the roughly 23 MB source folder is this documentation. It searches these documents instead of asking the internet, so it is easier to get answers that fit the current version. It is like having the neighborhood library inside your house.
| Tool | What to say | Result received (gist) |
|---|---|---|
search_manual_docs | "Search the manual for simplify subdivision" | The Max Subdivision description in render/cycles/render_settings/simplify.rst |
search_api_docs | "Search the API docs for resolution_percentage" | resolution_percentage in RenderSettings (1 to 32767, default 100) |
get_python_api_docs | "Show me the bpy.types.RenderSettings documentation" | The full documentation for that class |
get_python_api_docs takes a class or module name. If you give it a property name too, as in bpy.types.RenderSettings.resolution_percentage, it answers "not found (found: false)" and tells you to look at the level above, RenderSettings. To find one property, search_api_docs is the right tool.
The AI often calls doc search on its own before writing code. The note the official server sends the AI when it connects also says to search the documents first.
7. The code execution tool: the last resort
execute_blender_code runs Python code as is in the Blender you have open. It is the most powerful tool, and just as dangerous. The note the official server sends the AI also calls this tool "a last resort" and says to use another tool if one does the same job. blender.org also warns that this code runs without data safeguards.
Even so, it is essential for analysis that other tools cannot do. The third example in the official guide is such a case.
Follow along:
- Send the AI the official example sentence below.
Analyze the scene and list the outliers: objects with highest polygon count but smaller size from the camera point of view.
- When the AI says it wants to use the code execution tool, check that the code only reads (that no line changes or deletes values) before allowing it.
Here is the result of running the same analysis (count the faces after applying modifiers and sort from largest) through the official server.
| Rank | Object | Faces (viewport) | Longest side |
|---|---|---|---|
| 1 | coat 1 | 36,680 | 0.853 m |
| 2 | alphabet | 20,112 | 4.197 m |
| 3 | pipe | 3,708 | 8.285 m |
| 4 | pipe.001 | 3,708 | 7.994 m |
A coat less than 1 m in size is first in face count. The two outliers named in the official guide, coat 1 and alphabet, came out on top as expected. The official guide says coat 1 has about 74,000 faces when counted for rendering. That is because of the Solidify that is on only for rendering you saw in section 3. Whether the AI's answer says 37,000 or 74,000 faces depends on which basis the AI counted with.
execute_blender_code_for_cli does the same thing in Blender without a screen. It takes a .blend file path along with the code. According to the official guide, the screenless side does not accept results returned later (deferred responses), so the code must finish in one go.
Practice
- In the Classroom file, ask the AI to "count how many external files are missing," and check whether it matches 33.
- Ask "move the viewport to the alphabet object," then write down where that object is in the classroom.
- Ask "find the description of the Solidify modifier's Thickness in the manual," and write down the manual file name in the answer.
Common mistakes and fixes
| Symptom | Cause | Fix |
|---|---|---|
| The object list result gets cut off | The scene is large, so the result is too long | Narrow the question ("only the lights") |
get_object_detail_summary fails | The object name is wrong (spaces, upper and lower case) | Copy the name from the Outliner exactly |
| The rendered file is not in the folder you wanted | The render tools save to Blender's temporary folder | Take it from filepath in the result and move it |
| Blender seems frozen while rendering | A full render is running | Wait until it finishes. Next time, lower the resolution % |
| The camera view was lost after moving the viewport | The navigation tool changes the view | Numpad 0 |
| The captured image looks wrong | A version older than 1.0.3 | Upgrade the server and the add-on to 1.0.3 or later |
An API doc lookup returns found: false | A property name was included | Ask again with the class name, or use search_api_docs |
In one line
Start with the read tools (summary, lists, capture, docs), check the save location when rendering, and use code execution last. How the official and community MCPs differ continues in The official Blender MCP vs. the community MCP for Blender.
Read next
- Installing the official Blender MCP
- Connecting the official Blender MCP to Claude Code
- The official Blender MCP vs. the community MCP for Blender
- Blender Python automation: turning repeated work into scripts
- Fast EEVEE, accurate Cycles: how to choose a Blender render engine
References
- Blender Lab, blender_mcp repository (readme, readme_tools): https://projects.blender.org/lab/blender_mcp
- Blender Lab, release notes: https://projects.blender.org/lab/blender_mcp/releases
- Blender Lab, MCP Server: https://www.blender.org/lab/mcp-server/
- Blender demo files (Classroom, CC0): https://www.blender.org/download/demo-files/
- Blender 5.2 Manual, Simplify: https://docs.blender.org/manual/en/5.2/render/cycles/render_settings/simplify.html
- Shortcut: camera view numpad
0 - Images: all real Blender 5.2.1 screens, official MCP tool results, and Blender renders (EEVEE). The scene is the Blender demo file Classroom (CC0)