Installing the official Blender MCP: from the Blender Lab add-on to your first question
Follow along from the start: install the official MCP made by Blender Lab at the Blender Foundation, connect it to an AI app, and ask your first question with an official example file.
한국어English
ON THIS PAGE
- 011. How the official MCP came about
- 022. Two parts: the add-on and the server
- 033. What you need
- 044. Installing the MCP add-on in Blender
- 055. Connecting the server to an AI app
- 066. Your first question: trying the official example file
- 077. Habits for safe use
- 08Practice
- 09Common mistakes and fixes
- 10In one line
- 11Read next
- 12References
Based on: Blender 5.2 LTS (screenshots from 5.2.1, English interface, default shortcuts), the Blender Lab MCP add-on and server 1.0.3, the MCP Server page on blender.org, and the official Claude guides. Checked in October 2026. All images are real Blender screens and images returned by the official MCP tools.
In April 2026, the Blender Foundation, which makes Blender, released the stable version (1.0.0) of its own MCP server. It was made by Blender Lab, the foundation's experimental group, and its name is simply "MCP". Once you install it, an AI app such as Claude can look into the Blender scene you have open, answer questions about it, and, when needed, run Python code to change the scene.
MCP is a shared standard for plugging tools into AI apps. Think of a USB-C port. Because the standard is the same, Claude or any other app can use the same plug. If MCP itself is new to you, read What is MCP? first.
When you finish this guide, you will be able to do the following.
- Tell apart the two parts of the official MCP: the add-on and the server.
- Install the MCP add-on in Blender and check that the server is on.
- Connect the server to the Claude desktop app or another MCP app.
- Ask the AI your first question with an official example file.
- Know where to look when the connection does not work.
Using it from Claude Code (the terminal) is covered separately in Connecting the official Blender MCP to Claude Code.
1. How the official MCP came about
In the past, "Blender MCP" meant community tools made by individual developers. The guide Connecting Blender and AI on this site also describes that period. Things are different now.
| Date | Event |
|---|---|
| March 24, 2026 | First version (0.1.0) published in the Blender Lab repository |
| April 27, 2026 | 1.0.0 published |
| April 28, 2026 | Anthropic announces that "an MCP connector built by Blender developers" is officially available in Claude |
| September 11, 2026 | 1.0.3 published (fixes to the screen capture tools). The version this guide is based on |
The Anthropic announcement names three things this connector can do: analyze a scene and find problems, create scripts that change many objects at once, and add new tools to the Blender interface. MCP is an open standard, so AI apps other than Claude can use the same server.
How the official version differs from the community version is covered in The official Blender MCP vs. the community MCP for Blender.
2. Two parts: the add-on and the server
The official MCP works as a pair of two parts. The guide in the official repository draws the path the data travels like this.
MCP app (Claude, etc.) ⇐ MCP/stdio ⇒ blender-mcp server ⇐ TCP socket ⇒ add-on inside Blender
| Part | Where it runs | What it does | Comparison |
|---|---|---|---|
| Add-on (MCP) | Inside Blender | Runs incoming requests inside Blender and sends back the results | The order counter inside a shop |
| Server (blender-mcp) | Outside Blender, started by the AI app | Takes what the AI app says, passes it to the add-on, and passes the answer back to the AI app | The telephone operator between the customer and the counter |
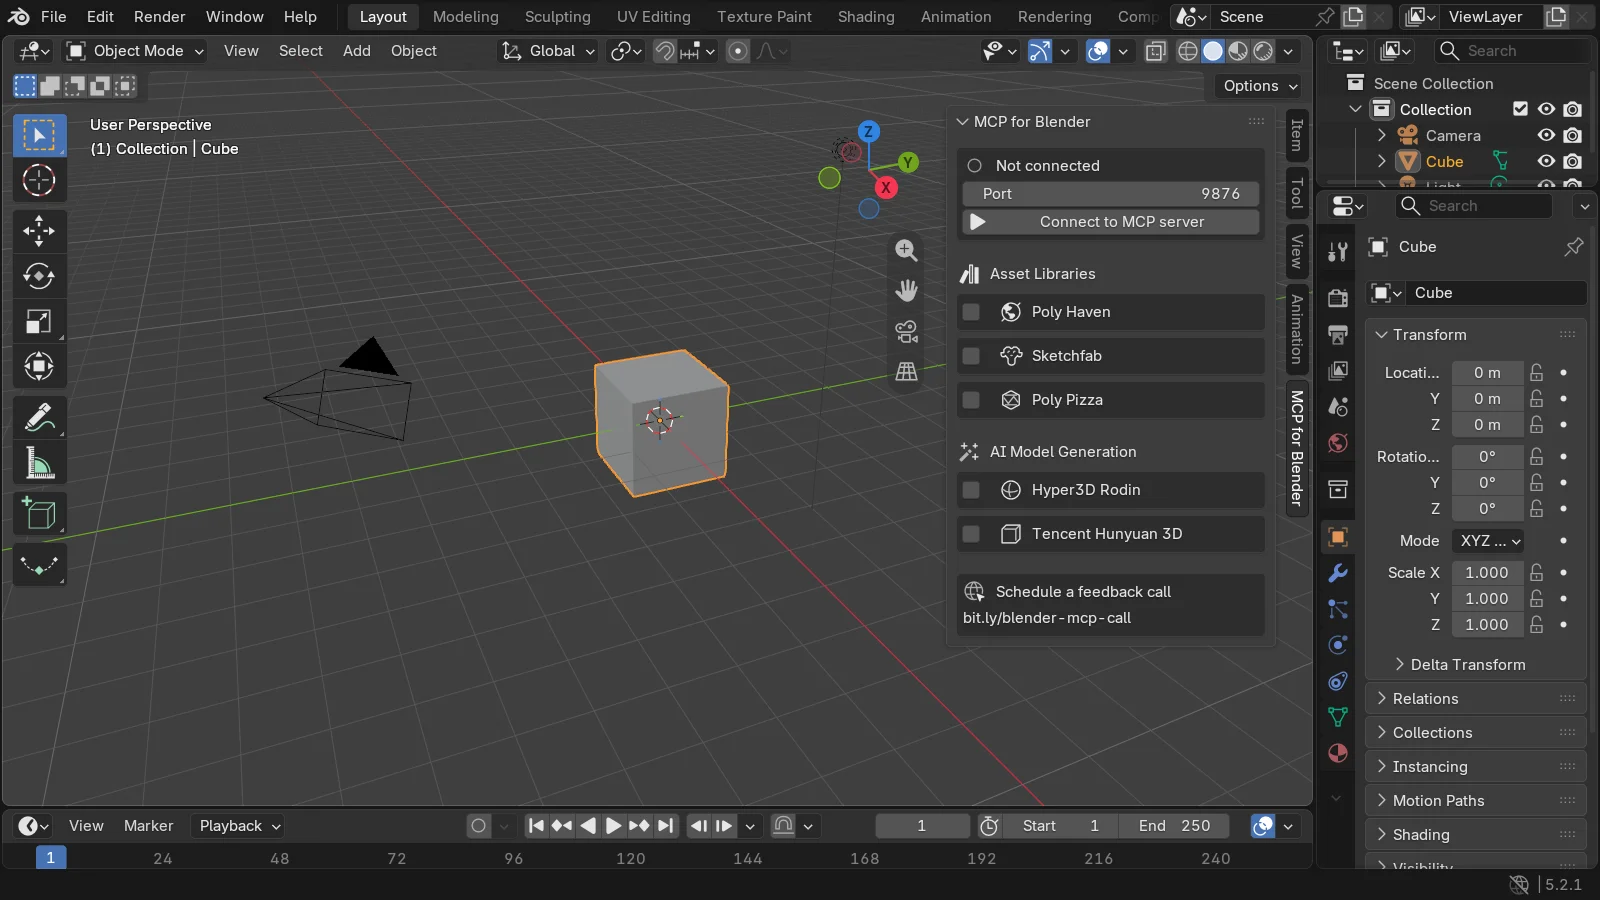
You can think of the TCP socket that links the two as a phone line inside the same computer. The port is the phone number. The default port of the official add-on is 9876. The server also calls 9876 by default. So if both keep their defaults, there is nothing to match.
The server contains the whole Blender Python API documentation and the user manual. The moment it connects, it also sends the AI a note saying "search these documents first." So the AI can find commands that fit the current version without searching the internet. What the 26 tools do is tried one by one in Trying the 26 tools of the official Blender MCP.
A warning to know first: the page on blender.org states plainly: "The MCP server will execute LLM generated code in Blender without any guards in place to protect your data from removal or being sent to a remote location." So it recommends using it in a virtual machine or on a computer with no sensitive information. The exercises in this guide use only the official example file. Open important work files only after making a copy.
3. What you need
| What you need | Requirement | Note |
|---|---|---|
| Blender | 5.1 or later | The minimum version written in the add-on's settings file is 5.1.0. For installation, see Blender for complete beginners, chapter 1 |
| Internet connection | When you download the add-on | Blender's online access must also be on (section 4) |
| One MCP app | The Claude desktop app, Claude Code, or another MCP app | The Claude guide says the Blender connector in the Claude desktop app is available on all plans, including the free plan |
| The same computer | Blender and the AI app on one PC | It does not work from claude.ai in a browser. This is because the server has to call Blender on your PC directly |
One place in the Claude guide says "Blender 4.2 or later." But the minimum version the add-on file requires is 5.1. The add-on will not install in Blender older than 5.1, so use 5.1 or later. This guide was checked with 5.2 LTS.
4. Installing the MCP add-on in Blender
You install the add-on with Blender's Extensions feature. If extensions are new to you, also see Installing and managing Blender add-ons and extensions.
Starting state: start with Blender running and any file open. A new file (File ‣ New ‣ General) is fine.
4-1. Turning on online access
The official add-on follows Blender's online access setting. If this setting is off, the server does not start and you get the error "Online access must be enabled in the system preferences". Despite the name, this add-on uses only a connection inside the same PC, not the internet. Even so, Blender's rules require this box to be on.
Follow along:
- Click Edit ‣ Preferences to open the Preferences window.
- Click System on the left.
- In the Network group, turn on Allow Online Access.
If you allowed online access when you first installed Blender, it is already on.
4-2. Adding the Blender Lab repository and installing
The method the official guide recommends is dragging the install link onto the Blender window twice.
Follow along:
- In a web browser, open the MCP Server page on blender.org (https://www.blender.org/lab/mcp-server/).
- Drag the add-on install link with the mouse and drop it onto the Blender window. The first time, Blender asks whether to add the Blender Lab repository (
https://lab.blender.org). Allow it. - Drag and drop the same link once more. This time the MCP add-on is installed and turned on.
When you install from a repository, Blender tells you about updates when a new version comes out. If dragging the link does not work well, you can also do it directly in Preferences.
Follow along (directly in Preferences):
- On the left of Preferences, click Get Extensions.
- Open the Repositories list at the top right and choose
+‣ Add Remote Repository. - Enter
https://lab.blender.org/in the URL box and add it. - Type
mcpin the search box at the top. - Click Install on the MCP row under Available.
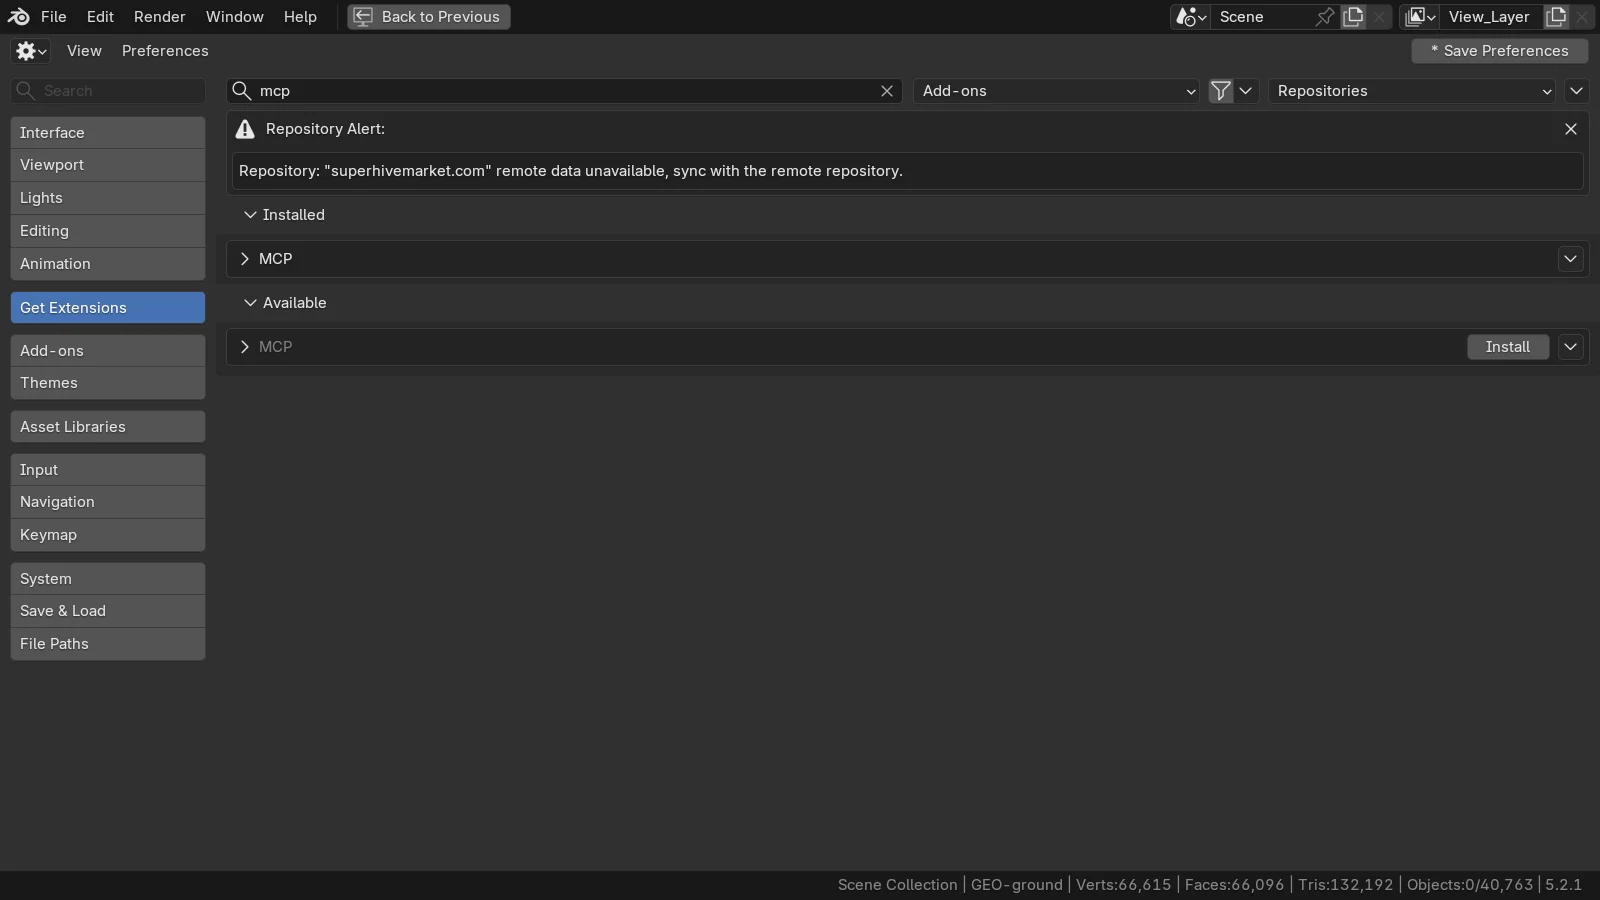 Figure 1. Searching for
mcp in Get Extensions. The search box at the top, MCP and its Install button under Available, and the Repositories list at the top right. In this image the add-on was already installed from a file, so MCP also appears under Installed. The Repository Alert at the top is a notice from another repository and has nothing to do with this guide (Blender screenshot)
On a PC without internet access, you can download the zip file (mcp-1.0.3.zip) from the MCP Server page and install it with Install from Disk in the drop-down menu at the top right of Get Extensions. With this method you do not get update notices.
4-3. Checking that the server is on
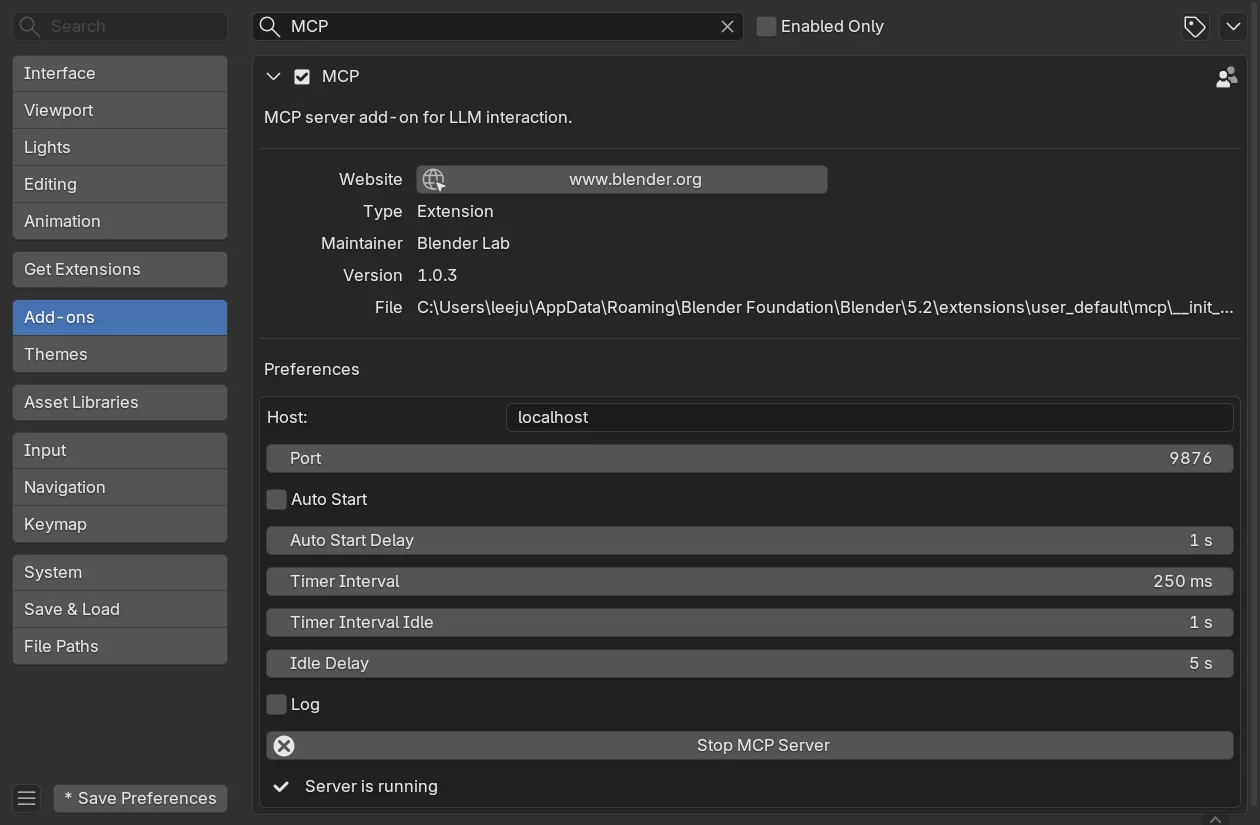
The official add-on has no tab in the 3D Viewport sidebar (N). Its settings and status are all in Preferences. The add-on starts the server on its own one second after Blender starts (Auto Start).
Follow along:
- On the left of Preferences, click Add-ons.
- Type
mcpin the search box at the top. - Click the arrow on the left of the MCP row to expand it.
- Check that Server is running appears at the very bottom.
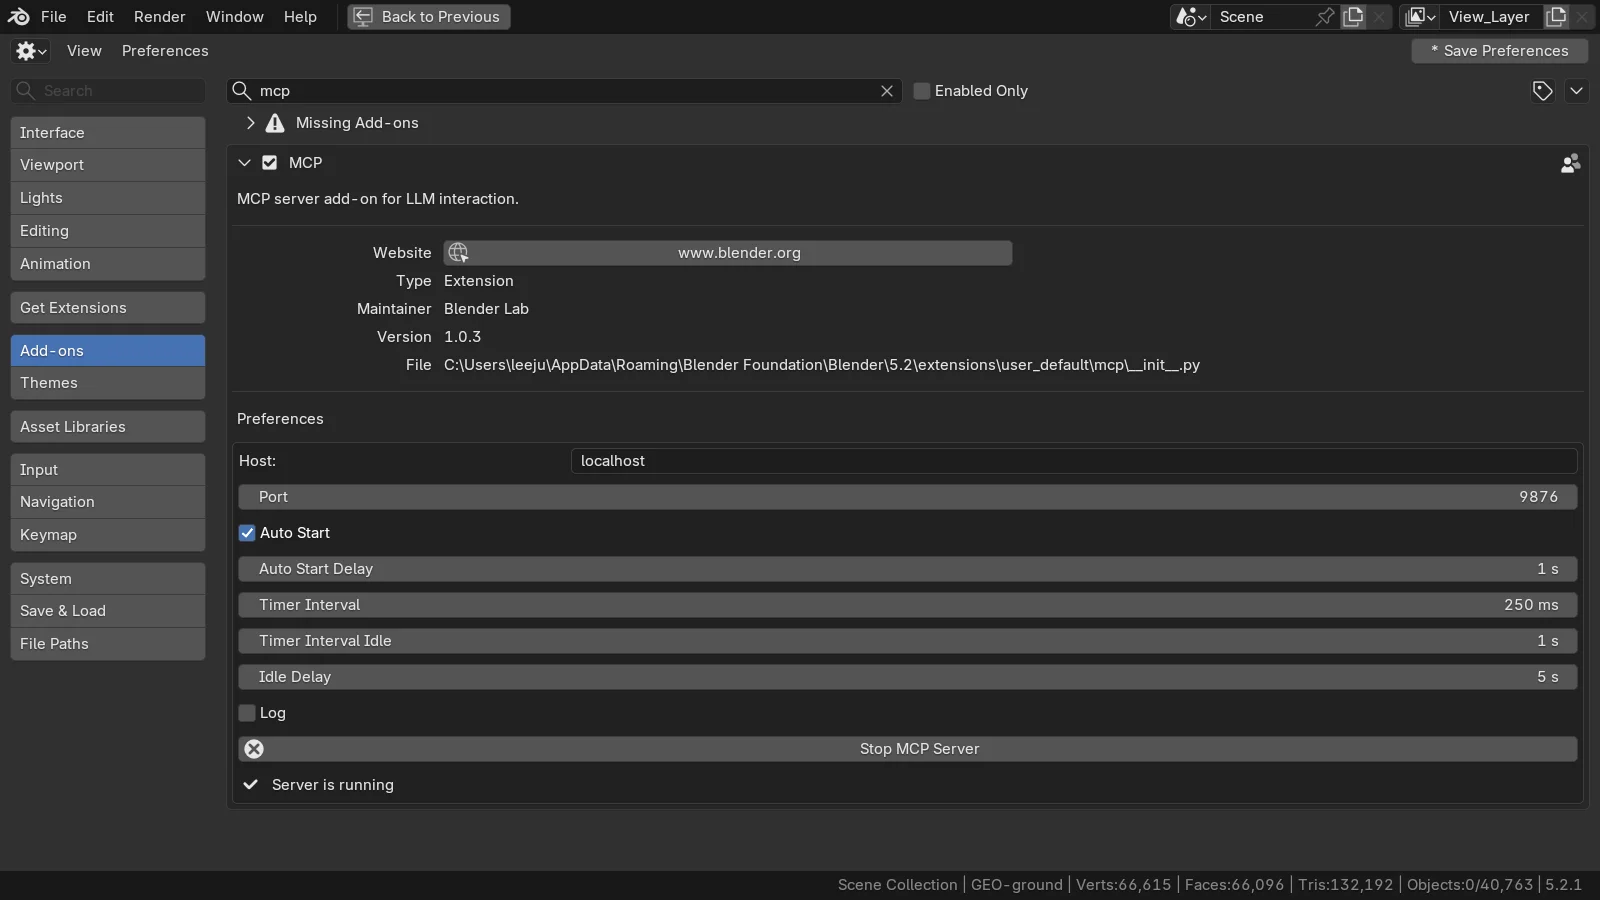 Figure 2. The MCP add-on with the server on. Maintainer Blender Lab and Version 1.0.3 at the top, Host, Port (default 9876), and Auto Start in the middle, and the Stop MCP Server button and Server is running at the bottom (Blender screenshot)
| Field | Default | Meaning |
|---|---|---|
| Host | localhost | Accepts connections only from inside the same PC |
| Port | 9876 | The number the server will call |
| Auto Start | On | Starts the server when Blender starts |
| Auto Start Delay | 1 s | How many seconds after Blender starts to begin |
| Log | Off | When on, writes each incoming request to the Blender console |
The Claude tutorial calls the add-on "BlenderMCP" and the button "start MCP server". On your screen, as in Figure 2, the add-on name is MCP, and when the server is off the button is named Start MCP Bridge Server.
You only need to click Save Preferences at the bottom left of the Preferences window when Auto-Save Preferences is off. This keeps the add-on installed and turned on the next time you start Blender.
5. Connecting the server to an AI app
The add-on is now waiting inside Blender, so next you attach the server outside Blender to an AI app. Pick just one method that fits the app you use.
| Method | When it fits | What you need |
|---|---|---|
| A. Claude desktop app connector | When you use the Claude desktop app | Just the app |
B. MCP bundle file (.mcpb) | When you use an app that supports .mcpb | The bundle file from the official releases page |
| C. Installing from source | Apps that register servers with a command, such as Claude Code, or when you want to manage it yourself | Git, uv |
Method A: the Claude desktop app
These are the steps from the official Claude tutorial.
Follow along:
- Open the Claude desktop app.
- Go to Customize ‣ Connectors.
- Type
Blenderin the search box. - Click Add on the Blender connector that appears.
- Start Blender and check Server is running from section 4-3.
You can start a chat in the app right away. The connector reconnects each time you start Blender, so each time you work, you only need to check that the server in Blender is on.
Method B: the MCP bundle file (.mcpb)
An .mcpb file is a bundle that holds a server and how to run it in one file. Like an app installer, it registers the server in one go. Download the latest bundle (blender-1.0.3.mcpb at the time of this guide) from the releases page of the Blender Lab repository (https://projects.blender.org/lab/blender_mcp/releases) and open it as your app's guide says. The official page notes that some apps do not support .mcpb yet (for example, Llama.cpp).
Method C: installing from source
These are the Windows steps from the official wiki (Setup). If you have never typed commands before, see GUI vs. CLI: what is the difference? first.
Follow along:
- Install Git and uv. uv is a tool that runs a Python program together with the parts it needs. The official install command is the one line below in PowerShell.
powershell -ExecutionPolicy ByPass -c "irm https://astral.sh/uv/install.ps1 | iex"
- Open a new PowerShell window and download the source.
cd c:\
git clone https://projects.blender.org/lab/blender_mcp.git
- The downloaded folder has 4,783 files and is about 23 MB (measured on my PC). About 16 MB of that is the bundled manual and API documentation. Because there are many small files, the "Size on disk" in File Explorer can look much larger than this, depending on the drive.
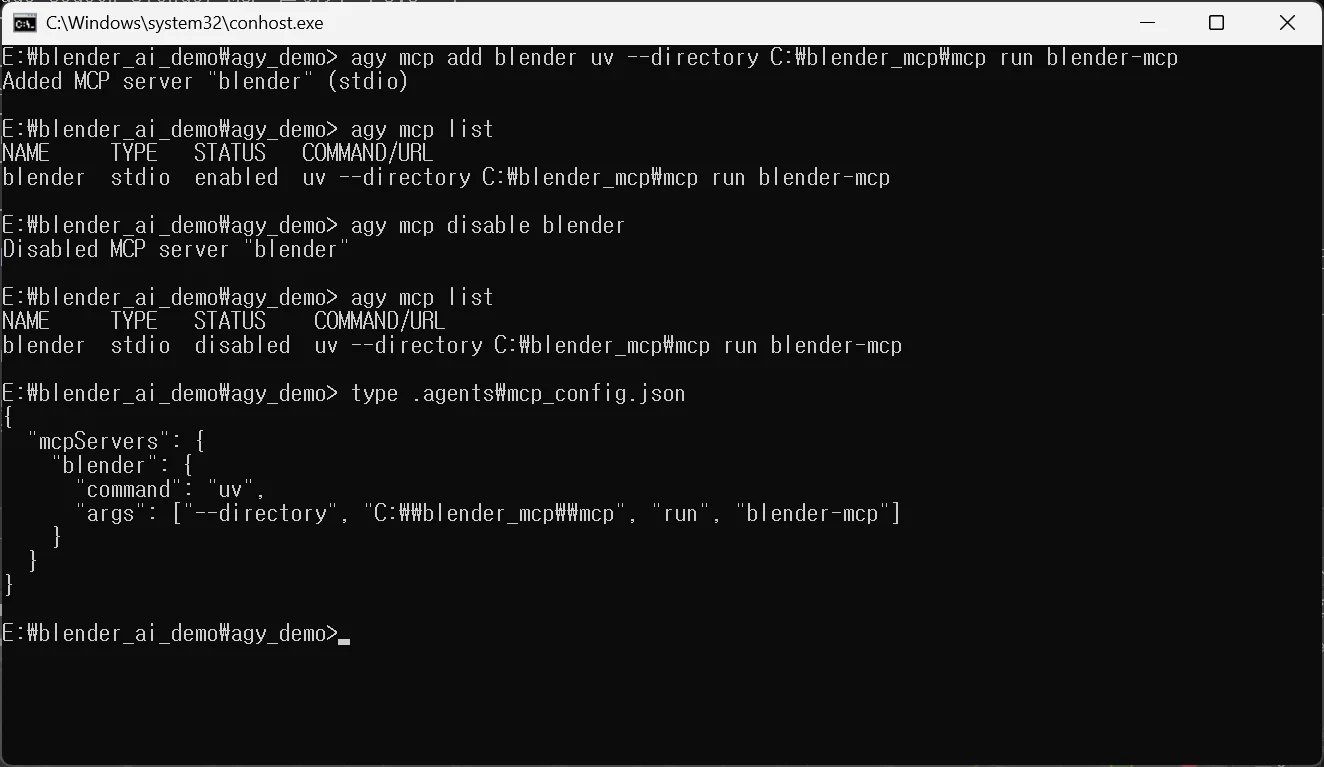
- In your AI app's MCP settings, write how to run it as shown below. This is the settings snippet from the wiki.
{
  "command": "uv",
  "args": ["--directory", "C:\\blender_mcp\\mcp", "run", "blender-mcp"]
}
In the settings file, you must write backslashes (\) twice. Where the settings file goes differs by app. The general method is in Connecting MCP servers, and Claude Code is covered in Connecting the official Blender MCP to Claude Code.
The first run takes a while: the first time uv runs, it downloads and installs the parts it needs (about 55 MB). On my PC, uv sync took 57 seconds and reinstalling (uv sync --reinstall) took 80 seconds. If the AI app gives up waiting in the meantime, the installation can be left half done. Before attaching it to the app, run the following once in PowerShell to finish the installation.
cd C:\blender_mcp\mcp
uv sync
6. Your first question: trying the official example file
The official guide has three examples that anyone can reproduce with the same results. Let's try the easiest one. Because the result is fixed, it is a good way to check that the connection works.
Starting state: continue from Blender, where you checked Server is running in section 4-3, and the AI app you connected in section 5.
Follow along:
- On the demo files page of blender.org, download Scattering Pebbles (file name
pebble_scattering.blend). The demo page says the file was made by Blender Studio and released under CC0 (free for anyone to use). - In Blender, open the file with File ‣ Open.
- Send the question below to the AI app as is. It is the official example sentence.
Which objects are using the following material: pebbles
You can also ask in your own words, such as "Find all the objects that use the pebbles material."
The answer the official guide gives is 7 objects: GEO-pebble through GEO-pebble.006. When the AI gets this question, it usually reads the material information inside Blender with the server's code execution tool. Below is the result that came back when I called the official server's code execution tool directly and asked the same thing. In the AI app's chat, you see this result summarized in sentences, so it may look different on your screen.
{
  "material": "pebbles",
  "count": 7,
  "objects": ["GEO-pebble", "GEO-pebble.001", "GEO-pebble.002", "GEO-pebble.003",
              "GEO-pebble.004", "GEO-pebble.005", "GEO-pebble.006"]
}
These objects are inside a collection (GRP-pebbles) that is turned off in the view, so you do not see them right away in the 3D Viewport or in the Outliner's default view. To check them yourself, change the Outliner's view.
Follow along:
- Open the display mode list (Display Mode) on the left of the Outliner header and choose Scenes.
- Type
GEO-pebblein the Outliner search box.
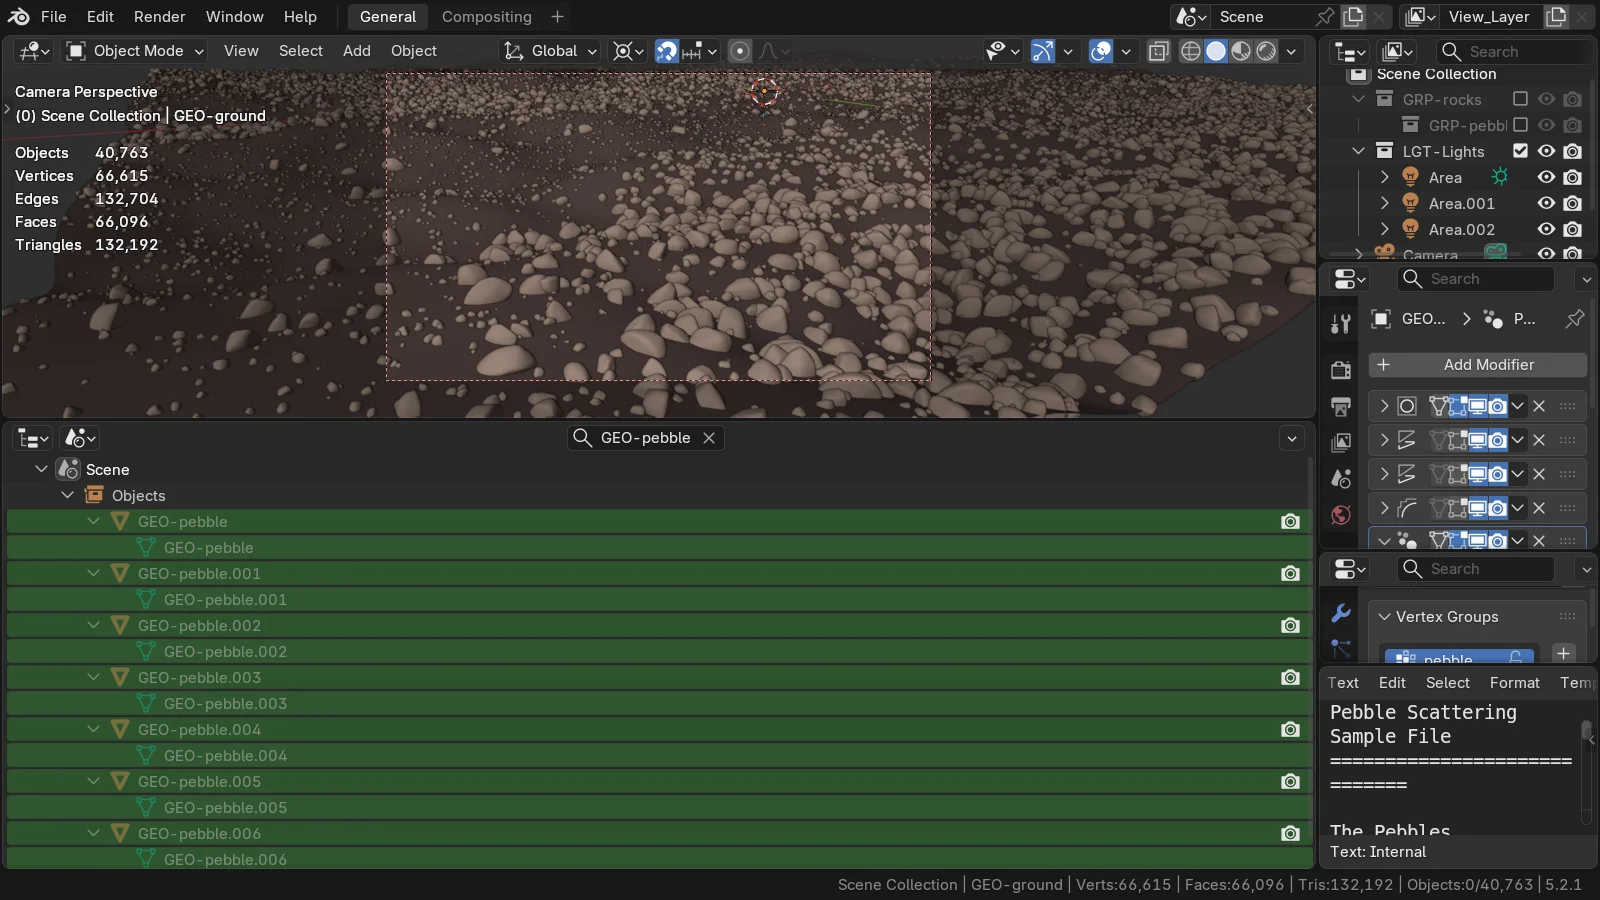 Figure 3. The seven objects the AI found, checked in the Outliner. Display mode Scenes,
GEO-pebble in the search box, and the seven objects highlighted in green. In this image the Node Editor area at the bottom was switched to an Outliner to show it larger (Blender screenshot)
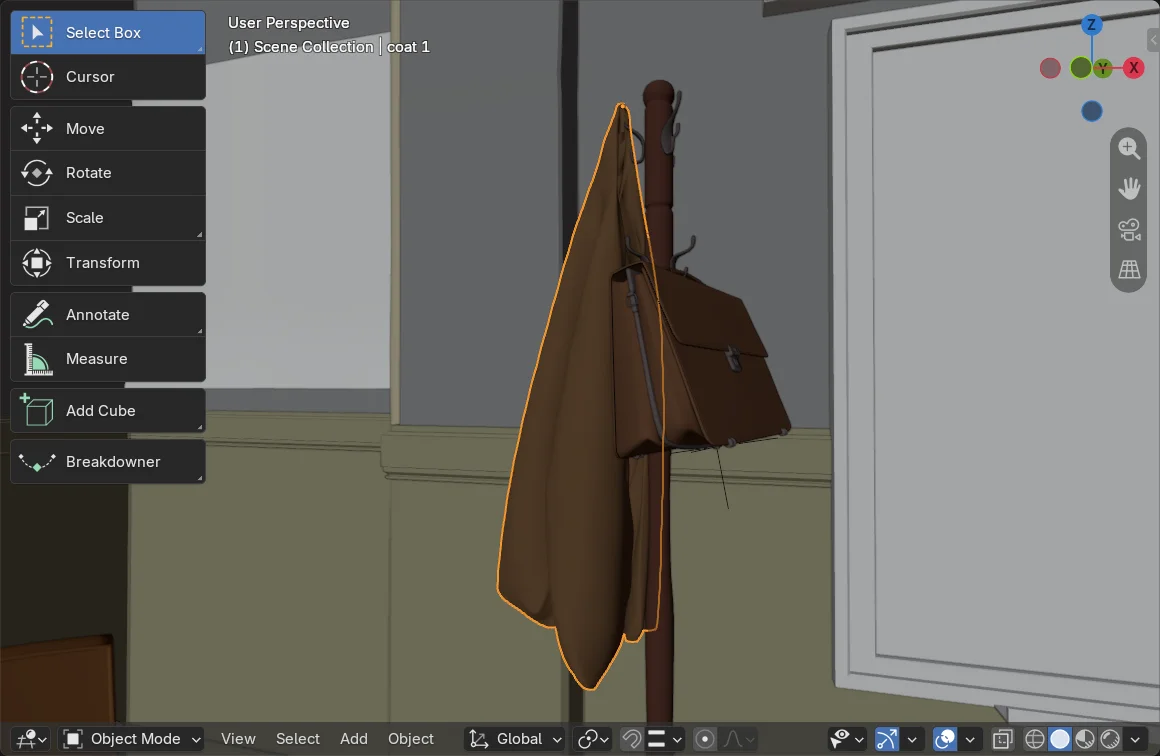
The AI can also see the Blender screen as an image. Below is the image that the official server's window capture tool returned. If an image like this appears in the AI app's chat, it means the AI is actually looking at your Blender screen.
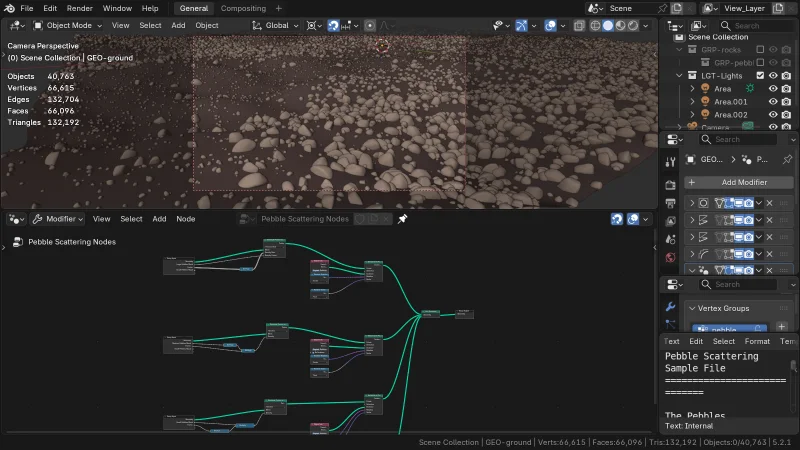 Figure 4. The image exactly as the window capture tool returned it (800×450). The tool shrinks the image to fit the message size (Blender screenshot, official MCP tool result)
The other examples in the official guide are also worth trying.
| Example | Question to send (official sentence) | Expected result in the guide |
|---|---|---|
| Fixing name typos | With the current open Blender file fix the name of all the data-blocks to remove typos. Report back which data-blocks got fixed. | Fixes names such as LGT-Lights → LGT-lights and reports the list |
| Finding heavy objects | Analyze the scene and list the outliers: objects with highest polygon count but smaller size from the camera point of view. | coat 1 and alphabet in the Classroom demo |
The first example actually changes names in the file. When you try it, open a copy of the demo file. The second example is actually run in Trying the 26 tools.
7. Habits for safe use
| Habit | Why |
|---|---|
| Open a copy of your work file before asking | The official page warns that the code the AI runs has no safeguards |
| Save before you give it work | If you do not like the result, go back to the saved file |
| Start with read-only questions | "Summarize this" and "find this" do not change the file |
| Read the code permission prompt before clicking | When the app asks to run a tool, see what the code changes before allowing it |
| Do not use it in folders with sensitive files | The code can reach any file Blender can open |
The general order for working with AI is in AI and Blender: start small and work together.
Practice
- In the Add-ons screen from section 4-3, find and write down your Blender's Port value and server status line.
- In the Pebble file, ask the AI "how many materials are in this file," and check whether the answer is right in the Material tab of the Properties editor or in the Outliner.
- Ask the AI "capture the current Blender screen and describe what you see," and see whether the description matches your screen.
Common mistakes and fixes
| Symptom | Where to check | Fix |
|---|---|---|
| MCP is not in Add-ons | Blender version (Help ‣ About) | Upgrade to 5.1 or later and install again |
| Server is stopped appears | The expanded MCP screen in section 4-3 | Click Start MCP Bridge Server. If this happens every time, turn on Auto Start |
| The error "Online access must be enabled…" appears | Preferences ‣ System ‣ Network | Turn on Allow Online Access and click Start MCP Bridge Server |
| The AI says it "cannot connect to Blender" | Whether Blender is running, the server status line | Start Blender, start the server, and reconnect in the app |
| The AI talks about the wrong file | How many Blender windows are open | Run only one Blender. If two Blenders share the same port, the connection goes to only one of them |
| The server disconnects right after installing from source | The result of uv sync in PowerShell | The installation may be half done. Run uv sync --reinstall and reconnect |
| Blender does not appear in claude.ai in the browser | The app you use | Use the Claude desktop app or Claude Code |
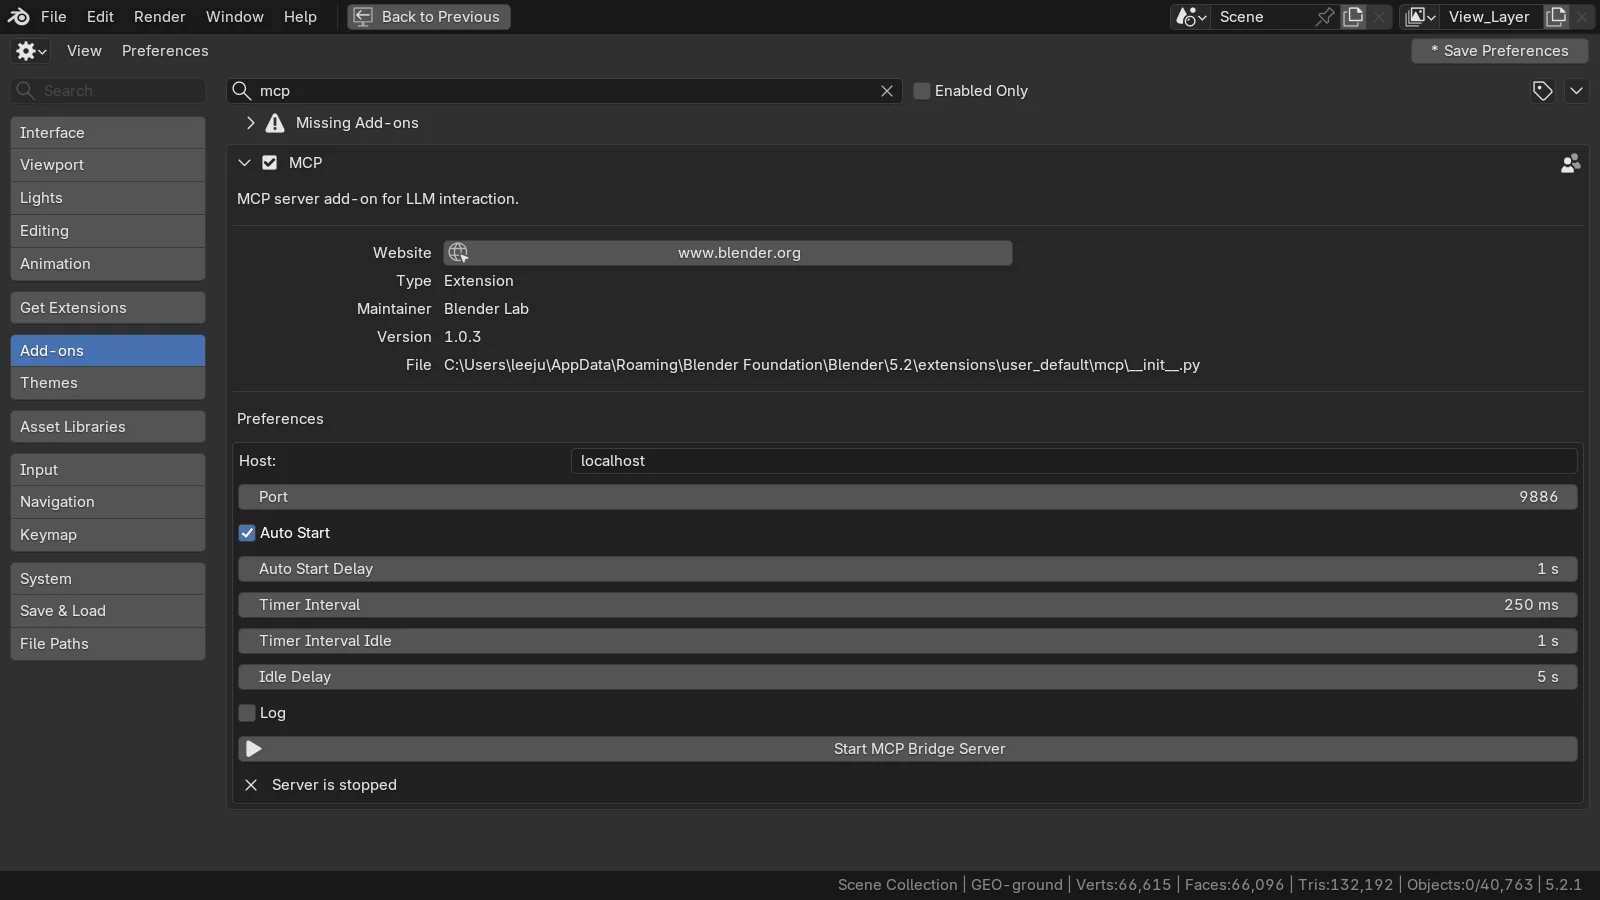 Figure 5. What it looks like when the server is off. The Start MCP Bridge Server button and Server is stopped below it. In this image the port was changed to 9886. The default is 9876 (Blender screenshot)
If you need to run several Blenders on the same PC, give each Blender a different port and tell the server the same number. How to do this is in the port section of the official vs. community comparison.
In one line
Blender 5.1 or later + the MCP add-on (check Server is running) + the server connected in your AI app, and your first question with the official example file. In the next guide, Connecting the official Blender MCP to Claude Code, you register the same server in Claude Code in the terminal.
Read next
- What is MCP? A USB-C-like standard for plugging tools into AI
- Connecting MCP servers: how to plug tools into an AI app
- Connecting Blender and AI: 3D work through MCP and scripts
- Connecting the official Blender MCP to Claude Code
- Trying the 26 tools of the official Blender MCP
- The official Blender MCP vs. the community MCP for Blender
References
- Blender Lab, MCP Server: https://www.blender.org/lab/mcp-server/
- Blender Lab, blender_mcp repository and releases: https://projects.blender.org/lab/blender_mcp , https://projects.blender.org/lab/blender_mcp/releases
- Blender Lab, Setup wiki: https://projects.blender.org/lab/blender_mcp/wiki/Setup
- Anthropic, Claude for Creative Work (April 28, 2026): https://www.anthropic.com/news/claude-for-creative-work
- Claude Academy, Using the Blender connector in Claude: https://academy.claude.com/tutorials/using-the-blender-connector-in-claude
- Blender 5.2 Manual, Extensions and System preferences: https://docs.blender.org/manual/en/5.2/editors/preferences/extensions.html
- Blender demo files (Scattering Pebbles, Classroom, CC0): https://www.blender.org/download/demo-files/
- uv installation guide: https://docs.astral.sh/uv/getting-started/installation/
- Shortcut: sidebar
N - Images: all real Blender 5.2.1 screens and official MCP tool results. The scene is the Blender demo file Scattering Pebbles (CC0)