Using Blender agent skills: adding SKILL.md, checking it first, and a geometry nodes exercise
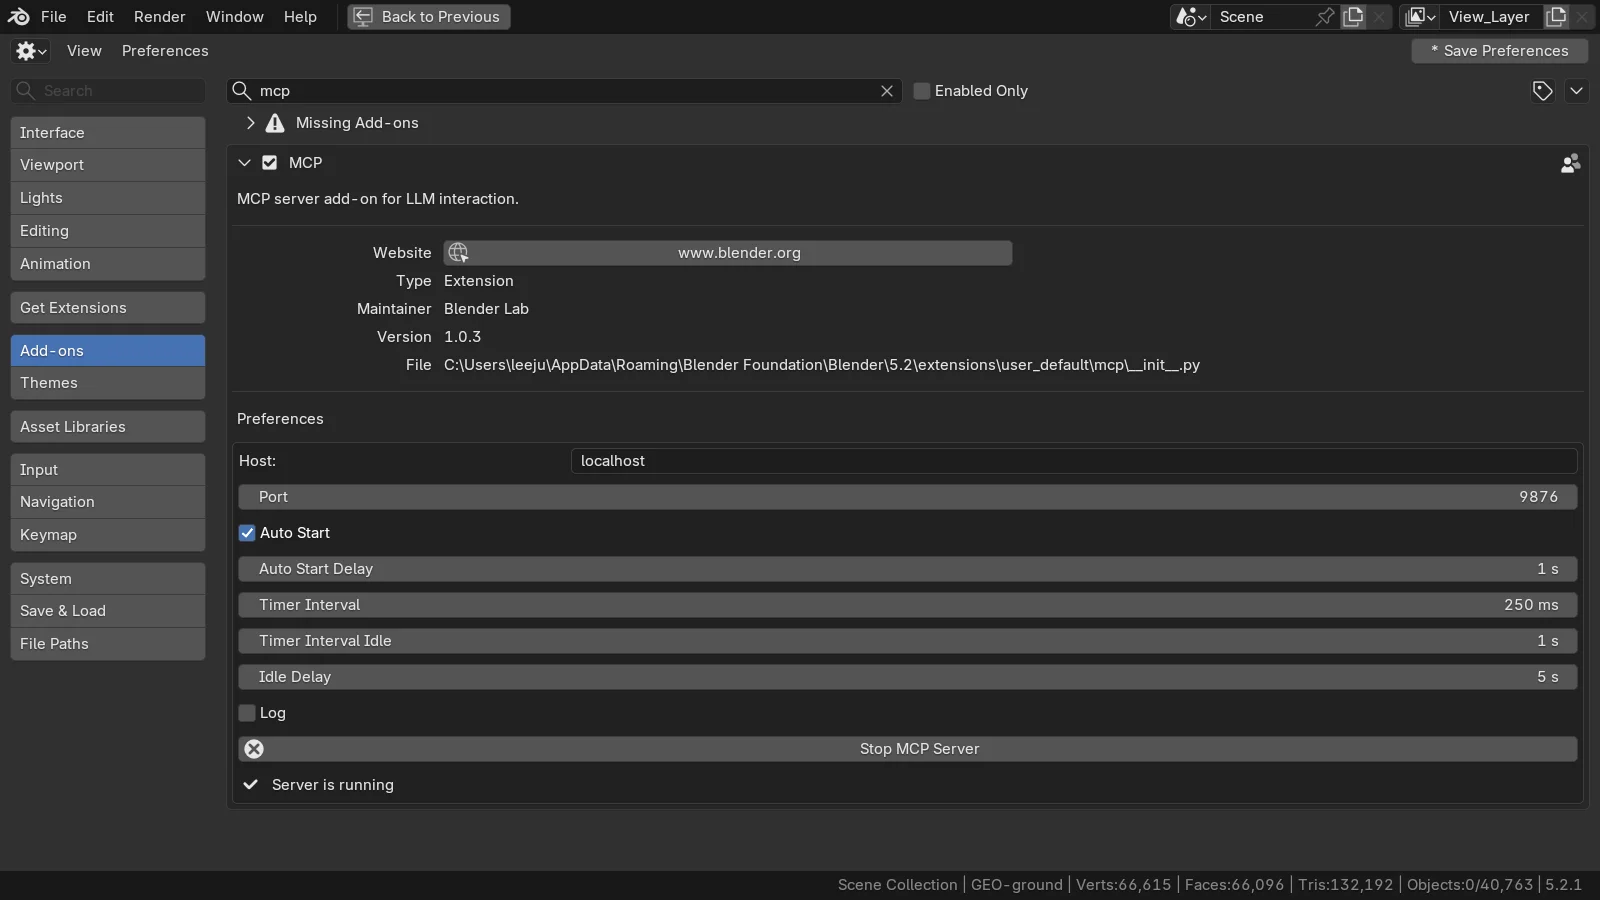
Blender Agent Skills is a set of instructions that AI coding assistants pull out and read when they need them. Follow along as you check it before installing, put it in a project folder, then run its asset check and geometry nodes scripts in real Blender.
한국어English
ON THIS PAGE
- 011. What a skill is
- 022. A tour of Blender Agent Skills
- 033. Check before installing
- 044. Put only the skills you need in a project folder
- 055. Exercise 1: catch a part floating in the air
- 066. Exercise 2: change the wingspan with a single number
- 077. Add your own rules at the top of a skill
- 08Rules for this project (read before this skill)
- 09Practice
- 10Common mistakes and fixes
- 11In one line
- 12Read next
- 13References
Based on: Blender Agent Skills 1.1.0 (the October 16, 2026 release, MIT license), Blender 5.2 LTS (tested on 5.2.1), and the official Claude Code skills documentation. Checked in October 2026. The pictures are a real terminal screen and Blender renders (EEVEE). The airplane is a block model made from boxes and cylinders for this guide.
If MCP gives the AI the "hands" to move Blender, skills give it the "know-how" to handle Blender well. The AI mixes up function names that changed between Blender versions, and sometimes says "done" without checking the finished model. Skills are bundles of instructions and check scripts written ahead of time to cut down on these mistakes.
This guide uses the Blender Agent Skills set, released in October 2026, as its example. It shows what to check before installing, how to put skills only in a project folder, and the results of running two of its scripts in real Blender. Along with what the scripts did well, the results include two real problems that came up.
If you have not connected MCP yet, see Installing the official Blender MCP first. If AI coding assistants are new to you, start with Getting started with Claude Code.
By the end of this guide you will be able to:
- Explain the difference between skills and MCP.
- Check the scripts in a skill someone else made before installing it.
- Put only the skills you need in a project folder's
.claude/skills. - Find a part floating in the air with the asset check script.
- Change the wingspan with a single number using the geometry nodes script, and check the result with your own eyes.
- Add your own project rules at the top of a skill.
1. What a skill is
A skill is one folder. Inside it is an instruction file called SKILL.md and, when needed, script files. When an AI assistant starts, it reads only the name and one-line description of each skill. Later, when a task matches that description, it opens and reads the full text.
Picture a shelf of cookbooks in a kitchen. The cook only skims the titles on the spines, and pulls out the fish book when cooking fish. Because the cook does not memorize every book, their head (context) stays light. The official Claude Code documentation also explains that skill descriptions are always in context, and the full content is read when the skill is used. The word context is explained in Tokens and context windows.
| Comparison | MCP | Skills |
|---|---|---|
| Picture it as | Hands (tools) | Cookbook (know-how) |
| What it does | Sends code to an open Blender and gets results back | Says what to do, in what order, and what to check |
| What it looks like | A server program that runs separately | A folder with SKILL.md + scripts |
| Without it | The AI cannot touch Blender | It has hands, but often misses version differences and checks |
The two are used together. The Blender Agent Skills instructions also say that with a Blender MCP server they run in the open Blender, and without one they run in Blender with no window.
The skill format (the SKILL.md layout) is an open standard, so many tools read it. Blender Agent Skills lists Claude Code, Codex, OpenCode, Gemini CLI, GitHub Copilot, and Cursor as targets.
2. A tour of Blender Agent Skills
| Item | Details |
|---|---|
| Repository | github.com/EL4CTEO/blender-skills |
| Release | 1.1.0 (October 16, 2026) |
| License | MIT (an open license that lets you use and change it) |
| Target Blender | 5.2 LTS or later |
| Number of skills | 22 |
The 22 skills split up modeling, UV, PBR materials, baking, rigging, animation, optimization, export, rendering, time of day (sunset, night), weather, simulation, and asset checks (QA). The starting point is blender-core, which points to the other skill that fits the task.
This guide uses four skills.
| Skill | What it does |
|---|---|
blender-core | How to run code, rules for functions that changed in 5.x, and directions to other skills |
blender-asset-qa | Checks for problems such as overlapping faces, parts floating in the air, flipped normals, and unapplied scale |
blender-geometry-nodes | Builds a geometry node group from a short JSON (a settings text) |
blender-hardsurface-modeling | Modeling hard objects with bevels, booleans, and so on |
3. Check before installing
The AI runs the scripts inside a skill on your computer. It is the same as installing a program someone else made, so skim it once before adding it. This applies even to public repositories.
Follow along: Download the repository (the green Code button ‣ Download ZIP, or git clone), unzip it, and search each skill's scripts folder for the words below. Your text editor's "find in folder" makes this quick.
| Word to search | What it is | If you find it |
|---|---|---|
requests, urllib, http | Going online | Read what it downloads or sends |
os.remove, shutil.rmtree | Deleting files and folders | Check whether it deletes only temporary files |
subprocess | Running other programs | Check what it runs and with what options |
--factory-startup | Starts Blender with factory settings | It runs without your add-ons and preferences |
In the scripts of this set (1.1.0), no online access or file deletion turned up (the test folders were left out of the search). There was one place that runs another program. blender-core/scripts/run_in_blender.py starts Blender with no window, and if you do not give it --user-prefs, it adds --factory-startup. This does not break your settings, but it means it runs without the add-ons you installed and the preferences you changed. If a task needs add-ons you normally use, keep this in mind.
4. Put only the skills you need in a project folder
There are two ways to install.
Way 1: a Claude Code plugin (from the repository's instructions). Enter two lines inside Claude Code.
/plugin marketplace add EL4CTEO/blender-skills
/plugin install blender-agent-skills@blender-agent-skills
All 22 go in at once.
Way 2: copy only what you need (the way in this guide). The repository's install scripts (install.ps1, install.sh) put the skills in the whole-user folders (~/.claude/skills, ~/.agents/skills) by default. Then the descriptions of all 22 always come along, even for work that has nothing to do with Blender. At first, it is lighter to put only what you need in your Blender work folder. The install scripts also have a --project <folder> option.
Follow along:
- Pick a project folder for Blender work. This guide uses
E:\blender_ai_demo\skills_demo. - Inside it, create a
.claude\skillsfolder. - From the
skillsfolder of the downloaded repository, copy the four foldersblender-core,blender-asset-qa,blender-geometry-nodes, andblender-hardsurface-modelingin whole. - Check in Command Prompt that they are there.
dir /b .claude\skills
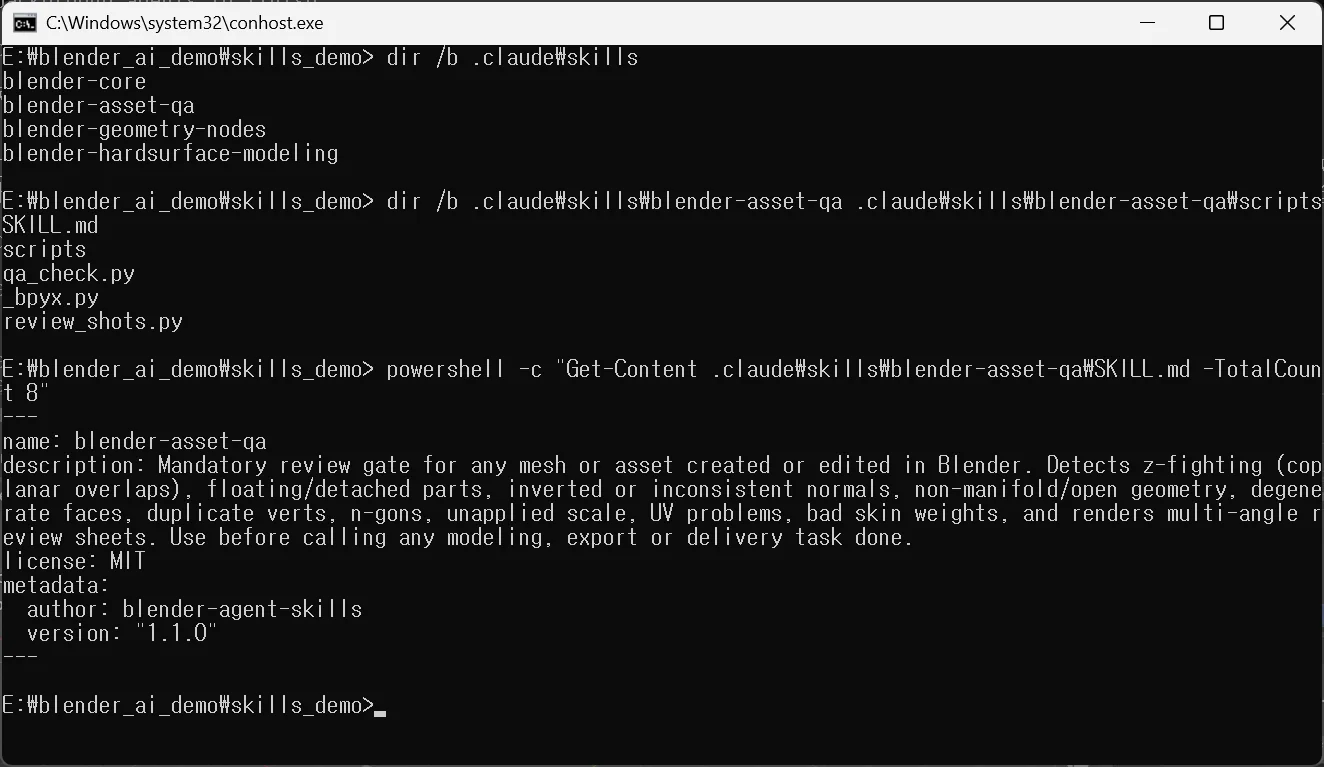 Figure 1. The four skills placed in the project folder. The list of skill folders at the top, the contents of one skill (SKILL.md and scripts) in the middle, and the name and description in the SKILL.md header at the bottom (terminal screenshot)
The header at the bottom of Figure 1 is the part the AI reads when it starts. name is the skill name, and description says "when to use this skill." This skill's description begins with "Mandatory review gate," meaning a check that every mesh or asset made or changed in Blender must go through. It is written so that the AI sees this description near the end of modeling work and pulls out the check skill.
Claude Code reads .claude/skills/<skill name>/SKILL.md in the project folder. The repository's instructions say that other tools (Codex, Gemini CLI, and others) read .agents/skills. The skills folder for Antigravity CLI is covered in Connecting Blender MCP to agy.
5. Exercise 1: catch a part floating in the air
A common mistake in models made by an AI is a part that comes off the body and floats in the air. In a small scene it is easy to spot, but with hundreds of parts it is easy to miss.
Starting state: Start from the block airplane below. The three parts, a cylinder fuselage, wide main wings, and a tail, are attached, and one small red box (named Stray) was floated in the air 4 m above the fuselage on purpose.
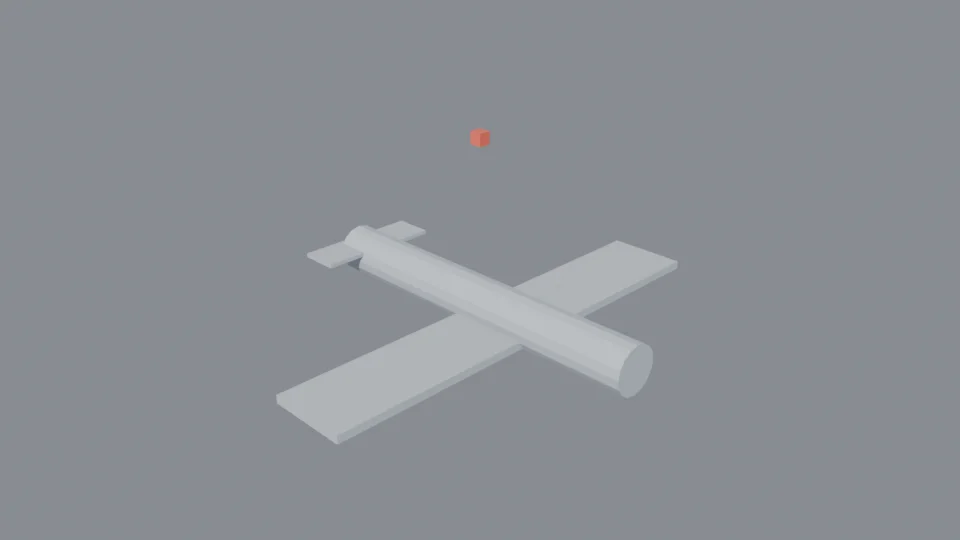 Figure 2. The scene before the check. The fuselage, main wings, and tail below, and the red box Stray floating in the air above (Blender render, EEVEE)
Follow along: Tell the AI something like this (translated from Korean).
Use the blender-asset-qa skill to check the four objects Fuselage, Wing, Tail, and Stray as one asset. Use the render profile.
Step 1 of the check order in the skill's instructions is running qa_check.py. If you want to run it yourself, call it in Blender with no window like this. plane.blend is the name of the file to check.
blender -b plane.blend -P .claude\skills\blender-asset-qa\scripts\qa_check.py -- --objects Fuselage Wing Tail Stray --profile render
-b means no window, -P runs a Python script, and everything after -- is passed to the script. The result comes out as one block of JSON. Here are just the important parts.
{
  "pass": false,
  "errors": ["floating/detached part in Stray (8 verts at [0.0, 0.0, 4.0])"],
  "warnings": [
    "Wing: unapplied scale [2.0, 11.2, 0.2]",
    "Tail: unapplied scale [1.0, 3.2, 0.1]",
    "asset lowest point z=-0.6 (not resting on ground plane z=0)"
  ]
}
| Line | Meaning |
|---|---|
"pass": false | The check failed |
floating/detached part in Stray | Stray floats without touching the other parts (error) |
unapplied scale | The Scale values of the main wings and tail are not 1. This can cause problems on export (warning) |
lowest point z=-0.6 | The lowest point of the model is 0.6 m below the ground (z=0) (warning) |
Follow along: Fix it by following the fix table in the skill's instructions.
- Delete Stray. If a part was not floated on purpose, attach it or delete it.
- Select the main wings and the tail, and apply the scale with
Ctrl+A‣ Scale. - Run the same check again.
{
  "pass": true,
  "errors": [],
  "warnings": ["asset lowest point z=-0.6 (not resting on ground plane z=0)"]
}
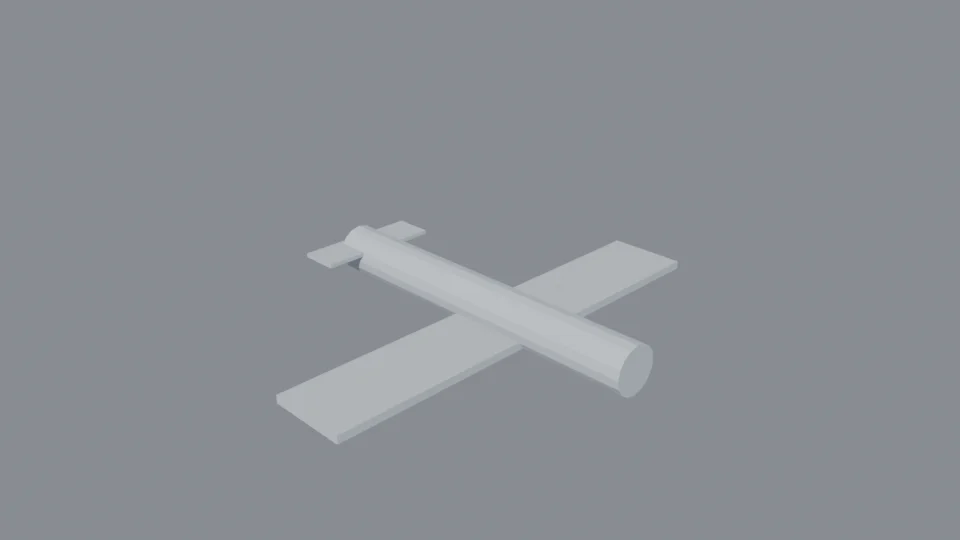 Figure 3. After the fix. The floating box is gone and the check gives pass true (Blender render, EEVEE)
The one warning left is about ground height. For an airplane in the air, it is a warning you can accept. The skill's instructions also say to either fix a warning or tell the user why it is accepted. Always fix errors, and for warnings, choose between fixing them and writing down the reason.
6. Exercise 2: change the wingspan with a single number
gn_builder.py in the blender-geometry-nodes skill builds a geometry node group from short JSON settings. Geometry nodes is a Blender feature that makes shapes from rules. If the recipe says "wingspan = a number," you get wings of a different size just by changing the number. The basics are in Getting started with Blender geometry nodes.
Starting state: Continue from the airplane fixed in section 5. Place a new 1 m box (GNWing) where the main wings go.
The settings in this exercise mean "stretch the box to Chord front-to-back, Span side-to-side, and a thickness of 0.2." The defaults are Span 11.2 and Chord 2.0.
{
  "name": "ParamWing", "tree": "geometry",
  "inputs": [["Geometry", "GEOMETRY"], ["Span", "FLOAT", 11.2], ["Chord", "FLOAT", 2.0]],
  "outputs": [["Geometry", "GEOMETRY"]],
  "nodes": {"cmb": ["ShaderNodeCombineXYZ", {}, {"Z": 0.2}], "xf": ["GeometryNodeTransform"]},
  "links": [["in.Chord", "cmb.X"], ["in.Span", "cmb.Y"], ["in.Geometry", "xf.Geometry"],
            ["cmb.Vector", "xf.Scale"], ["xf.Geometry", "out.Geometry"]]
}
Follow along: Tell the AI this (translated from Korean).
Use gn_builder from the blender-geometry-nodes skill to apply the settings above to GNWing. Set Span to 6.0.
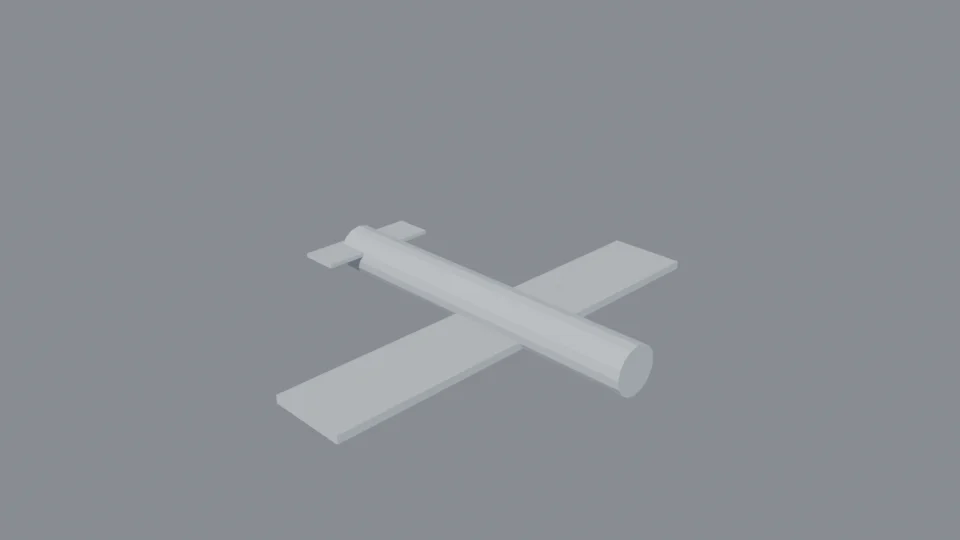 Figure 4. The wings made with the default Span 11.2. Dimensions 2.0 × 11.2 × 0.2 m (Blender render, EEVEE)
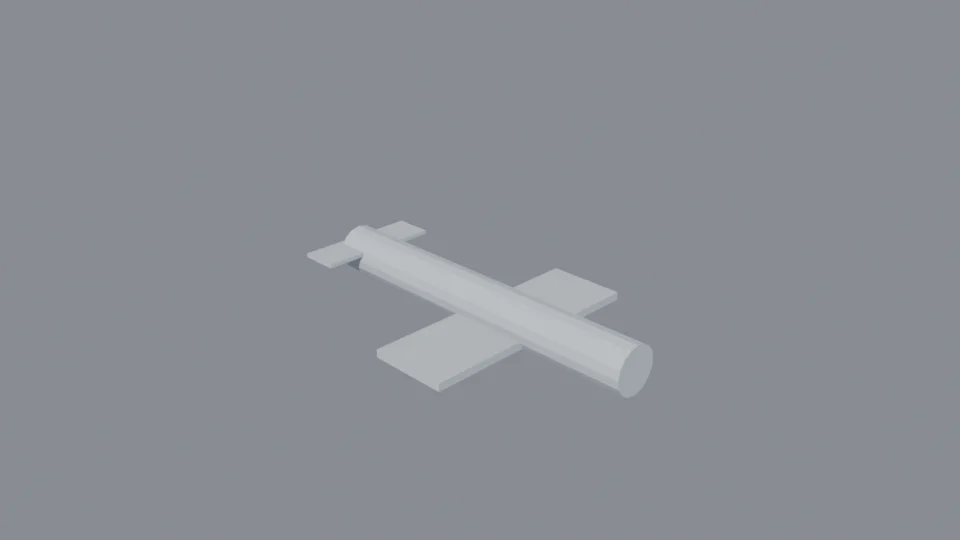 Figure 5. The wings made with Span 6.0. Dimensions 2.0 × 6.0 × 0.2 m (Blender render, EEVEE)
One number changed the wingspan from 11.2 m to 6.0 m. This is very useful when you make several aircraft from the same settings.
Two problems found during testing: Skills are made by people, so they have mistakes. These were actually seen in release 1.1.0, and the second one was checked again by running the same test twice. They were not reported to the repository, so they may be fixed in a newer release.
| Problem | What happens | How to avoid it |
|---|---|---|
The usage example in the script's header comment is apply="Plane" | Calling it this way returns "ok": true with no error, but nothing is attached to the object. The real argument name is apply_to | Use apply_to= when calling from Python. The command line (--apply) works fine |
Calling gn_builder twice on the same object | On the second call, only Span was changed, but Chord became 0 and the wing turned into a thin line like a sheet of paper | To change values, call it only once on a new object, or change the number in the field on the modifier panel |
In both cases the result JSON alone says "success." The first returned ok, and the second had no errors either. They are only caught by looking at the shape yourself in a render or on screen, as in Figures 4 and 5. That is why the asset check skill's instructions stress always looking with your own eyes after checking with numbers.
7. Add your own rules at the top of a skill
A skill is just a text file, so you can rewrite it. It is under the MIT license, so changing it is allowed too. If you found a trap like the ones in section 6, or have rules just for your project, write them right below the header (between the two --- lines) of blender-core/SKILL.md. That is the skill the AI opens first when it starts Blender work.
Follow along:
- Open
.claude\skills\blender-core\SKILL.mdin a text editor. - Right below the second
---line, leave one blank line and write something like the following (translated from Korean). Change the content to fit your project.
## Rules for this project (read before this skill)
- Render with EEVEE. The first render is 960x540.
- Write render output paths as absolute paths.
- When calling gn_builder from Python, the apply argument is apply_to= (apply= is ignored).
- Do not call gn_builder twice on the same object. Change values in the modifier panel.
- After making or changing a model, check it with blender-asset-qa, confirm the shape with one render, and only then say it is done.
- Save. It takes effect from the next chat.
Do not change the top of the header (name, description). The AI uses them to pick skills, so a bad edit means the skill cannot be found. Your additions may be erased when you update the repository to a new release, so keep a separate note of your rules.
Practice
- Search the downloaded repository for
subprocess. Write down which files it appears in. - Put just two skills in your project folder and check with
dir /b .claude\skills. - Make a scene with a small cube floating in the air above the default cube, run the asset check, and see whether the floating error appears.
- Change Chord to 3.0 in the section 6 settings, apply it to a new object, and check that the dimensions become 3.0 × 11.2 × 0.2.
- Add three lines of your own rules to
blender-core/SKILL.mdand save it.
Common mistakes and fixes
| Symptom | Cause | Fix |
|---|---|---|
| The AI does not use the skills | The skill folder is in the wrong place (not .claude\skills\<name>\SKILL.md) | Check that SKILL.md is one folder level in, as in Figure 1 |
| Chats got heavy after adding all 22 | All the skill descriptions are always in context | Keep only the skills you use in the project folder |
| The check passes but the shape looks wrong | Number checks cannot judge proportions or silhouettes | Look at it yourself in a render or on screen |
| gn_builder says ok but the object does not change | It was called with apply= | Call it again with apply_to= |
| After a second gn_builder call, the wing became as thin as a line | Calling it twice on the same object sets the other input values to 0 | Call it only once on a new object, or change the number in the modifier panel |
| Add-on features you normally use do not work in the script | run_in_blender.py starts Blender with factory settings | Add --user-prefs, or run it in the Blender opened through MCP |
In one line
Skills are the cookbook, MCP is the hands. Check before adding, put only what you need in the project folder, and confirm results with both numbers and pictures.
Read next
- Installing the official Blender MCP
- Connecting the official Blender MCP to Claude Code
- Safety checks before handing Blender to AI
- From Gemini CLI to Antigravity CLI: connecting Blender MCP to agy
- Getting started with Blender geometry nodes
- Starting small with AI and Blender
References
- Blender Agent Skills repository (README, CHANGELOG, LICENSE): https://github.com/EL4CTEO/blender-skills
- Claude Code official documentation, Skills: https://code.claude.com/docs/en/skills
- Agent Skills open format: https://agentskills.io/
- Blender 5.2 manual, Geometry Nodes: https://docs.blender.org/manual/en/5.2/modeling/geometry_nodes/index.html
- Shortcut: apply scale with
Ctrl+A‣ Scale - Pictures: one terminal screenshot (Windows Command Prompt) and four Blender 5.2.1 EEVEE renders. The block airplane is an example made for this guide