From Gemini CLI to Antigravity CLI: connecting Blender MCP to agy
Install Google Antigravity CLI (agy), the successor to Gemini CLI, and register the official Blender MCP server step by step. It also covers what changed from the old Gemini CLI settings and how tool permissions work, with real screens.
한국어English
ON THIS PAGE
- 011. What changed
- 022. Install agy and check the version
- 033. Get Blender ready
- 044. Register Blender MCP in agy
- 055. Register it for one folder only
- 066. Check the connection inside agy
- 077. Permissions and safety
- 088. Move old Gemini CLI settings
- 09Practice
- 10Common mistakes and fixes
- 11Summary
- 12Read next
- 13References
Based on: Google Antigravity CLI (agy) 1.4.7 on Windows, the official Antigravity docs (MCP, Getting started, Migrating from Gemini CLI), and the Blender Lab MCP add-on and server 1.0.3. Checked in October 2026. All images are real screens. Sections 6 and 7 show a read-only scene question and a permission rule tried with agy 1.4.7. Running code that changes the scene was not tested.
Since June 18, 2026, Gemini CLI for free-tier and Google One users has been replaced by Antigravity CLI. The official Gemini CLI docs show this notice at the top. So if you follow an older guide such as "Connecting Blender MCP to Gemini CLI", the settings file locations will already be wrong.
Antigravity CLI is Google's AI assistant that you talk to in a terminal (the black text window). The command is agy. Think of it as moving house: most of the furniture (MCP servers, rule documents) still works, but the drawers (settings files) have moved. This guide shows where the new drawers are and how to put Blender MCP in them.
If the terminal is new to you, read GUI vs CLI first. If MCP is new to you, start with What is MCP?.
After this guide you can:
- Explain how Gemini CLI and Antigravity CLI relate.
- Install agy on Windows and check its version.
- Register the official Blender MCP server with
agy mcp add, and turn it on and off. - Write a folder-only settings file,
.agents/mcp_config.json, by hand. - Find what changed in old Gemini CLI settings and move it over.
- Check that agy can read your Blender scene, and set tool permissions.
1. What changed
| Item | Gemini CLI | Antigravity CLI |
|---|---|---|
| Command | gemini | agy |
| MCP settings (global) | mcpServers inside ~/.gemini/settings.json | ~/.gemini/config/mcp_config.json |
| MCP settings (one folder) | .gemini/settings.json in the folder | .agents/mcp_config.json in the folder |
| Remote server address key | url, httpUrl | serverUrl (url also works) |
| Time limit field | timeout (milliseconds) | timeoutSeconds (seconds) |
| Folder skills | .gemini/skills/ | .agents/skills/ |
| Rule documents | GEMINI.md | reads both GEMINI.md and AGENTS.md |
~ is short for your user folder (for example C:\Users\name). The official "Migrating from Gemini CLI" page says rule documents (GEMINI.md) need no changes. What changes is mostly the MCP settings file and the skills folder.
The Gemini CLI notice is written for "Unpaid tier and Google One users". Work accounts and paid API keys are outside the scope of this guide. If you use one, check your administrator's guidance first.
2. Install agy and check the version
These are the install commands from the official Getting started page. Pick one.
| Environment | Command |
|---|---|
| Windows PowerShell | irm https://antigravity.google/cli/install.ps1 | iex |
| Windows Command Prompt | curl -fsSL https://antigravity.google/cli/install.cmd -o install.cmd && install.cmd && del install.cmd |
| macOS, Linux | curl -fsSL https://antigravity.google/cli/install.sh | bash |
It is also in the Windows package manager winget as Google.AntigravityCLI (winget install Google.AntigravityCLI). On Windows the default install location is C:\Users\<name>\AppData\Local\agy\bin.
Follow along:
- After installing, open a new terminal.
- Check the version.
agy --version
- Look at the help for the MCP add command once.
agy mcp add --help
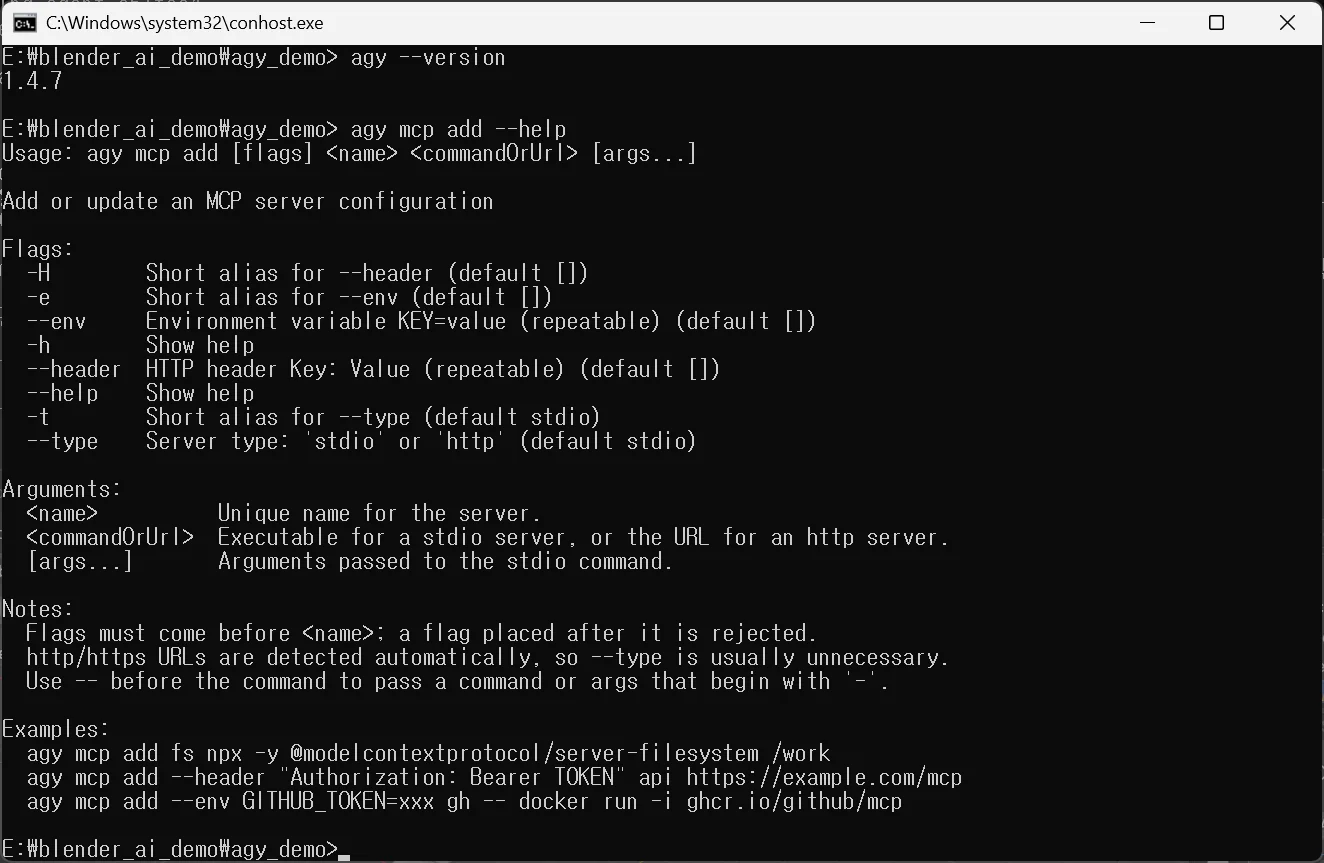 Figure 1. The agy version and the MCP add help. Version 1.4.7 at the top, the Usage line below it (options, name, command or address, arguments, in that order), the server type --type stdio or http under Flags, and the note under Notes that options go before the name (terminal screenshot)
The three lines under Notes matter:
- Options (such as
--env) go before the server name. Options after it are rejected. - An address that starts with
http://orhttps://is treated as a web (http) server automatically. - To pass an argument that starts with
-, put--before it.
First run: The first time agy started in a fresh user folder, a color scheme screen came first, and then this Terms of Service and data use screen.
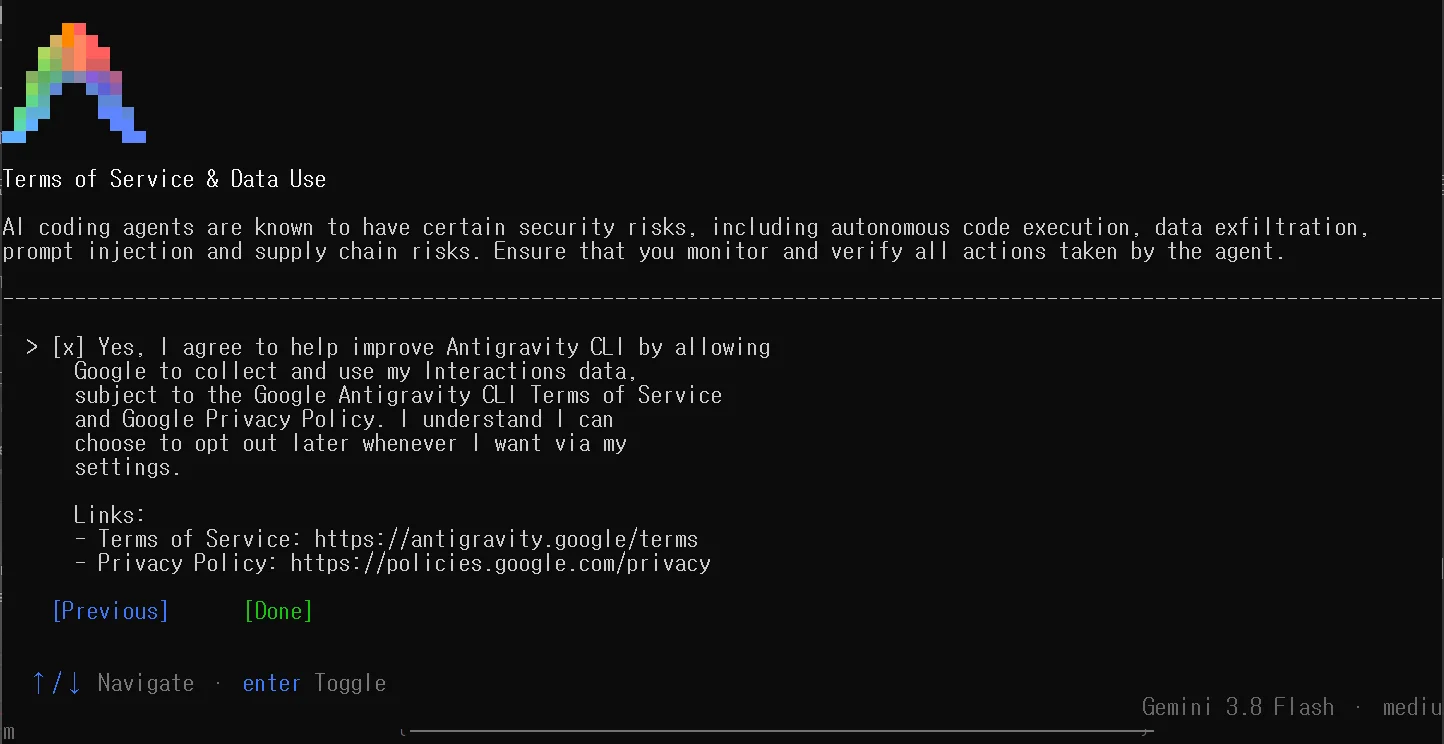 Figure 2. The first-run terms and data use screen. Security warning at the top, the data use box already checked in the middle, Previous and Done at the bottom (terminal screenshot)
The two lines at the top warn that AI coding agents carry risks: running code on their own, leaking data, prompt injection, and supply chain risks (risks in the parts they pull in). You should watch and check what the agent does. The box below is already checked. If you press Done with it checked, you agree that Google can use your interaction data to improve the service. If you do not want that, press Enter on the box to uncheck it, then choose Done. The screen says you can opt out later in the settings.
Signing in: According to the official authentication page, when no saved sign-in exists on your own computer, agy opens your default web browser and you sign in with a personal or work Google account. After that, the sign-in is stored in the operating system keyring, and agy signs in quietly without a browser. Where no browser is available, the page says you can also use a Gemini API key (GEMINI_API_KEY) or Google Cloud credentials.
The official docs say that if old Gemini CLI settings are on the computer, the first run shows a checklist of what to move over. To move only old extensions, use this command:
agy plugin import gemini
3. Get Blender ready
Before you register anything in agy, Blender and the official MCP server need to be ready. The steps are the same as in Installing the official Blender MCP.
- Install and enable the Blender Lab MCP add-on in Blender 5.1 or later.
- Put the official MCP server source in
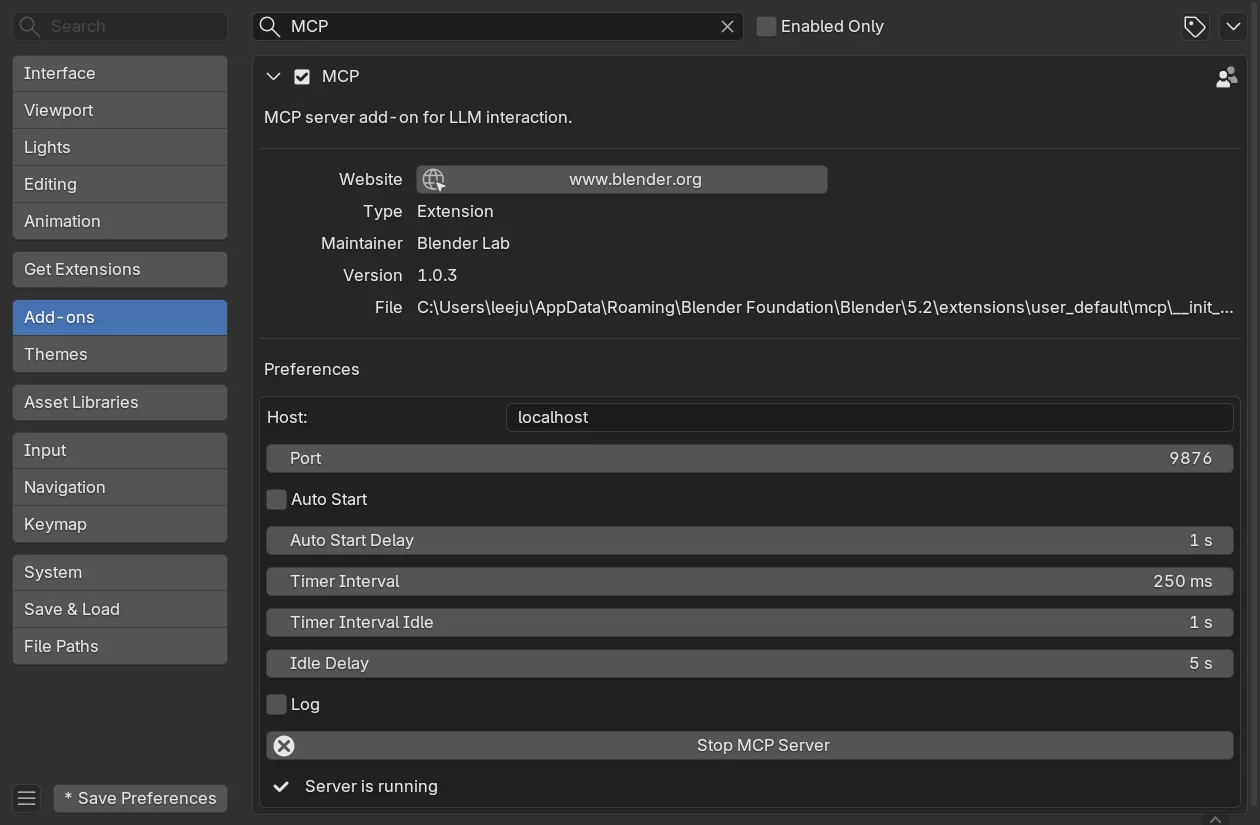
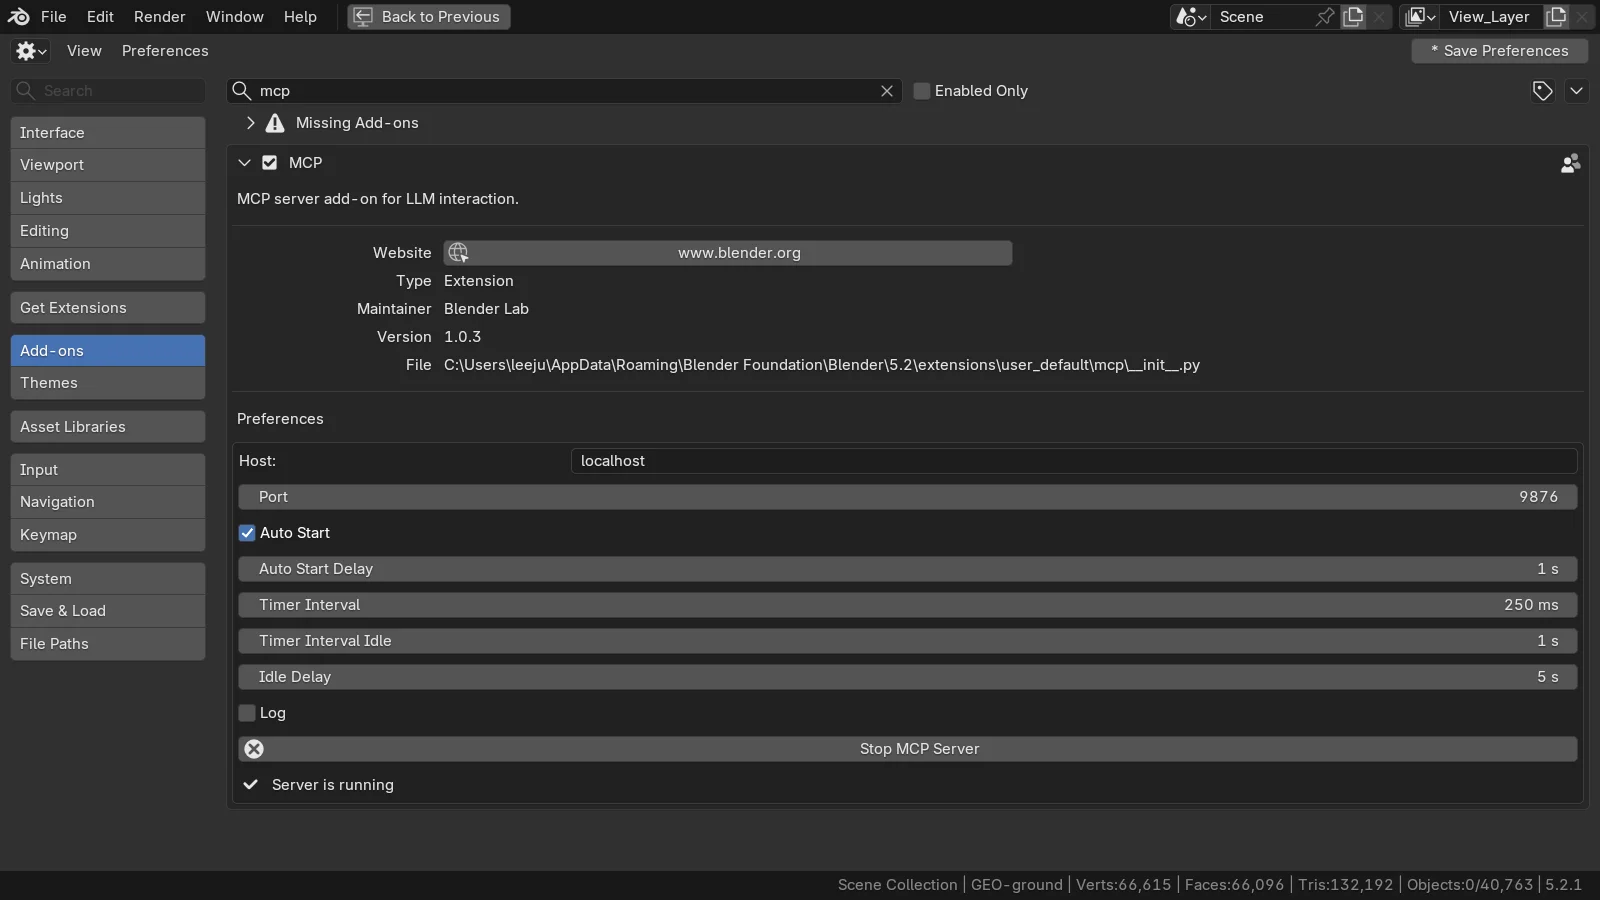
C:\blender_mcp\mcpand install uv. - In Blender, check under Edit > Preferences > Add-ons > MCP that the server is running.
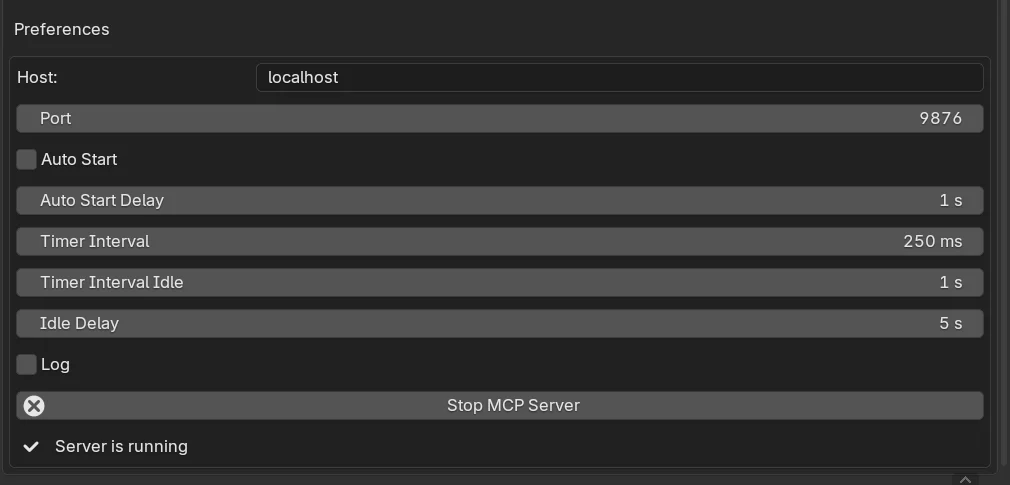 Figure 3. Checking the Blender side. Port 9876 near the top, Server is running at the bottom (Blender screenshot)
4. Register Blender MCP in agy
Starting state: Continue in the terminal from section 2. Move to the folder you will use for Blender work (for example cd E:\blender_ai_demo\agy_demo).
Follow along:
- Register the server with this command. Name it
blender.
agy mcp add blender uv --directory C:\blender_mcp\mcp run blender-mcp
- When you see "Added MCP server "blender" (stdio)", it is registered.
- Check the list.
agy mcp list
- If you will not use it for a while, turn it off instead of deleting it. Use
enableto turn it back on.
agy mcp disable blender
agy mcp enable blender
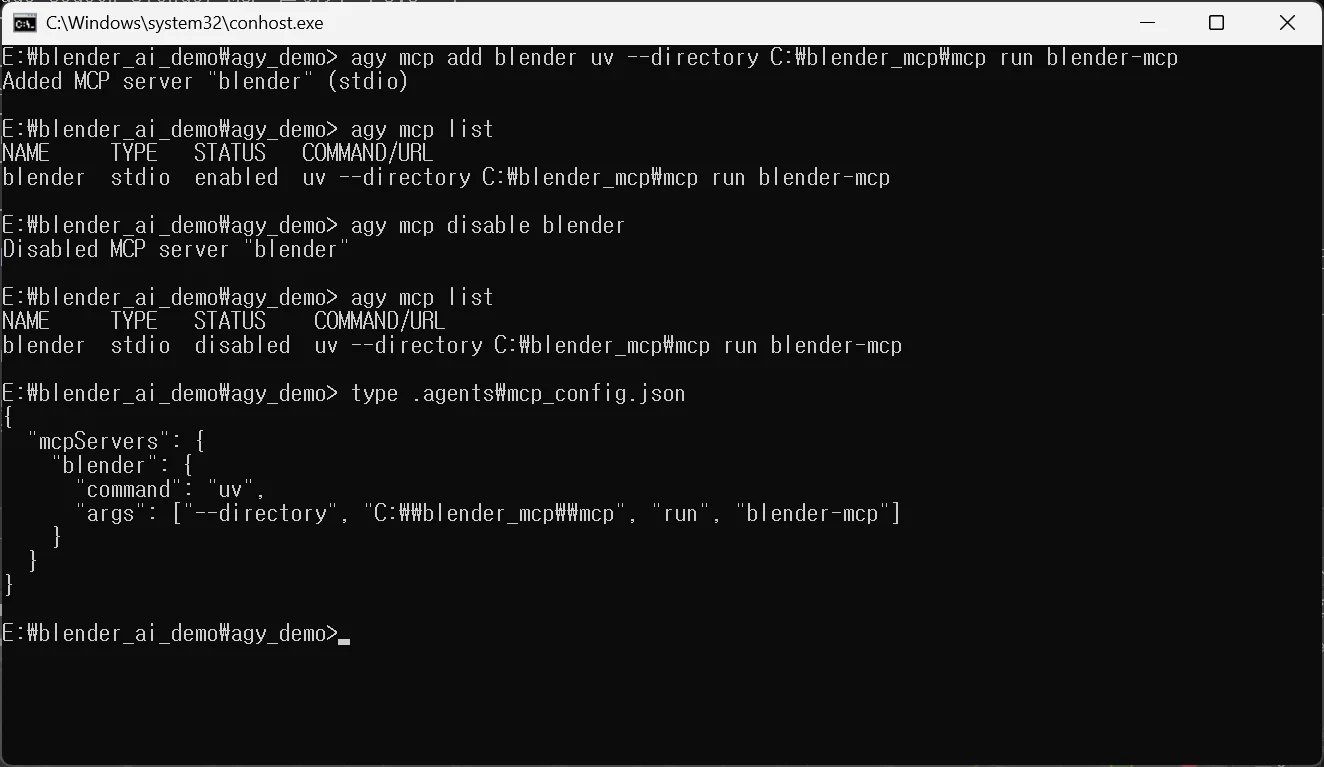 Figure 4. Register, check, turn off. Added MCP server at the top, STATUS enabled in the first list, disabled in the second list after disable, and the folder settings file at the bottom (terminal screenshot)
agy mcp add writes this to the global settings file ~/.gemini/config/mcp_config.json:
{
  "mcpServers": {
    "blender": {
      "args": ["--directory", "C:\\blender_mcp\\mcp", "run", "blender-mcp"],
      "command": "uv",
      "disabled": false
    }
  }
}
disable changes it to "disabled": true and keeps the settings. The official docs also describe disabled as a field that stops the connection without deleting the settings. You flip the light switch off. You do not take the lamp down.
If you changed the Blender port from 9876, tell the server with an environment variable. The official server reads BLENDER_MCP_PORT. Put the option before the name.
agy mcp add --env BLENDER_MCP_PORT=9877 blender uv --directory C:\blender_mcp\mcp run blender-mcp
5. Register it for one folder only
In the global settings, the Blender server is attached wherever you start agy. If you want it only in your Blender work folder, put a settings file in that folder. The official folder settings location is <folder>/.agents/mcp_config.json.
Follow along:
- Create a
.agentsfolder inside your work folder. - Create
mcp_config.jsoninside it with this content and save it.
{
  "mcpServers": {
    "blender": {
      "command": "uv",
      "args": ["--directory", "C:\\blender_mcp\\mcp", "run", "blender-mcp"]
    }
  }
}
Inside a JSON file, write each \ in a path twice, as \\. With a single one, the file cannot be read.
The last part of Figure 4 shows this file on screen. The backslashes appear as pairs of won (₩) signs because the Korean Windows Command Prompt draws \ as ₩. One more thing: agy mcp list shows only the global settings. With only the folder file in place, agy mcp list printed "No MCP servers configured." To check that the folder settings are read, start agy in that folder and use the /mcp screen in section 6.
To attach a web server, use serverUrl instead of command. For example, for the http://127.0.0.1:9191/ server started in Running Blender with AI on your own computer, it looks like this. agy mcp add blender-local http://127.0.0.1:9191/ writes the same shape.
{
  "mcpServers": {
    "blender-local": {
      "serverUrl": "http://127.0.0.1:9191/"
    }
  }
}
The official docs say to use only one connection type per entry. Do not put command and serverUrl in the same entry.
6. Check the connection inside agy
From here on, you work in a signed-in agy session. For this test, blender was registered only in the folder's .agents/mcp_config.json (as in section 5), and Blender had an example scene open with props on a table (11 objects).
Starting state: The work folder and settings file from section 5, and Blender with its MCP server running.
Follow along:
- Type
agyin the work folder to start a session. - The first time you start it in that folder, it asks "Do you trust the contents of this project?" agy needs your permission to read, edit, and run files there. If it is a folder you made, choose Yes, I trust this folder.
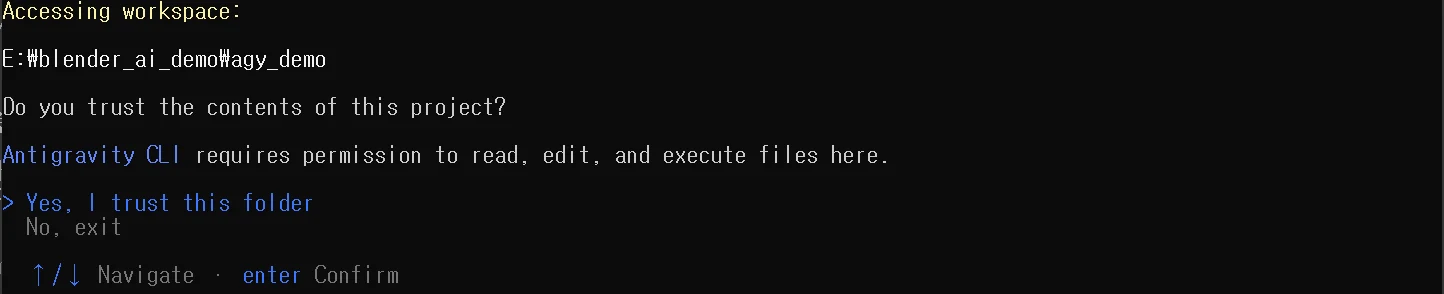 Figure 5. The trust question the first time you open a folder. The folder path at the top, Yes and No at the bottom (terminal screenshot)
- Type
/mcpin the input box and pressEnter. The MCP Servers screen opens.
 Figure 6. The
/mcp screen. blender with a green check, five tool names, then +21 more (terminal screenshot)
blender has a green check, and the tools show as five names plus "+21 more". That is 26 in total, the same as the official server's tool count. Select the line and press Enter to choose Restart (reconnect) or Disable (turn off).
In the figure, the group name reads "Plugins (~.gemini\config\plugins)". But that folder did not exist on the test computer, and the global settings file ~/.gemini/config/mcp_config.json was empty. blender was read from the folder's .agents/mcp_config.json. Do not judge where a setting comes from by the group name on this screen.
- Start with a question that does not change the scene.
List the names and the number of objects in the open Blender scene. Do not change anything.
The test used the same question in Korean. agy did not use the MCP tool right away. It first tried to list the files in the work folder and its parent folder with PowerShell commands. Each command asked "Run this command?", and I chose No, cancel. When this happens, name the tool to use.
Do not look at files. Use the scene summary tool of the blender MCP server.
- This time a permission prompt appears before it calls the MCP tool
blender/get_objects_summary.
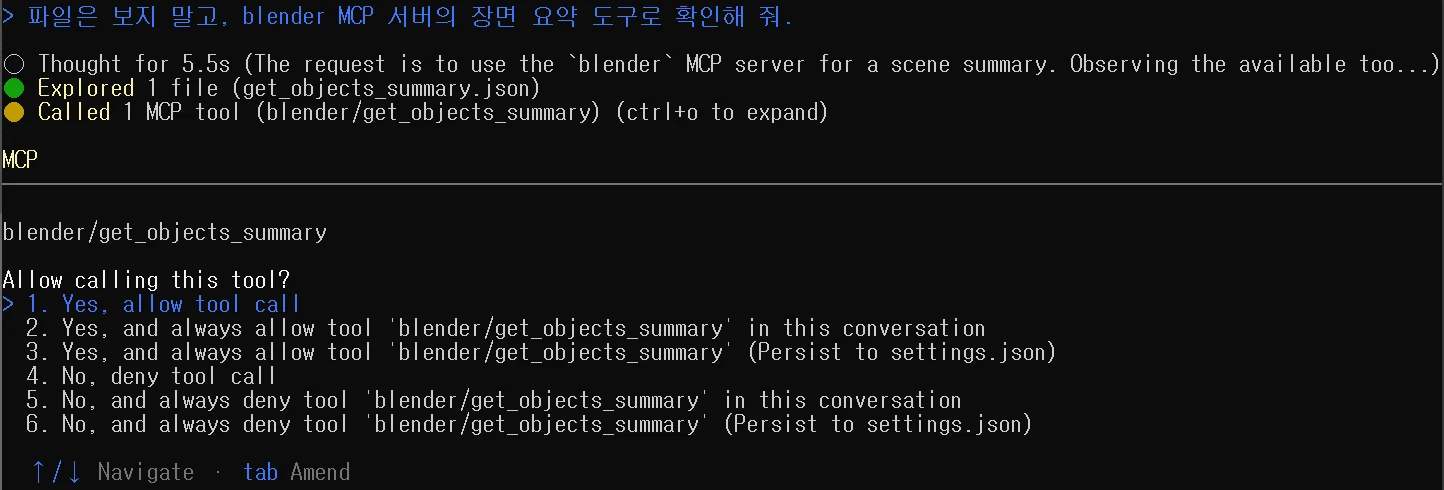 Figure 7. The MCP tool permission prompt. The tool name at the top, six choices below: allow or deny once, for this conversation, or always (terminal screenshot)
| Choice | Meaning |
|---|---|
| 1. Yes, allow tool call | Allow this one time |
| 2. … in this conversation | Do not ask again for this tool until the conversation ends |
| 3. … (Persist to settings.json) | Save to the settings file and never ask again |
| 4 to 6. No … | Deny, with the same three scopes |
This tool only reads the scene, so choose 1. The answer appears shortly.
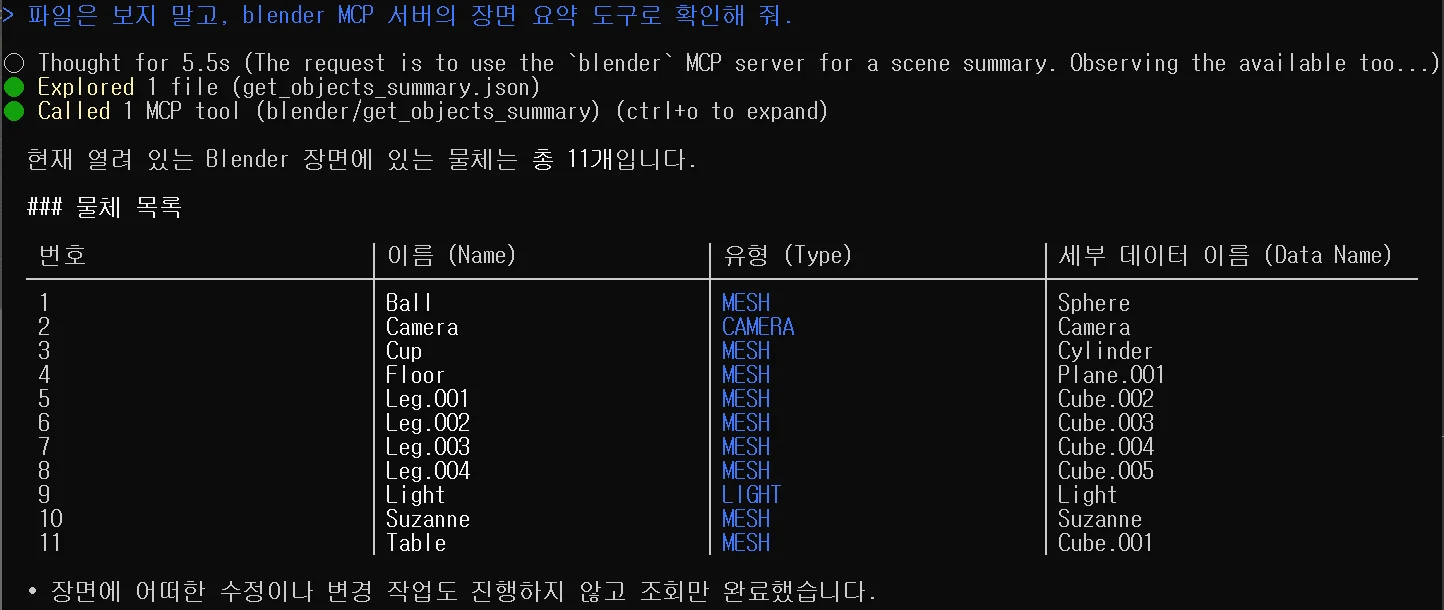 Figure 8. The answer after reading the Blender scene. The tool call record at the top, a table of 11 objects in the middle, and a line at the bottom saying it only read the scene. The answer is in Korean because the question was (terminal screenshot)
It got all 11 objects and their types (MESH, CAMERA, LIGHT) right. If it does not connect, go through the "Common mistakes and fixes" table below.
7. Permissions and safety
According to the official docs, MCP tools without a rule run in Ask mode. That means agy asks every time a tool is used, and Figure 7 in section 6 is that prompt. You can put tools you use often on an allow list. Rules look like this:
| Rule | Meaning |
|---|---|
mcp(blender/get_objects_summary) | The scene summary tool of the blender server only |
mcp(blender/*) | Every tool of the blender server |
mcp(*) | Every tool of every MCP server |
Instead of answering the prompt each time, put one read-only tool on the allow list in advance.
Follow along:
- In the session, type
/permissionsand pressEnter. The Permission Config Editor opens and asks you to pick a scope: Project, Shared with Antigravity, or Global. - Choose Project and press
Enter. You see three lists: allowlist, denylist, and asklist. - On the allowlist, press
a, typemcp(blender/get_objects_summary), and pressEnter. It becomes allowlist (1).
 Figure 9. One rule added to the Project allowlist in
/permissions (terminal screenshot)
- Quit agy, start it again in the same folder, and ask it to use the scene summary tool.
 Figure 10. A new session after adding the rule. It calls the tool right away with no prompt and answers. The request and answer are in Korean because the test was run in Korean (terminal screenshot)
This time it called the tool with no prompt, so the rule worked. In the version tested (1.4.7), the Project-scope rule was saved not in the work folder but in your user folder, in ~/.gemini/config/projects/default-cli-project.json. To remove the rule, select that line on the same screen and press d. Your choice to trust the work folder (step 2 in section 6) is also kept, under trustedWorkspaces in ~/.gemini/antigravity-cli/settings.json.
In this new session, agy again first tried a PowerShell command to see whether Blender was running, and that command asked for permission separately. MCP tool rules and shell command permissions are separate.
For Blender MCP we recommend:
- Put only read-only tools (scene summary, object details, screen capture) on the allow list.
- Leave
execute_blender_code, which runs code, on Ask so you read the code and approve it each time. - Do not use broad rules such as
mcp(blender/*)ormcp(*). - Do not use
--dangerously-skip-permissions(listed inagy --help; it approves everything automatically) for Blender work.
A checklist for before you hand a scene to the AI is in Safety checks before letting AI work in Blender.
8. Move old Gemini CLI settings
Suppose your old Gemini CLI ~/.gemini/settings.json had the Blender server like this:
{
  "mcpServers": {
    "blender": {
      "command": "uv",
      "args": ["--directory", "C:\\blender_mcp\\mcp", "run", "blender-mcp"],
      "timeout": 30000,
      "trust": false
    }
  }
}
Follow along:
- From the
blenderentry undermcpServers, takecommand,args,env, andcwd. If there is atimeout, rename it and change its unit in step 2. - Paste them into
~/.gemini/config/mcp_config.json(global) or.agents/mcp_config.json(one folder). You can also register again with oneagy mcp addline, as in section 4. - If it was a web server, change
urlorhttpUrltoserverUrl. - If you kept skills in
.gemini/skills/, move them to.agents/skills/. The official docs say this move is manual. - Check the global settings with
agy mcp list.
The old timeout was in milliseconds. The agy MCP settings docs have a timeoutSeconds field in seconds. Move "timeout": 30000 from the example as "timeoutSeconds": 30. If you leave the field out, the defaults from the official docs apply (180 seconds per tool call, 300 seconds to connect). The property table also has fields such as enabledTools, which shows only some of a server's tools, and disabledTools, which hides some.
trust is not in the agy settings table, so do not move it. Decide what to approve automatically with the permission rules in section 7.
Practice
- Run
agy --versionand write down the version. - In the Notes of
agy mcp add --help, find where options must go. - Register the Blender server with
agy mcp add, then check STATUS withagy mcp list. - Turn it off with
agy mcp disable blender, runlistagain, and write down what changed in the settings file. - Rewrite the
httpUrlentry of an old Gemini CLI setting for agy.
Common mistakes and fixes
| Symptom | Cause | Fix |
|---|---|---|
agy is not found | Ran it in the window used for installing | Open a new terminal and try again. If it still fails, check that C:\Users\<name>\AppData\Local\agy\bin exists |
agy mcp add rejects an option | --env placed after the server name | Move the option before the name |
A folder settings file exists but agy mcp list is empty | list shows only the global settings | Start agy in that folder and check with /mcp |
| The settings file cannot be read | A single \ in a JSON path | Write it twice, as in C:\\blender_mcp\\mcp |
Followed an old guide and put it in settings.json, but the server does not show | agy reads mcp_config.json | Move it as in section 8 |
| agy tries to look at files or programs with PowerShell instead of the MCP tool | It picks tools on its own from the question | Choose No, cancel at the prompt and name the tool, for example "use only the get_objects_summary tool of blender MCP" |
| The server starts but Blender tools fail | The Blender MCP add-on server is off, or the port differs | Check "Server is running" and the Port in Figure 3. If the port differs, set BLENDER_MCP_PORT |
Summary
Install agy → agy mcp add blender uv --directory C:\blender_mcp\mcp run blender-mcp → check with /mcp. The settings file is mcp_config.json. How to give the same Blender know-how to several AI tools is covered in Blender agent skills.
Read next
- Installing the official Blender MCP
- Connecting the official Blender MCP to Claude Code
- Safety checks before letting AI work in Blender
- Using Blender agent skills
- Connecting MCP servers
References
- Gemini CLI docs, MCP servers (notice about the switch to Antigravity CLI): https://geminicli.com/docs/tools/mcp-server/
- Antigravity docs, MCP: https://antigravity.google/docs/mcp
- Antigravity docs, Getting started (CLI): https://antigravity.google/docs/getting-started
- Antigravity docs, Migrating from Gemini CLI: https://antigravity.google/docs/cli/gcli-migration/
- Antigravity docs, /permissions command: https://antigravity.google/docs/cli/commands/permissions/
- Antigravity docs, Install and authenticate (CLI): https://antigravity.google/docs/install?tab=cli
- Blender Lab, MCP Server: https://www.blender.org/lab/mcp-server/
- Images: 9 terminal screenshots (agy 1.4.7, Windows Command Prompt; the header showing the account and plan was cropped out) and 1 Blender 5.2.1 Preferences screenshot