The official Blender MCP vs. the community MCP for Blender: the differences and how to choose
Compare two Blender MCPs with similar names, Blender Lab's official version and the community MCP for Blender made by an individual developer, by installation, tools, ports, and telemetry, and follow along to fix things when the two clash.
한국어English
Based on: Blender 5.2 LTS (screenshots from 5.2.1, English interface, default shortcuts), Blender Lab MCP 1.0.3, and the GitHub README of the community project MCP for Blender. Checked in October 2026. All images are real Blender screens. The community version images are from an older version (add-on 1.6), so some text differs slightly from the current version. This is noted in the captions.
There are now two tools called "Blender MCP." One is the official MCP server that Blender Lab at the Blender Foundation released in 2026. The other is a community project by an individual developer that came out earlier and was widely used; its current name is MCP for Blender. If you followed a YouTube video or blog post and got confused because your screen looked different, you were usually looking at a mix of the two tools.
The two tools use the same MCP standard, but they differ in who makes them, how you install them, and what they can do. Think of two shops with similar names in the same neighborhood: one is run directly by the head office, and the other has long been run by an individual. Their menus differ, so choose based on what you are going there to buy.
When you finish this guide, you will be able to do the following.
- Tell whether the Blender MCP on your screen is the official version or the community version.
- Know how the two tools differ in installation, tools, ports, and data collection.
- Set the ports so they do not overlap when you use both on the same PC.
- Choose the one that fits what you want to do.
If MCP itself is new to you, read What is MCP? first.
1. Comparison at a glance
| Item | Official version | Community version |
|---|---|---|
| Official name | MCP (add-on), blender-mcp (server) | MCP for Blender (add-on), mcp-for-blender (server package) |
| Made by | Blender Lab at the Blender Foundation | A project by the individual developer Siddharth (GitHub ahujasid). The README says it is "a third-party integration not made by Blender" |
| License | GPL-3.0-or-later | MIT |
| Blender version | 5.1 or later | 3.0 or later |
| Add-on installation | Blender's Extensions, Blender Lab repository | The command uvx mcp-for-blender install-addon, or install addon.py directly |
| Add-on interface | Only inside Preferences Add-ons. No sidebar tab | The MCP for Blender tab in the 3D Viewport sidebar (N) |
| Server start | Automatic when Blender starts (Auto Start) | Automatic when Blender starts. If it is off, Start MCP Server in the sidebar |
| Default port | 9876 | 9876 |
| Tools | 26: file diagnosis, object information, screen capture and navigation, rendering, manual and API search, code execution | Code execution, scene information, viewing the screen (look), asset search and import, AI 3D generation, and more |
| Outside services | None (the documentation is inside the server) | Poly Haven, Sketchfab, Poly Pizza (assets), Meshy, Tripo, Hyper3D Rodin, Hunyuan3D (AI generation) |
| Usage data collection | Nothing separately stated on the official page. Privacy follows the blender.org policy | Sends minimal anonymous usage records by default. Collects content such as prompts, code, and screens only with consent |
The official version is stronger at reading and diagnosing the current scene and finding documentation. The community version is stronger at bringing in models and assets from outside and creating new ones.
2. Telling which one is on your screen
Starting state: start with the Blender you use running.
Follow along:
- Open Edit ‣ Preferences ‣ Add-ons.
- Type
mcpin the search box. - Look at the name and Maintainer of the row that appears.
| What you see | Which one |
|---|---|
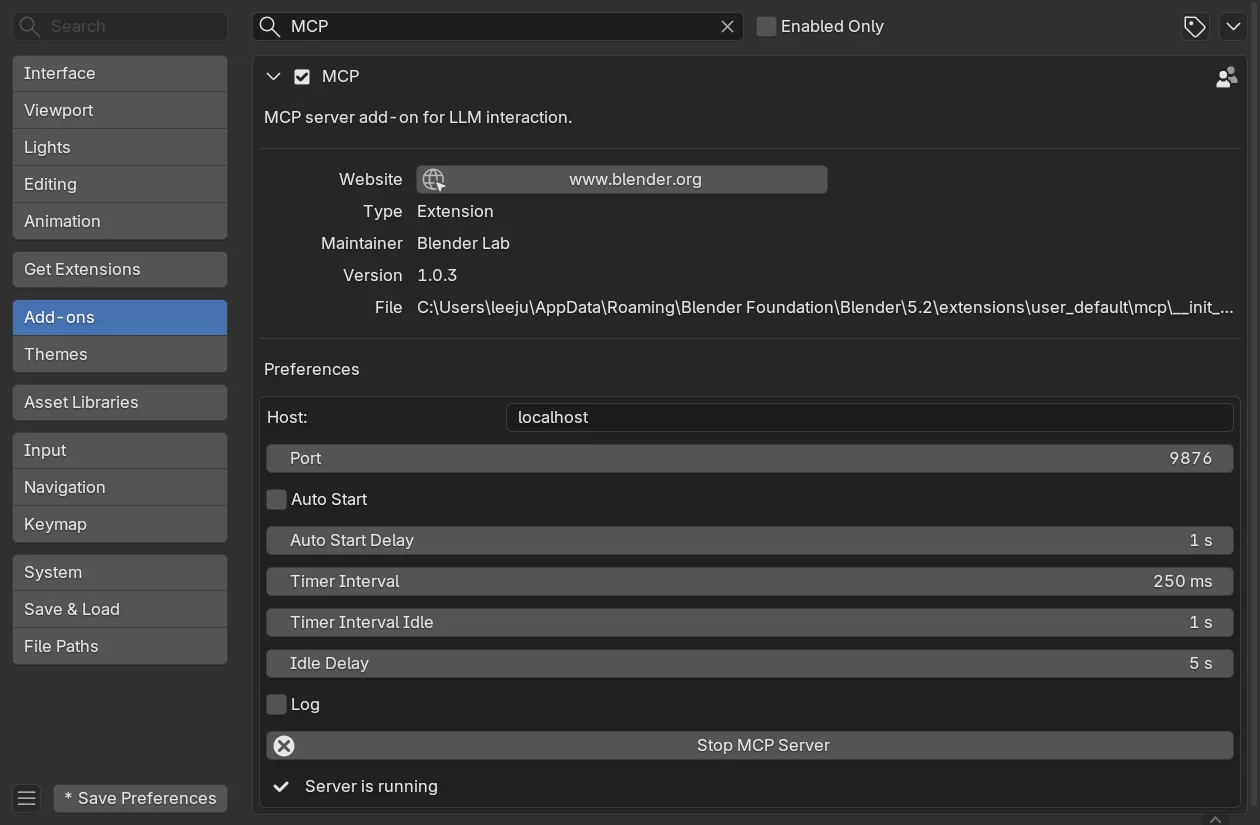
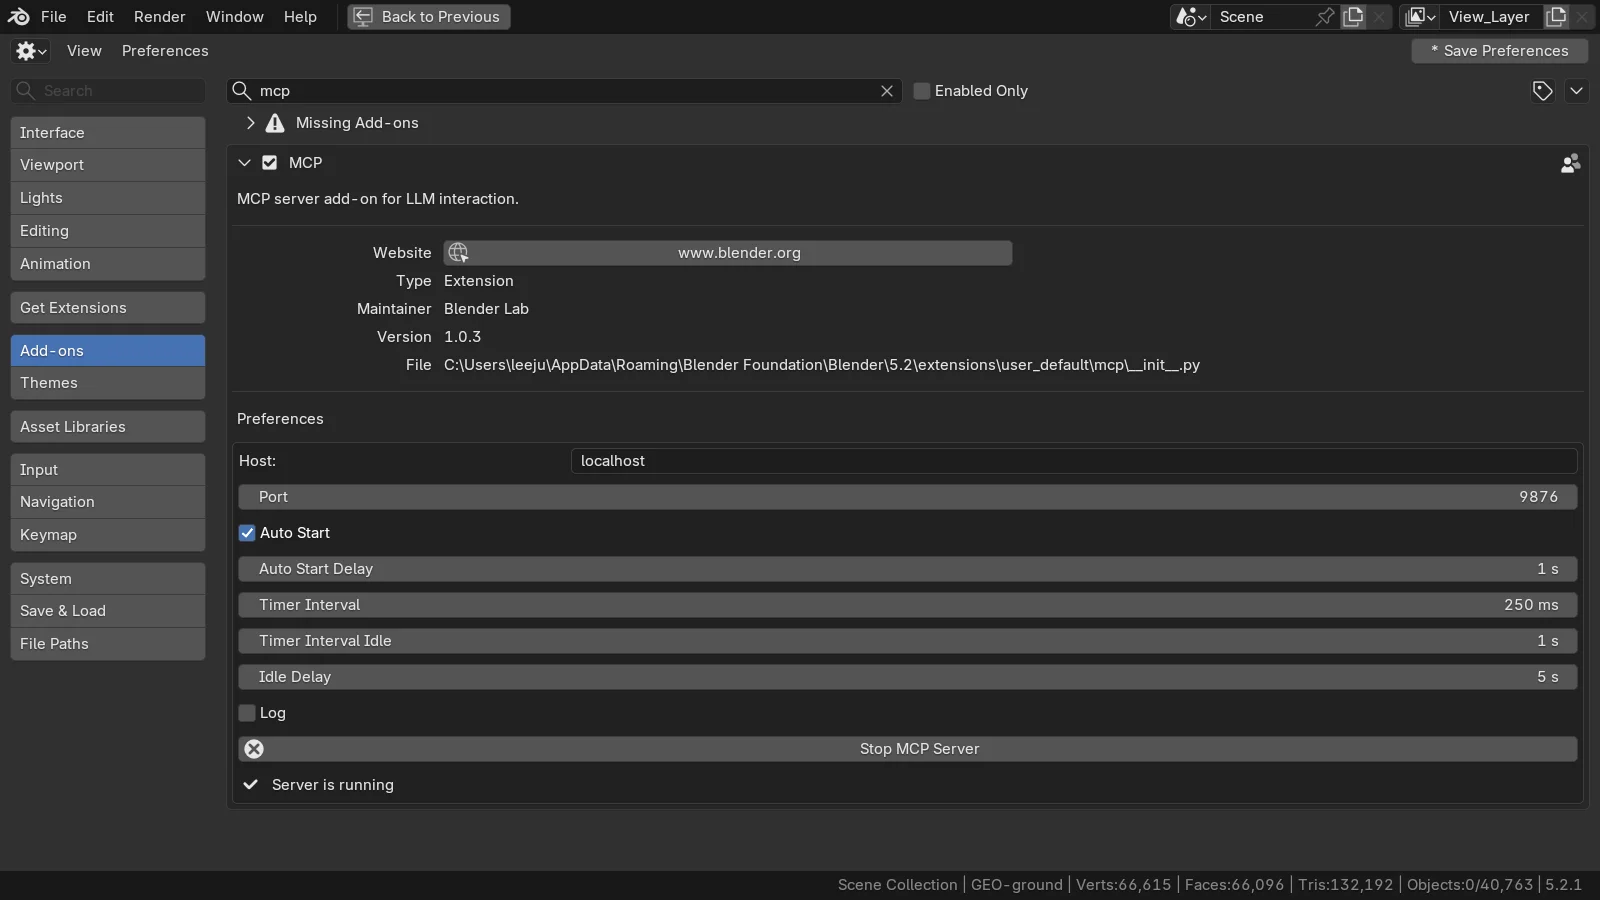
| Name MCP, Maintainer Blender Lab, Type Extension | Official version |
| Name MCP for Blender, Maintainer BlenderMCP, Type Legacy | Community version |
If you press N in the 3D Viewport to open the sidebar and there is an MCP for Blender tab, the community version is turned on. The official version does not make a sidebar tab.
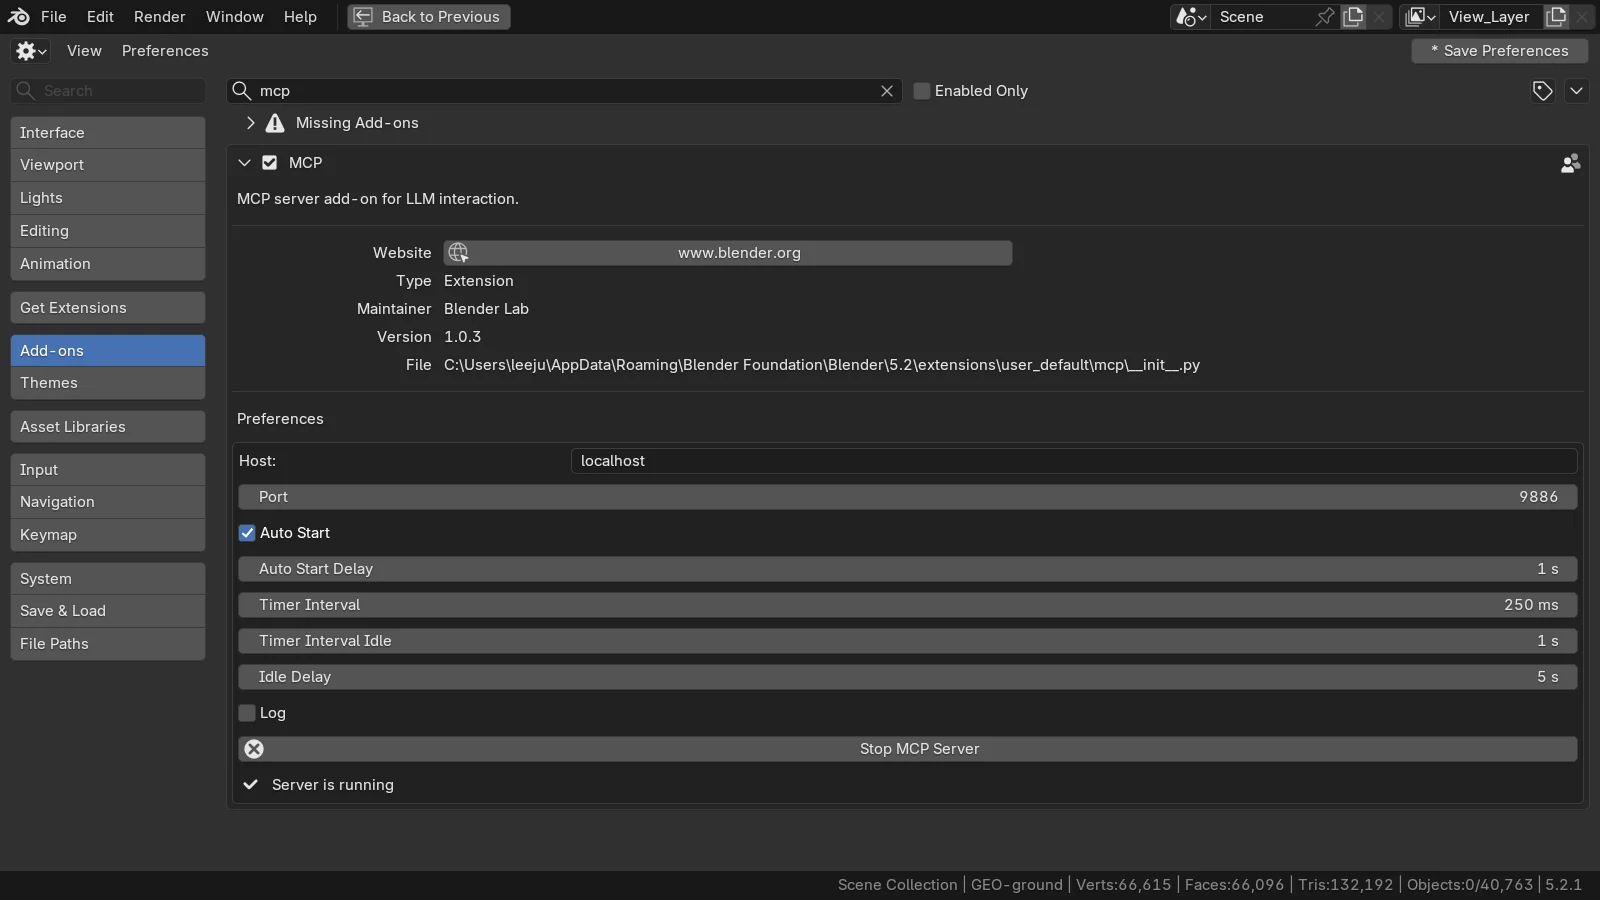 Figure 1. The official version's Add-ons screen. The name MCP and Maintainer Blender Lab at the top, the Port field in the middle, and Server is running at the bottom. In this image the port was changed to 9886, as in section 4 (Blender screenshot)
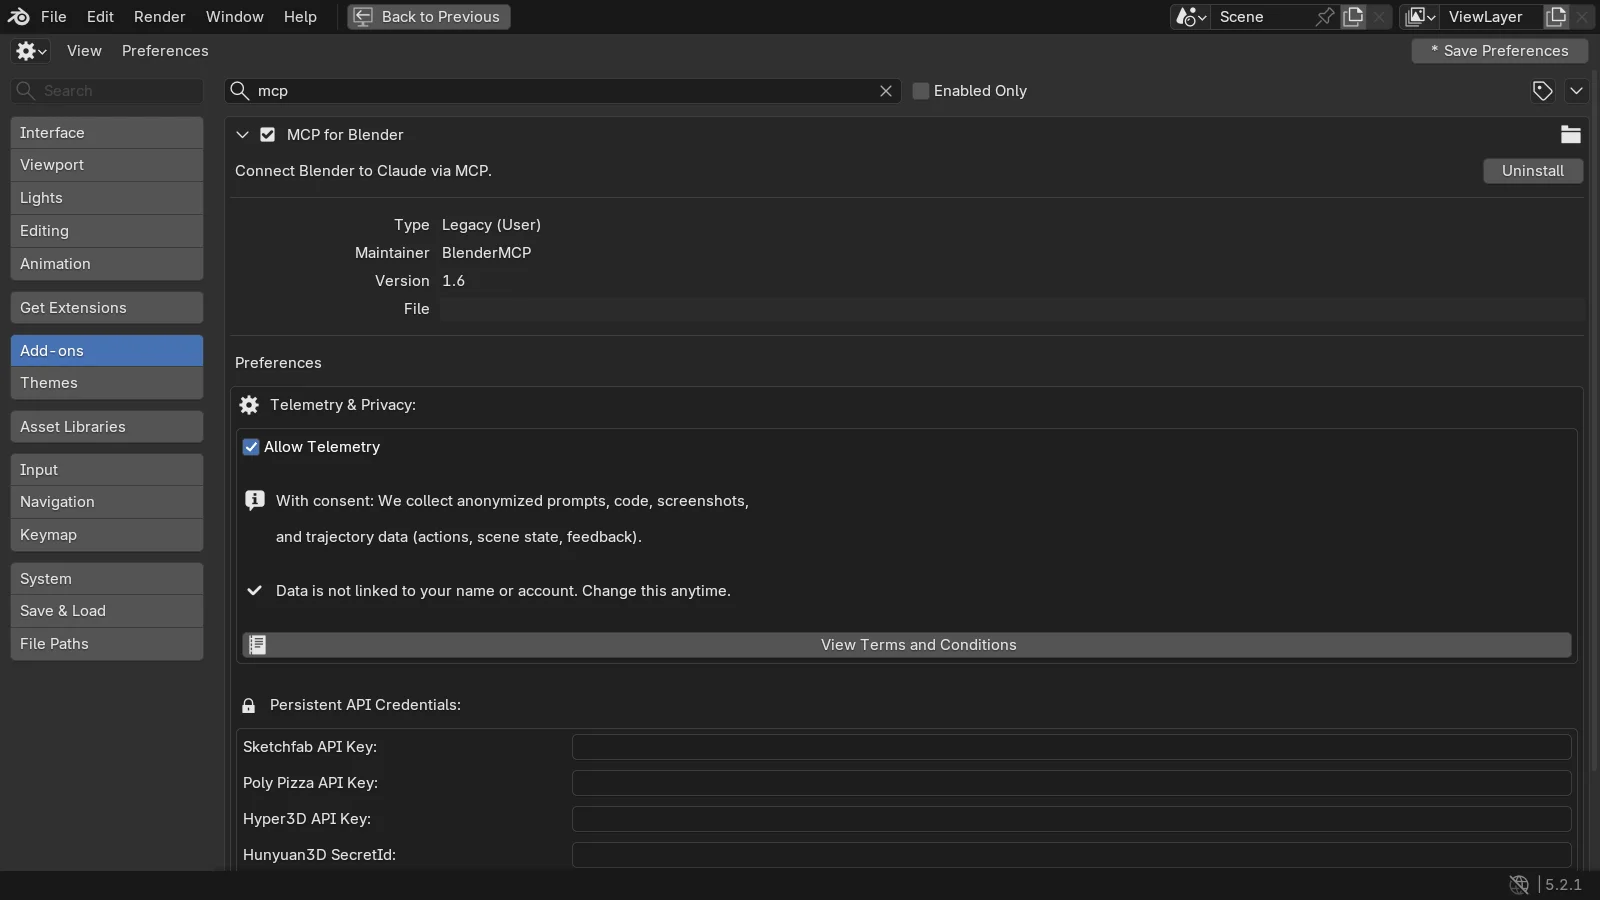 Figure 2. The community version's Add-ons screen. Type Legacy and Maintainer BlenderMCP at the top, Allow Telemetry in the middle, and key fields for outside services at the bottom. This image shows an older version (1.6) right after it was turned on, and the file path is hidden (Blender screenshot)
3. A look at the community MCP for Blender
3-1. Installing and starting (based on the README)
These are the commands the community README gives. All of them run with uv's uvx. The README specifically asks you to install uv with the official installer (it does not recommend pip install uv).
| What you want to do | Command in the README |
|---|---|
| Set up in one go | uvx mcp-for-blender setup |
| Install only the add-on | uvx mcp-for-blender install-addon |
| Upgrade to a new version | uvx mcp-for-blender@latest update |
| Register in Claude Code | claude mcp add blender uvx mcp-for-blender |
After installing the add-on, turn on Interface: MCP for Blender in Add-ons. When you start Blender, the add-on starts the server on its own. If the server is off, click Start MCP Server in the MCP for Blender tab in the 3D Viewport sidebar.
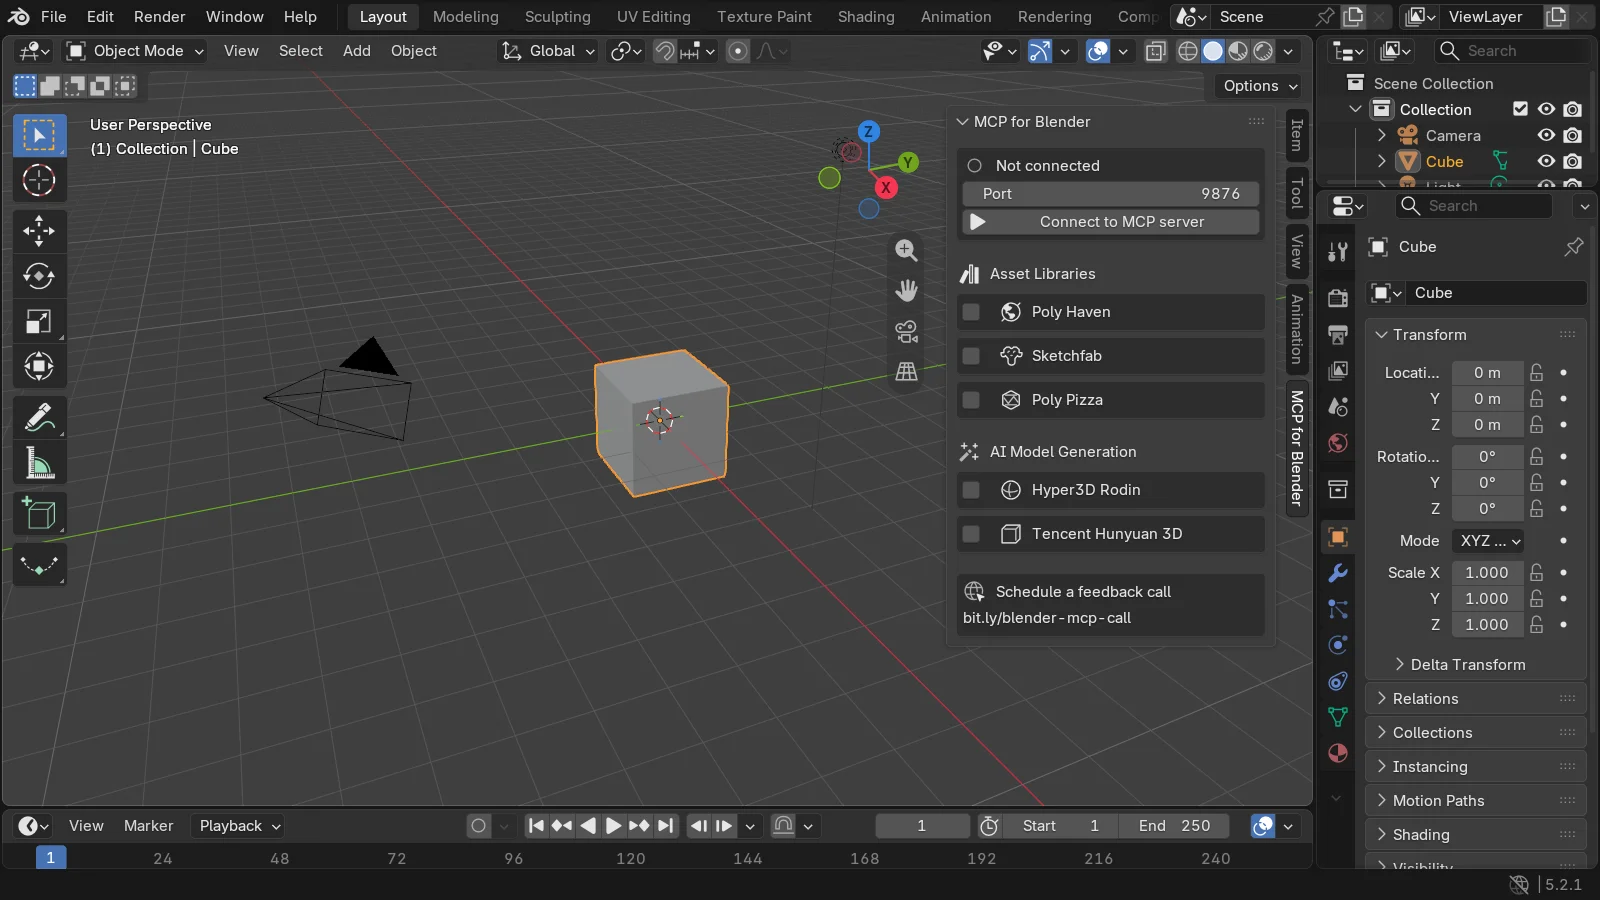 Figure 3. The community version's sidebar tab. From the top: the connection status Not connected, Port 9876, the server start button, and boxes to turn on asset and AI generation services. This image is from an older version (1.6), so the button reads Connect to MCP server, and there are only two AI generation boxes. The current README calls the button Start MCP Server and also describes a Meshy box for AI generation (Blender screenshot)
3-2. If you set it up under the old name blender-mcp
The community server package was renamed from blender-mcp to mcp-for-blender. The README says "old setups keep working and you do not need to change your settings." You only need to use the new name for new installations.
There is one easily confused point. The official server's run name is also blender-mcp. If you see blender-mcp in a settings file, look at the command in front of it to tell them apart.
| Run command in the settings | Which one |
|---|---|
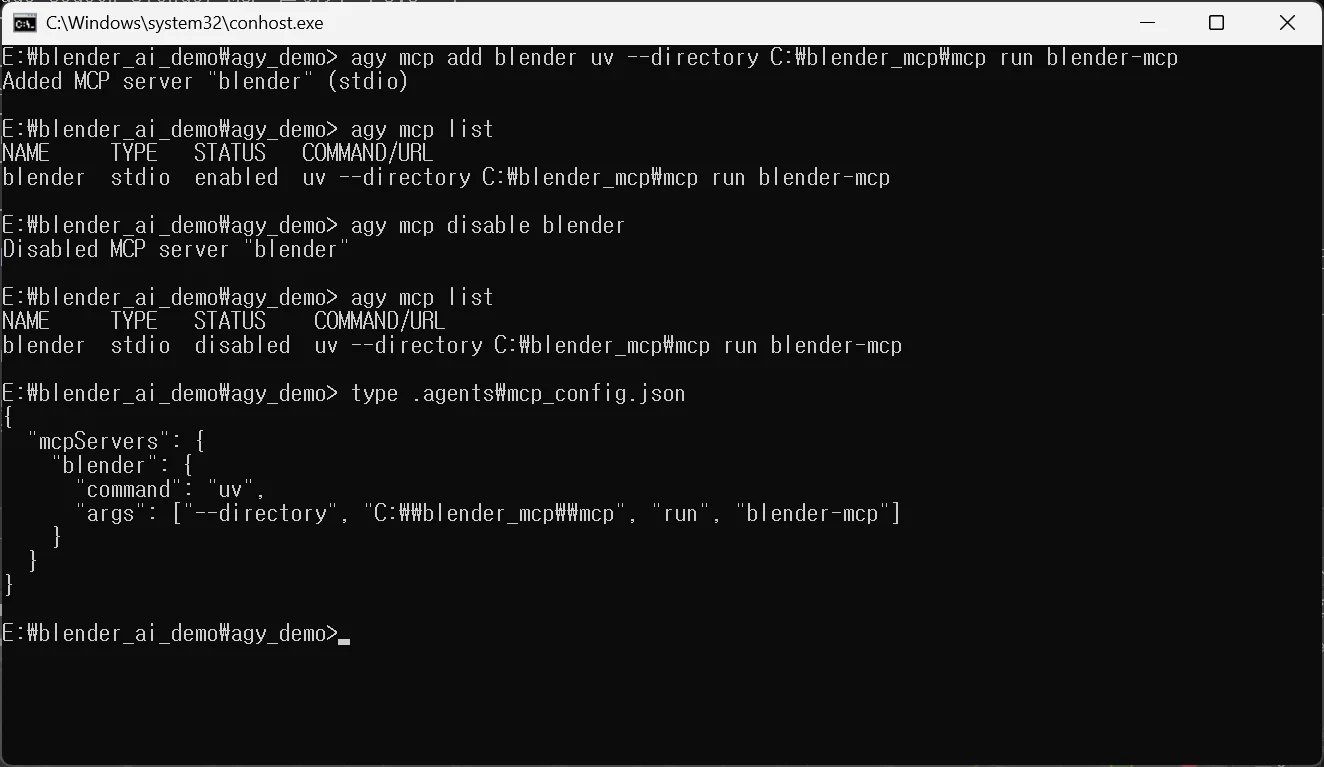
uv --directory C:\blender_mcp\mcp run blender-mcp | Official version (installed from source) |
uvx blender-mcp or uvx mcp-for-blender | Community version |
3-3. Usage data collection and safe mode
The community README describes telemetry (usage data collection) like this.
- It sends minimal anonymous records by default, such as an installation ID, the names of tools used, whether they succeeded, how long they took, the version, and the operating system.
- It sends content only when you consent, such as prompts, generated code, screen captures, and scene data. You turn this on and off in the add-on's preferences.
- Setting the environment variable
DISABLE_TELEMETRY=trueturns off everything, including the minimal records.
The older version (1.6) in Figure 2 had Allow Telemetry checked as soon as it was turned on. The default may differ by version, so if you install the community version, open the place shown in Figure 2, check the box state yourself, and change it as you like.
The README also has a safe mode. Setting BLENDER_MCP_SAFE_MODE=1 makes it check scripts before running them and block dangerous code such as direct file access, running other programs, and network connections. Normal work such as modeling, materials, rendering, and saving still works. The README also says the add-on's connection has no authentication and no encryption, so do not open it beyond the same PC (localhost) unless the network is trusted.
The official version also warns that code execution has no safeguards. Either way, have it work on a copy of your work file.
4. When you use both: the port 9876 clash
Both tools use the same default port, 9876. As mentioned, a port is a phone number used inside the same PC. If two phones are attached to one number, calls go to the wrong one. Both start their server when Blender starts, so just having both add-ons turned on can cause a clash.
4-1. What happens when they clash
This is the result of running two Blenders with the official add-on on at the same time on the same PC. Both Blenders showed Server is running in the Add-ons screen, and there were no errors. The Windows connection list (netstat -ano) also showed both programs waiting on the same number.
TCP    127.0.0.1:9876         0.0.0.0:0              LISTENING       38560
TCP    127.0.0.1:9876         0.0.0.0:0              LISTENING       30716
But when I connected to 9876 four times, only the Blender started first (38560) answered all four times. The Blender started later showed "running" but did not receive a single connection. In the AI app, this shows up as "it talks about the wrong file" or "it cannot see the scene I opened." Running the official and community versions at the same time can cause the same problem if they use the same number.
4-2. How to check
Follow along:
- Open Task Manager (press
Ctrl+Alt+Deleteand choose Task Manager). - In the process list, see how many Blenders are running.
- In PowerShell, run the following and see how many lines are waiting on 9876.
netstat -ano | findstr ":9876"
If there are two or more LISTENING lines, they clash.
4-3. Splitting the ports
The easiest fix is to run only one Blender. If you really need to use both together, change the number on one side. You must change the add-on (the Blender side) and the server (the AI app side) together to the same number.
Follow along (the official version to 9886):
- Expand MCP in Add-ons and click Stop MCP Server.
- Enter
9886in the Port field. - Click Start MCP Bridge Server and check Server is running (Figure 1).
- Add the environment variable
BLENDER_MCP_PORT=9886to the server settings in your AI app. In Claude Code, register it as below.
claude mcp add -e BLENDER_MCP_PORT=9886 -s project blender-lab -- uv --directory C:\blender_mcp\mcp run blender-mcp
I checked in the server source that the official server sets its port from this environment variable. Putting -e right before the server name causes an error, so watch the order (the reason is in section 4-3 of Connecting the official Blender MCP to Claude Code).
- To keep using 9886 the next time you start Blender, save the preferences (Save Preferences).
When changing the community version instead: the README says to run the server like uvx mcp-for-blender --port 9877 and to set the Port field in the sidebar to the same number. As an environment variable, it uses BLENDER_PORT. The name differs from the official version's BLENDER_MCP_PORT, so do not mix them up.
5. Which one to choose
| What you want to do | The right one | Why |
|---|---|---|
| Checking a file someone gave you (missing images, linked files) | Official version | It has dedicated file diagnosis tools |
| Learning by asking about Blender features and Python commands | Official version | The manual and API for the current version are inside the server |
| Making scripts that fix a scene | Both | Both have a code execution tool |
| You have to use Blender 5.0 or older | Community version | The official version needs 5.1 or later |
| Finding free assets and putting them in a scene | Community version | Poly Haven, Sketchfab, and Poly Pizza integration |
| Making 3D models from text or images | Community version | AI 3D generation service integration. Each service has its own account and pricing terms, and the README also describes a paid Premium that generates without your own API key |
| You do not want to send data to outside services | Official version | It does not use outside services |
If you are just starting, I recommend getting used to MCP with the official version first, then adding the community version when you need assets or AI generation. When you use both, split the ports as in section 4. For the community version's asset and generation services, check each service's license and terms of use separately. Some, like Sketchfab, need an API key, and some, like Poly Pizza, have different attribution terms for each model.
Practice
- Search for
mcpin your Blender's Add-ons and write down the name, Maintainer, and Type of the rows you see. Use the table to decide whether it is the official or community version. - In PowerShell, run
netstat -ano | findstr ":9876"and compare the number ofLISTENINGlines with one Blender running and after closing it. - Change the official version's port to 9886, match the AI app's settings, and check the connection with "summarize the open file." When you are done, change the port back to 9876.
Common mistakes and fixes
| Symptom | Cause | Fix |
|---|---|---|
| Unlike the video, there is no MCP tab in the sidebar | You installed the official version but watched a video about the community version | The official version is managed in Preferences Add-ons. See section 4 of the official installation guide |
| AI talks about a different Blender file | Two Blenders (or two add-ons) are on the same port | Run only one Blender, or split the ports as in section 4-3 |
| The connection fails after changing the port | You changed only the add-on and left the server settings as they were | Give the server the same number too (official BLENDER_MCP_PORT, community --port or BLENDER_PORT) |
You cannot tell which one blender-mcp in a settings file is | The official run name and the old community package name are the same | If the command in front is uv --directory … run, it is official. If it is uvx, it is community |
| Community asset search does not work | That service's box is not on in the sidebar, or there is no key | Turn on the service box in the sidebar, and enter the needed key in the preferences |
| You are worried about usage data collection | The community version's default anonymous records | Turn off Allow Telemetry, and to turn off everything, set DISABLE_TELEMETRY=true |
In one line
The official version for scene diagnosis and doc search, the community version for assets and AI generation, and split the ports when you use both.
Read next
- Installing the official Blender MCP
- Connecting the official Blender MCP to Claude Code
- Trying the 26 tools of the official Blender MCP
- Connecting Blender and AI: 3D work through MCP and scripts
- Connecting MCP servers: how to plug tools into an AI app
- What is MCP? A USB-C-like standard for plugging tools into AI
References
- Blender Lab, MCP Server: https://www.blender.org/lab/mcp-server/
- Blender Lab, blender_mcp repository: https://projects.blender.org/lab/blender_mcp
- MCP for Blender (community version) README: https://github.com/ahujasid/blender-mcp
- Claude Code Docs, Connect Claude Code to tools via MCP: https://code.claude.com/docs/en/mcp
- Blender 5.2 Manual, Extensions preferences: https://docs.blender.org/manual/en/5.2/editors/preferences/extensions.html
- Shortcut: sidebar
N - Images: all real Blender 5.2.1 screens. The community version images are from an older version (add-on 1.6)