When a material turns pink: fix texture paths with Find Missing Files and Pack Resources
The order to fix a Blender object that shows up pink because its texture is missing. Covers why it turns pink, checking with Report Missing Files, finding the image path in the Image Texture node and the Image Editor, relinking with Find Missing Files, switching between relative and absolute paths, and packing images into the .blend with Pack Resources and taking them out with Unpack.
한국어English
ON THIS PAGE
- 011. What pink means
- 022. Check what is missing: Report Missing Files
- 033. Find which image it is: the Image Texture node and the Image Editor
- 044. Relative and absolute paths
- 055. Relink everything at once: Find Missing Files
- 066. Stop it breaking again: Pack Resources
- 077. The fixing order at a glance
- 088. Exercises
- 099. Common mistakes and fixes
- 10Summary
- 11References
Based on: Blender 5.2 LTS (screenshots from 5.2.1, English interface, default shortcuts). Checked in November 2026. Figures 1 and 2 are real Blender screenshots, Figures 4 and 5 are pages of the Blender 5.2 manual, and Figure 3 is a diagram. The red numbers and boxes were added to explain them. Steps that have no picture follow the official Blender 5.2 manual and the default keymap.
You open a .blend file someone sent you, or you move your project folder, and an object shows up pink (magenta). A material that had a wood or stone pattern turns into one flat pink color. This is Blender's sign that it could not find an image file (texture) used by the material.
Blender beginner chapter 5, section 7 briefly explains why this happens and how to prevent it. This guide focuses on the order to fix a file that is already broken: check what is missing, tell Blender where the images are, and bundle them so it does not break again.
After this guide you can:
- Recognize pink as "image file not found".
- Check for missing files with Report Missing Files.
- Find an image's file name and path in the Image Texture node and the Image Editor.
- Relink images with Find Missing Files and switch the paths to relative.
- Put images inside the .blend with Pack Resources, and take them out again with Unpack when needed.
1. What pink means
A .blend file does not hold image files by default. It only writes down the address (path) of each image. It is like a cookbook that says "the spices are on the second shelf of the cupboard". Move the cupboard, or open the cookbook in another house, and you cannot find the spices. When an image is not at its address, Blender paints that spot bright pink to say "something is missing here".
Starting point: A .blend file open, with an object that looks pink.
Steps: With the mouse over the 3D Viewport, choose Z → Material Preview (① in Figure 1). In Solid view the material colors are not shown, so the pink is easy to miss.
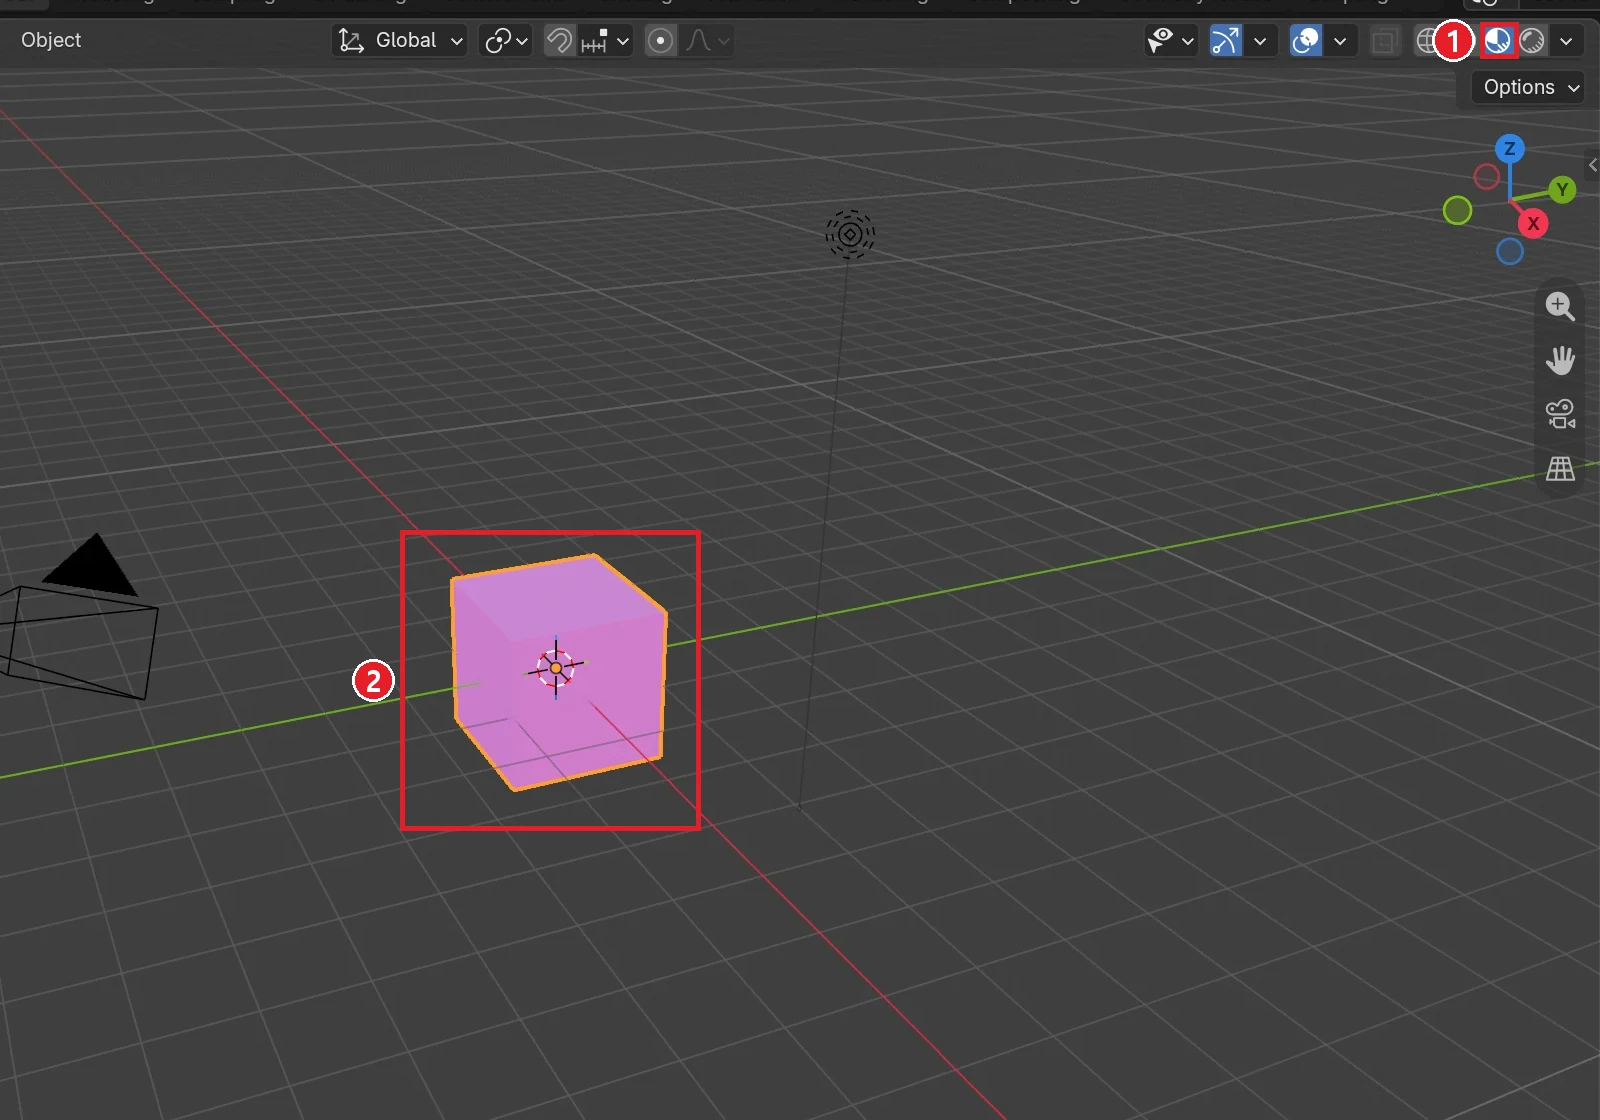 Figure 1. ① Material Preview ② A cube whose image file was not found (Blender screenshot)
Common cases:
| Case | Why the image is not found |
|---|---|
| You received only the .blend file | The image files did not come with it |
| You moved only the .blend to another folder | With a relative path, the base folder changed |
| The image folder was renamed or deleted | The stored address no longer matches |
| You moved to another PC | The absolute path (for example D:\work\…) does not exist there |
2. Check what is missing: Report Missing Files
First, see what is missing. The steps in this section follow the official manual and the menu names.
Starting point: The file from section 1.
Steps:
- In the top menu, choose File ‣ External Data ‣ Report Missing Files.
- If files are missing, a warning appears. You can see it in the header of the Info editor and in the status bar at the bottom. No warning means no external files are missing.
The path in the warning shows where the file's author kept the images.
3. Find which image it is: the Image Texture node and the Image Editor
Next, see which material uses the image from the warning.
Starting point: The pink object selected.
Steps:
- Click the Shading workspace tab at the top. The Shader Editor opens at the bottom middle.
- Find the Image Texture node among the material nodes. It is the box with an orange header that shows the image name (
wood.pngin Figure 2).
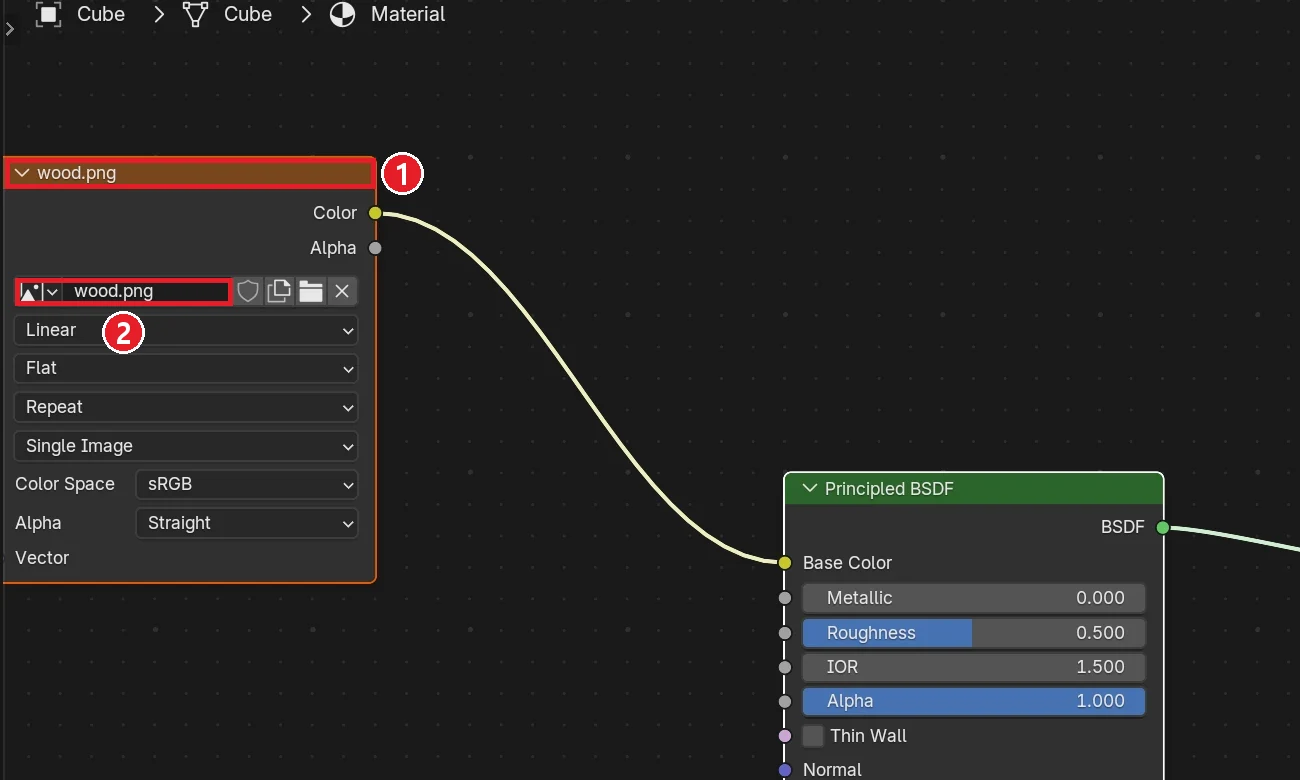 Figure 2. The material nodes of the same cube. ① Image Texture node ② Image name
wood.png (Blender screenshot)
As Figure 2 shows, the node still shows a normal-looking name. The name alone does not tell you whether the file exists. Look at the real path in the Image Editor.
- In the Image Editor at the lower left of the Shading workspace, use the image browse button in its header to pick
wood.png. In another workspace, you can switch any editor to the Image Editor with its editor type button. - With the mouse over the Image Editor, press
Nto open the sidebar. - Click the Image tab in the sidebar. The Image panel has the image's file path field.
A path that starts with // is a relative path. One that starts with a drive letter like C:\ or D:\ is an absolute path. Section 4 explains the difference. Click the folder button next to the path field and pick the image file directly to fix just that image. When only one or two images are missing, this is the fastest way.
4. Relative and absolute paths
A .blend can store an image address in two ways.
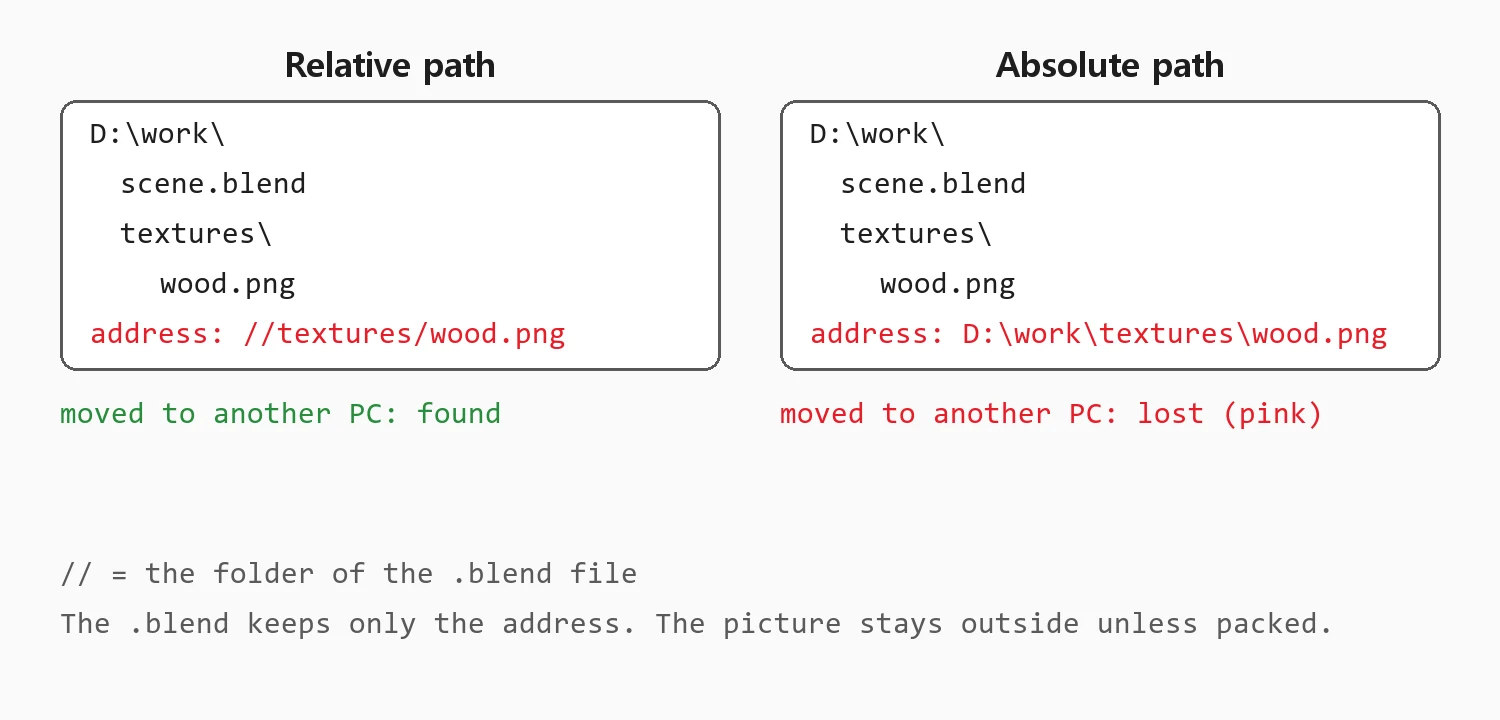 Figure 3. The same folder moved to another PC. Left: relative path. Right: absolute path (diagram)
| Relative path | Absolute path | |
|---|---|---|
| Looks like | //textures/wood.png | D:\work\textures\wood.png |
| Means | "the textures folder inside the .blend's folder" | "the textures folder in the work folder on drive D" |
| After moving the whole folder | Found | Lost if the original place is gone |
| Default | Yes (for newly added images) | No |
A relative path is like "the room to the left of the front door"; an absolute path is like a full street address. If you move the whole house, "left of the front door" still works, but the street address is wrong. That is why the normal setup is the .blend and its images in one project folder, with relative paths.
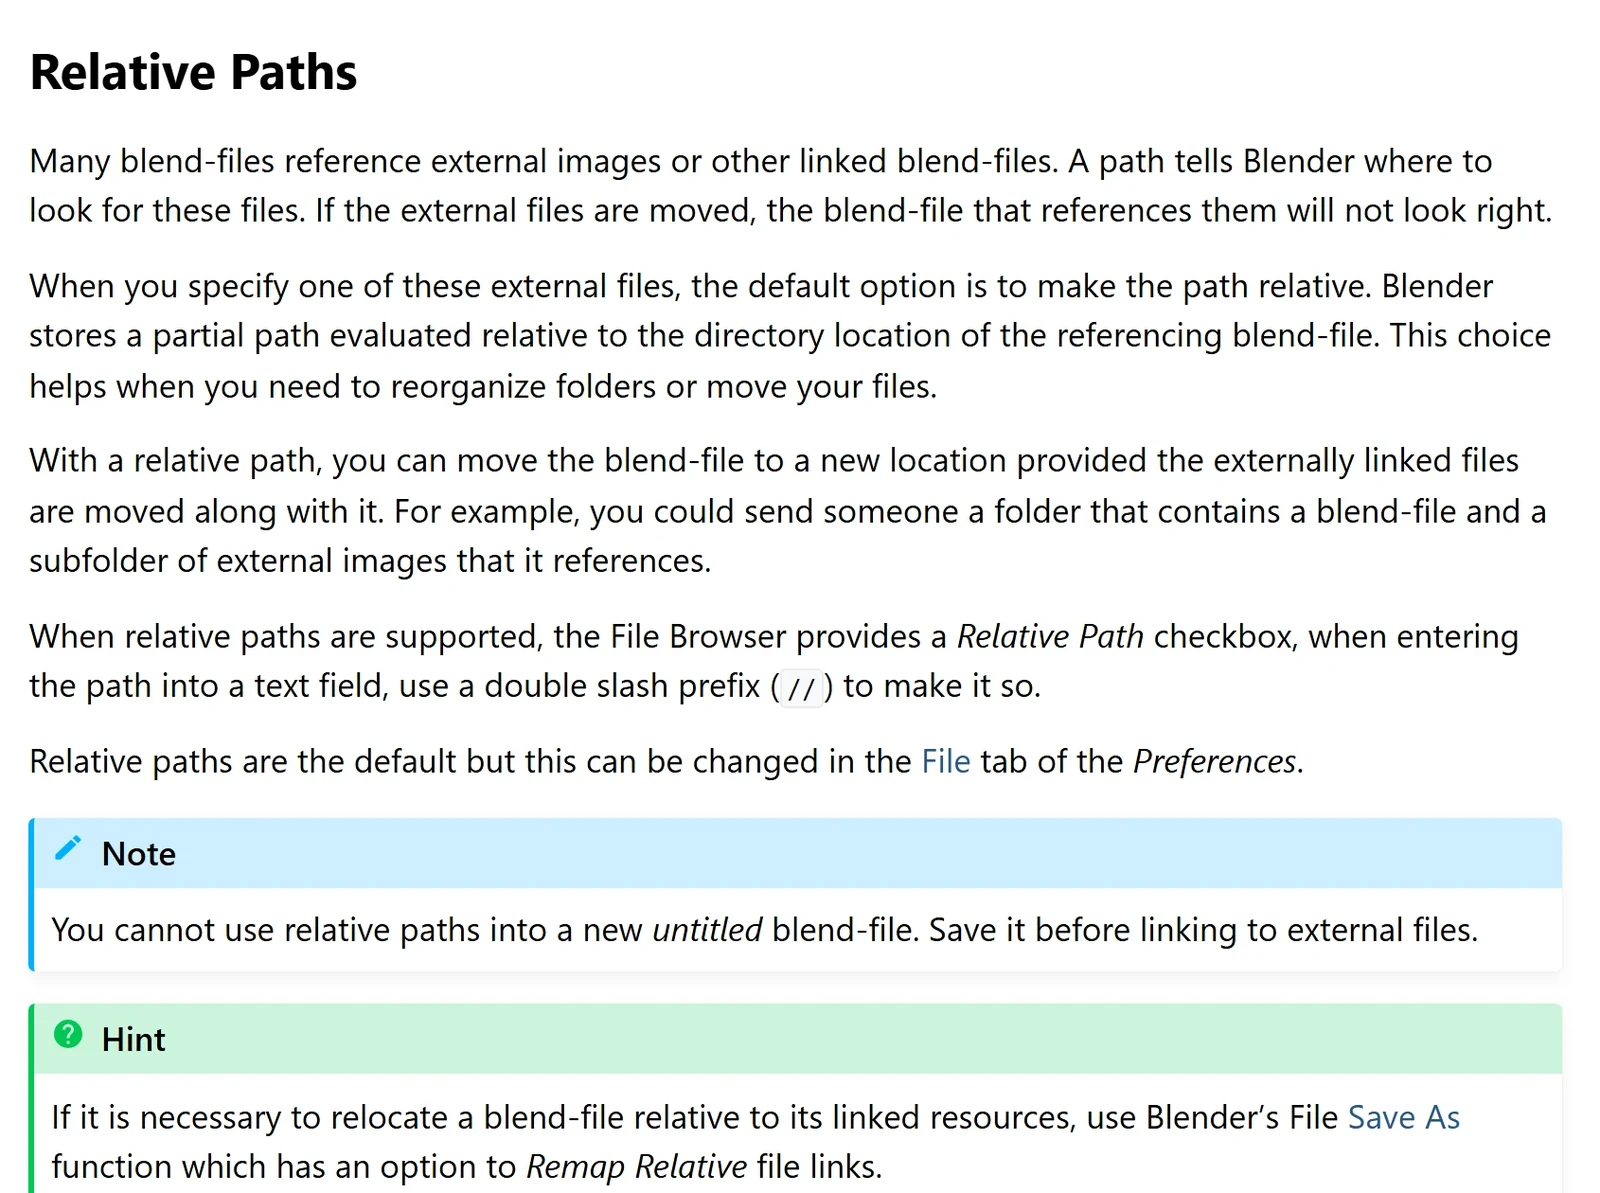 Figure 4. The Relative Paths section of the manual (Blender 5.2 manual screenshot, CC BY-SA 4.0)
The Note in Figure 4 matters. A new file that has never been saved cannot use relative paths, because there is no .blend folder to use as the base yet. Save to your project folder before you add images.
There are menus to change all paths at once:
- File ‣ External Data ‣ Make Paths Relative makes every external file path relative to the .blend.
- File ‣ External Data ‣ Make Paths Absolute makes every path absolute, starting from the drive.
When you Save As the .blend into another folder, the Remap Relative option in the save window adjusts relative paths to the new place.
5. Relink everything at once: Find Missing Files
If several images are missing and you know which folder holds them, you can relink them all at once. The steps in this section follow the official manual.
Starting point: The missing image files placed in one folder on your PC (for example, the folder where you unzipped what you received).
Steps:
- Choose File ‣ External Data ‣ Find Missing Files…. A File Browser opens.
- Go into the folder that holds the images (you can also select one file inside it).
- Press the confirm button (Find Missing Files). Blender searches that folder and all its subfolders, and relinks files with matching names.
- Found images are relinked with absolute paths. To use relative paths, then choose File ‣ External Data ‣ Make Paths Relative.
- If an image is still pink, save the file (
Ctrl+S) and open it again. That reloads all external files at once. - Run File ‣ External Data ‣ Report Missing Files again and check that there is no warning.
Find Missing Files searches by file name. If an image was renamed, it will not be found; pick it one by one as in section 3.
6. Stop it breaking again: Pack Resources
To remove the risk of losing images, for example before sending a file to someone, put the images inside the .blend (pack them). It is like taping the spice packets inside the cookbook. This section also follows the official manual.
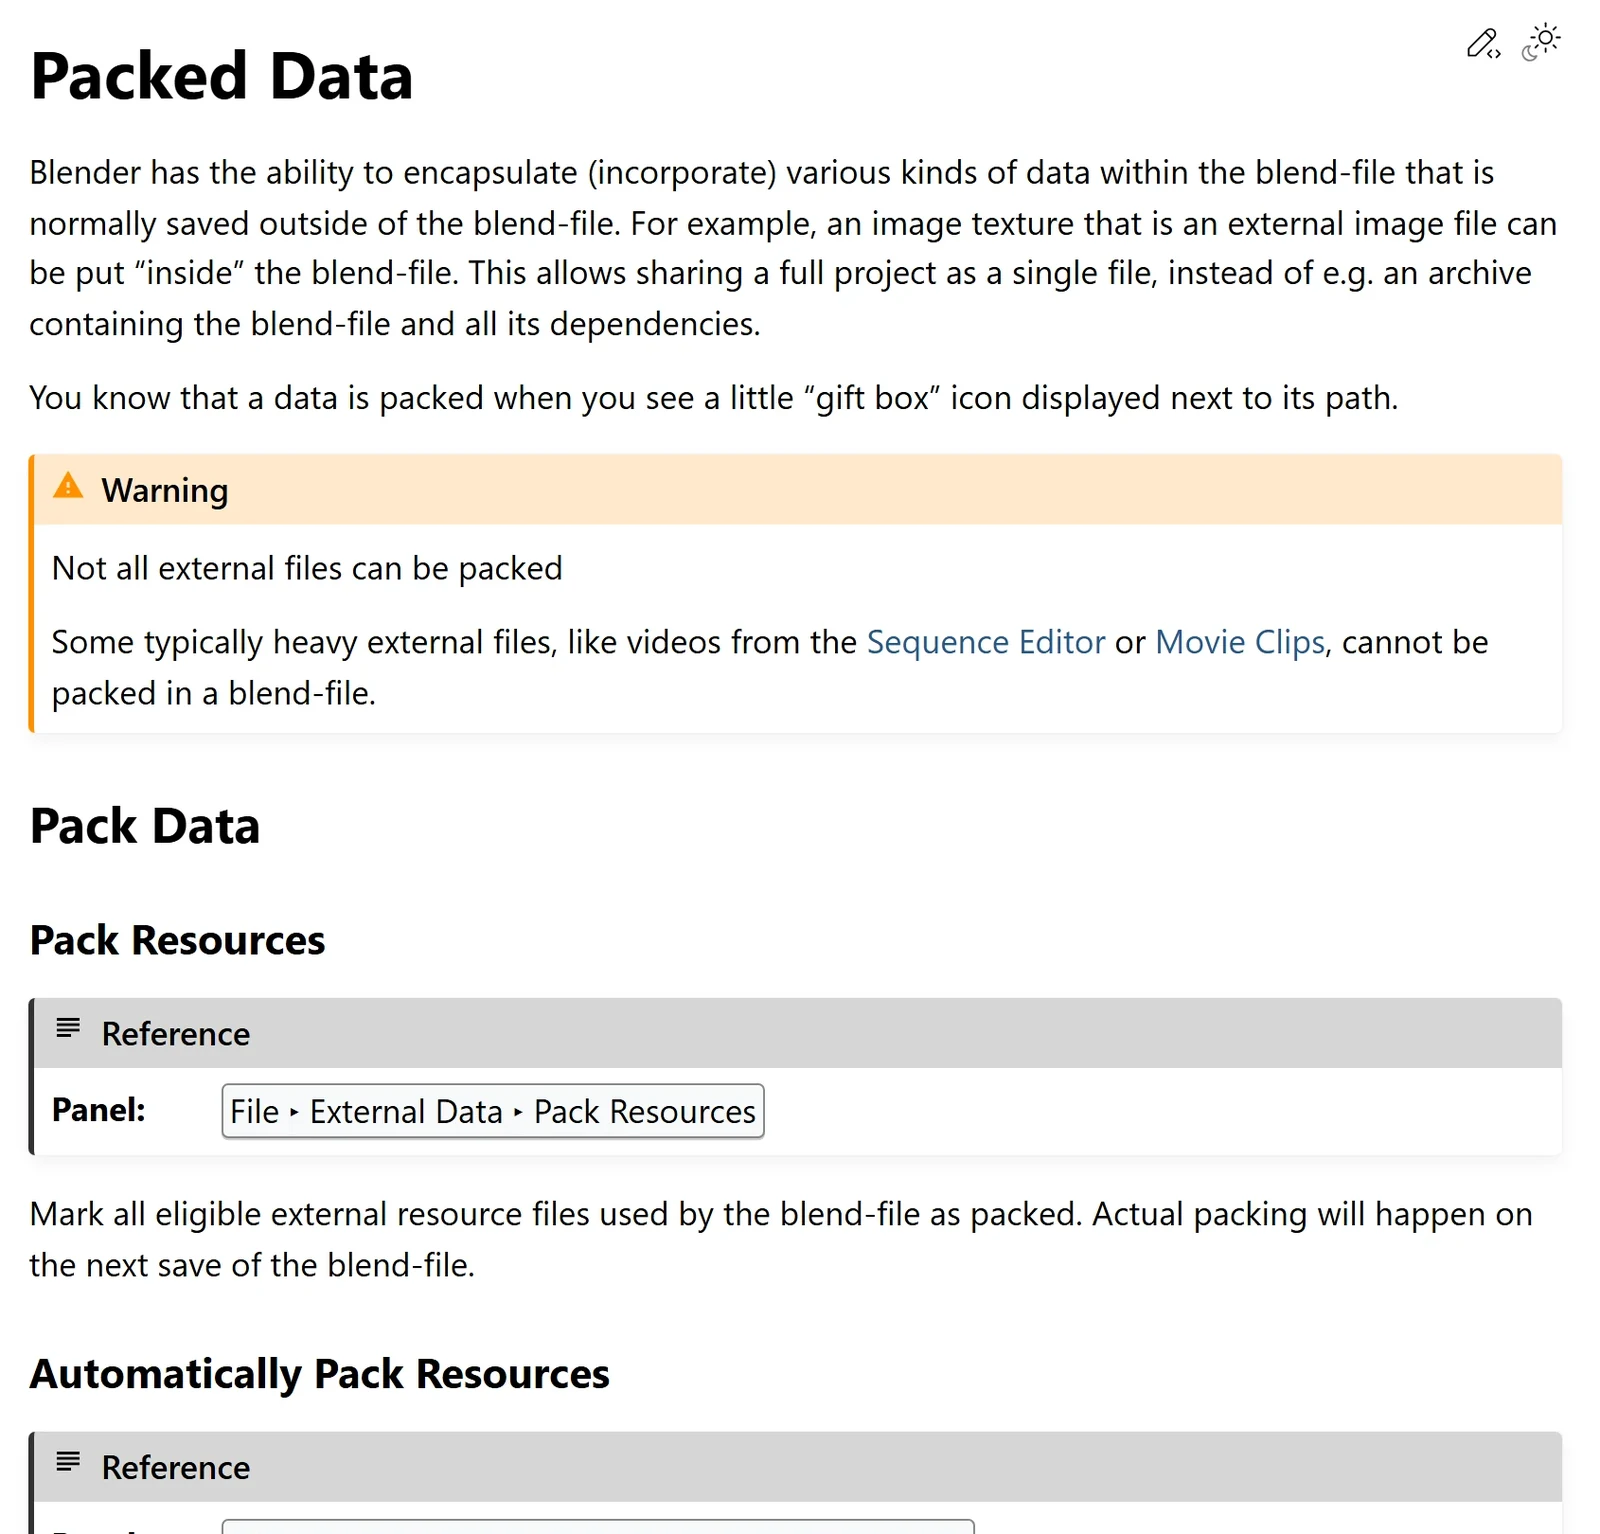 Figure 5. The Packed Data page of the manual (Blender 5.2 manual screenshot, CC BY-SA 4.0)
Starting point: The file from section 5, with no pink left. Missing images cannot be packed, so relink them first.
Steps:
- Choose File ‣ External Data ‣ Pack Resources. All external files in use are marked to be packed.
- Save with
Ctrl+S. They actually go into the .blend when you save. - In the Image Editor sidebar from section 3, a gift box icon now appears next to the path field. It means the image is packed.
After packing, the .blend looks the same even if you move or delete the image files. In exchange, the .blend grows by the size of the images, and edits to the outside image files no longer reach the .blend. Heavy files such as videos cannot be packed (the Warning in Figure 5).
With Automatically Pack Resources on, images you add later are packed every time you save. While it is on, the Pack Resources and Unpack Resources menu items are grayed out.
Taking them out: Unpack Resources
To edit an image again, take it out with File ‣ External Data ‣ Unpack Resources. A choice appears.
| Choice | What it does |
|---|---|
| Use files in current directory (create when necessary) | Unpacks into the .blend's folder (for example a textures folder). If the file already exists, uses that file |
| Write files to current directory (overwrite existing files) | Same, but overwrites existing files |
| Use files in original location (create when necessary) | Unpacks to the original path. If the file already exists, uses that file |
| Write files to original location (overwrite existing files) | Same, but overwrites existing files |
| Disable AutoPack, keep all packed files | Only turns off automatic packing and keeps packed images as they are |
At first, the first choice (Use files in current directory) is fine. The images are written next to the .blend and the paths point there.
7. The fixing order at a glance
| Order | What to do | Menu |
|---|---|---|
| 1 | Check the pink in Material Preview | Z → Material Preview |
| 2 | See the list of missing files | File ‣ External Data ‣ Report Missing Files |
| 3 | For one or two images, pick them again | Path field in the Image tab of the Image Editor sidebar |
| 4 | For many images, search a folder | File ‣ External Data ‣ Find Missing Files… |
| 5 | Switch to relative paths | File ‣ External Data ‣ Make Paths Relative |
| 6 | For a file you will send, pack the images | File ‣ External Data ‣ Pack Resources, then save |
8. Exercises
- Save a new file into a project folder first, then add an image to the cube's material with an Image Texture node. Check in the Image Editor sidebar that the path starts with
//. - Close that file, rename the image file, and open the .blend again. Write down whether the cube turns pink and what Report Missing Files reports.
- Rename the image back, run Pack Resources and save. Then move the image file to another folder and reopen the .blend. Check that the cube still looks right.
9. Common mistakes and fixes
| Symptom | Cause | Fix |
|---|---|---|
| It looks fine in Solid view, but the render is pink | Solid view does not show material images | Check in Material Preview (section 1) |
| Find Missing Files changed nothing | The image was renamed, or the wrong folder was chosen | Pick images one by one as in section 3, check the folder |
| Found, but still pink | The images were not reloaded | Save and reopen the file (step 5 of section 5) |
| An image added to a new file has an absolute path | The image was added before saving | Save first → Make Paths Relative (section 4) |
| I used Pack Resources but it broke again | The file was not saved after packing | Always Ctrl+S after packing (section 6) |
| The Pack menu items are gray | Automatically Pack Resources is on | Packing is already automatic. Just save |
Summary
Pink means "image not found": check with Report Missing Files → relink with Find Missing Files → Make Paths Relative → for files you send, Pack Resources and save. The next guide covers what to check when the Blender viewport is slow.
Previous: Apply Scale · Next: When the Blender viewport is slow
References
- Blender 5.2 Manual: Topbar (File ‣ External Data) (Report Missing Files, Find Missing Files, Make Paths Relative/Absolute)
- Blender 5.2 Manual: Packed Data (Pack Resources, Unpack Resources choices)
- Blender 5.2 Manual: Opening & Saving (Relative Paths, Remap Relative)
- Related: Blender beginner chapter 5: saving and recovery, Shader nodes and materials
- Shortcuts: default (Blender) keymap of Blender 5.2.1.
- Pictures: Figures 1 and 2 are screenshots made in Blender 5.2.1 for this site's beginner series, Figures 4 and 5 are pages of the Blender 5.2 manual (CC BY-SA 4.0), and Figure 3 is a diagram drawn for this guide.