Working in Blender with Kimi Code CLI: install, sign-in, MCP, and skills
Based on the official documentation, this guide installs Moonshot AI's terminal agent Kimi Code CLI, signs in, then connects the official Blender MCP server and Blender skills to build and check a scene.
한국어English
ON THIS PAGE
Based on: the Kimi Code CLI official documentation (installation, sign-in, MCP, permissions, skills, 2.3.2), the K3.1 Pro guide on the Kimi API platform, Blender Lab's Blender MCP Server page (add-on 1.0.3, Blender 5.2), and the Blender Agent Skills repository (1.1.0). Checked in October 2026. The Kimi Code setup steps in this guide were written from the official documentation, and there are no Kimi Code screenshots. All pictures are real Blender screens.
Kimi Code CLI is an AI agent that works in the terminal, and it connects to Blender in two ways: MCP and skills. MCP is a connection that drives an open Blender directly. Skills are bundles of instructions that say "do Blender work in this order." For both, you put files in set folders.
Kimi is the name of an AI service made by the Chinese AI company Moonshot AI. Kimi Code CLI is the coding agent that company released. It gets work done by reading and writing files and running commands. Think of it as the same kind of tool as Claude Code or Codex.
By the end of this guide you will be able to:
- Install Kimi Code CLI on Windows and sign in.
- Register the official Blender MCP server in
mcp.jsonand check the connection. - Know the difference between the three permission modes and choose the right one for Blender work.
- Put Blender skills in the skills folder and call them with the
/skill:command. - Know the flow of checking and fixing a model with a check script.
Kimi, K3.1 Pro, and Kimi Code CLI
| Name | What it is |
|---|---|
| Kimi | The name of Moonshot AI's set of AI services and models |
| K3.1 Pro | The current flagship model presented on the Kimi API platform. 3T (3 trillion) parameter class, 1 million token context, open weights (the model files are made public), and the company says it will release the weights by November 4, 2026 |
| Kimi Code CLI | Kimi's coding agent for the terminal. The command to run it is kimi |
Parameters are the count of numbers inside a model. Like the number of books on a bookshelf, more of them means more knowledge it can hold. But bigger does not mean better at every task.
The K3.1 Pro guide says it can write and run scripts for professional modeling tools without relying on an MCP connection. That means an AI has two ways to drive Blender: scripts and MCP. The difference between the two is in Connecting Blender and AI: 3D work through MCP and scripts. This guide uses both.
Step 1: install
Starting state: Start on Windows where Kimi Code CLI has never been installed.
On Windows, Kimi Code CLI uses Git Bash, which comes with Git for Windows, as its shell (the window that takes commands and runs them). So the official documentation says to install Git for Windows first, before the first run.
Follow along:
- Install Git for Windows (gitforwindows.org).
- Open PowerShell and run the official install script.
irm https://code.kimi.com/kimi-code/install.ps1 | iex
- Open a new terminal window, move to the folder you want to work in, and type
kimi.
The install script downloads the latest version, checks its checksum, and sets up the kimi command so it works from any folder. If you have Node.js 22.19.0 or later, you can also install it with npm install -g @moonshot-ai/kimi-code. If you installed Git Bash somewhere other than the default location, put the full path of bash.exe in the KIMI_SHELL_PATH environment variable.
If you used the older Kimi CLI: The first time you run the new Kimi Code CLI, it finds your old data and asks whether to move it. You can also move it later with kimi migrate. Settings and the MCP server list are moved, but sign-in information is not, so you need to sign in again.
Step 2: sign in
Starting state: Continue from step 1, with the chat screen open after running kimi.
Follow along:
- Type
/loginin the input box and pressEnter. - Choose one of the two.
- Kimi Code (OAuth): Open the link shown on screen on any device, sign in, and approve by entering the code on screen.
- Kimi Platform API key: Enter an API key you got from the Kimi platform.
- To sign out, use
/logout.
OAuth is a way to approve "give this app permission" on a web page where you are signed in, without handing your password to the app. It is like getting only a room key card at a hotel front desk without being given the master key. Which models you can use and how much depends on your plan, so check the official pricing page.
Step 3: prepare the Blender side
Starting state: Start with Blender Lab's official MCP add-on installed in Blender 5.1 or later. Installation is in Installing the official Blender MCP.
Follow along:
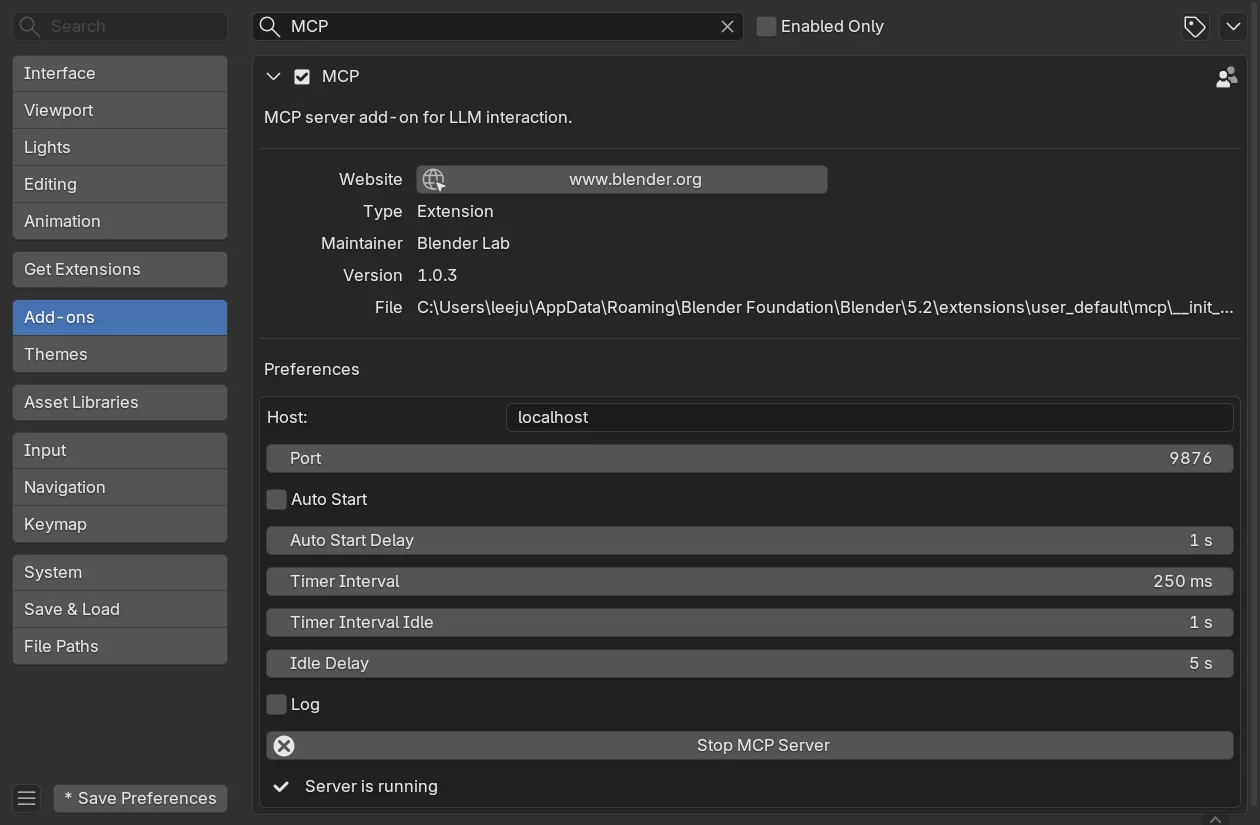
- Start Blender and open Edit ‣ Preferences….
- In Add-ons, search for
MCPand expand the row. - Check that Server is running appears at the very bottom. If not, click Start MCP Bridge Server.
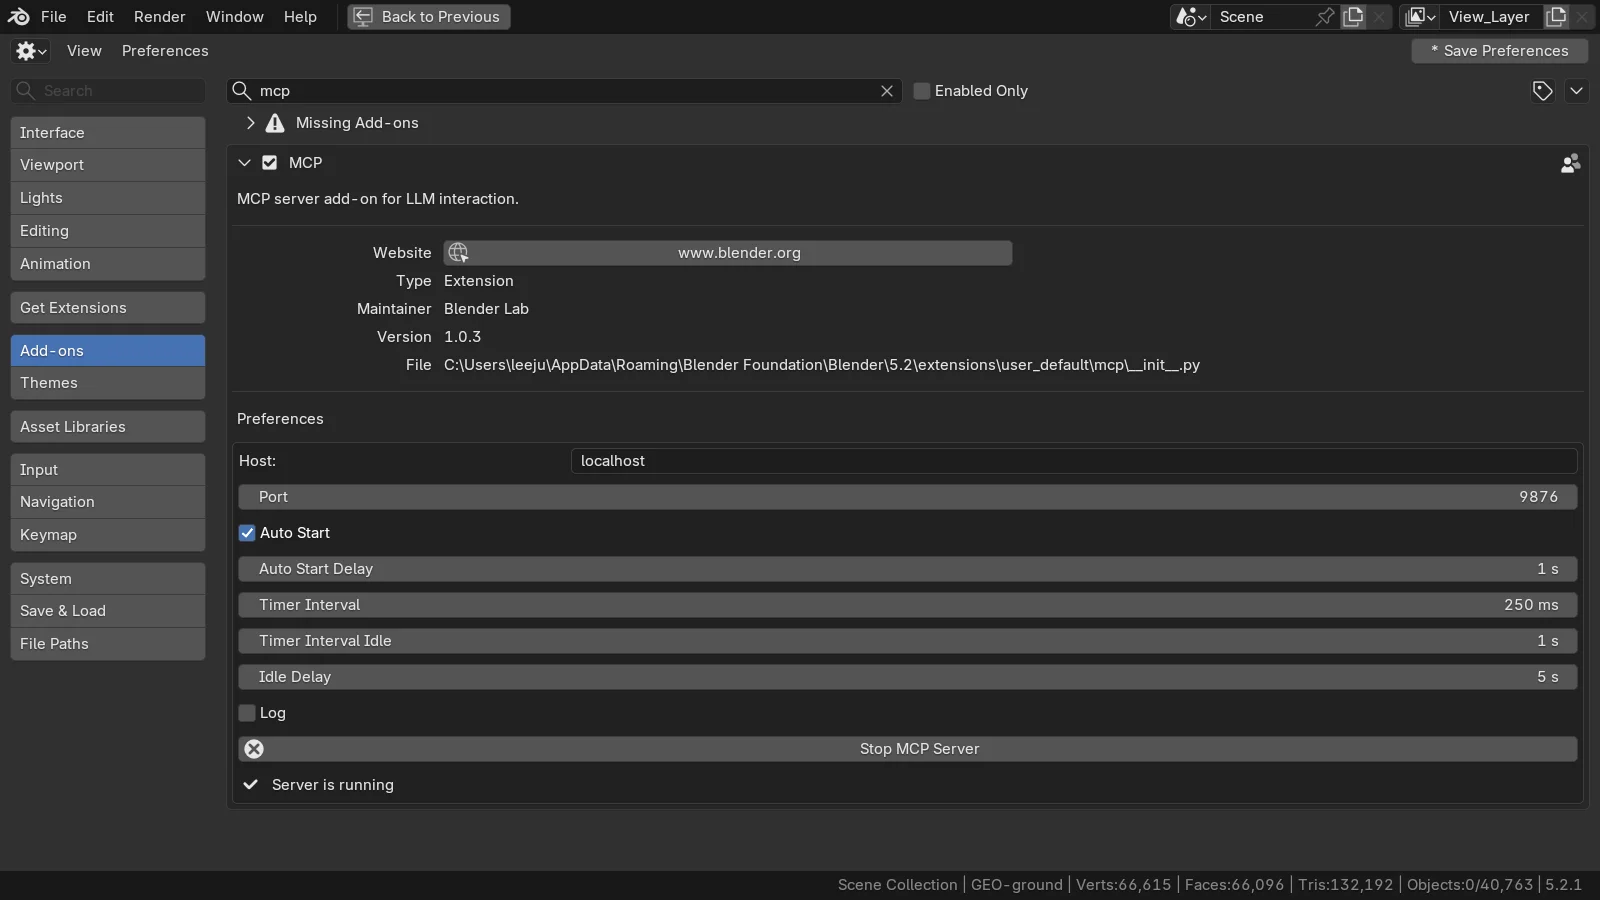
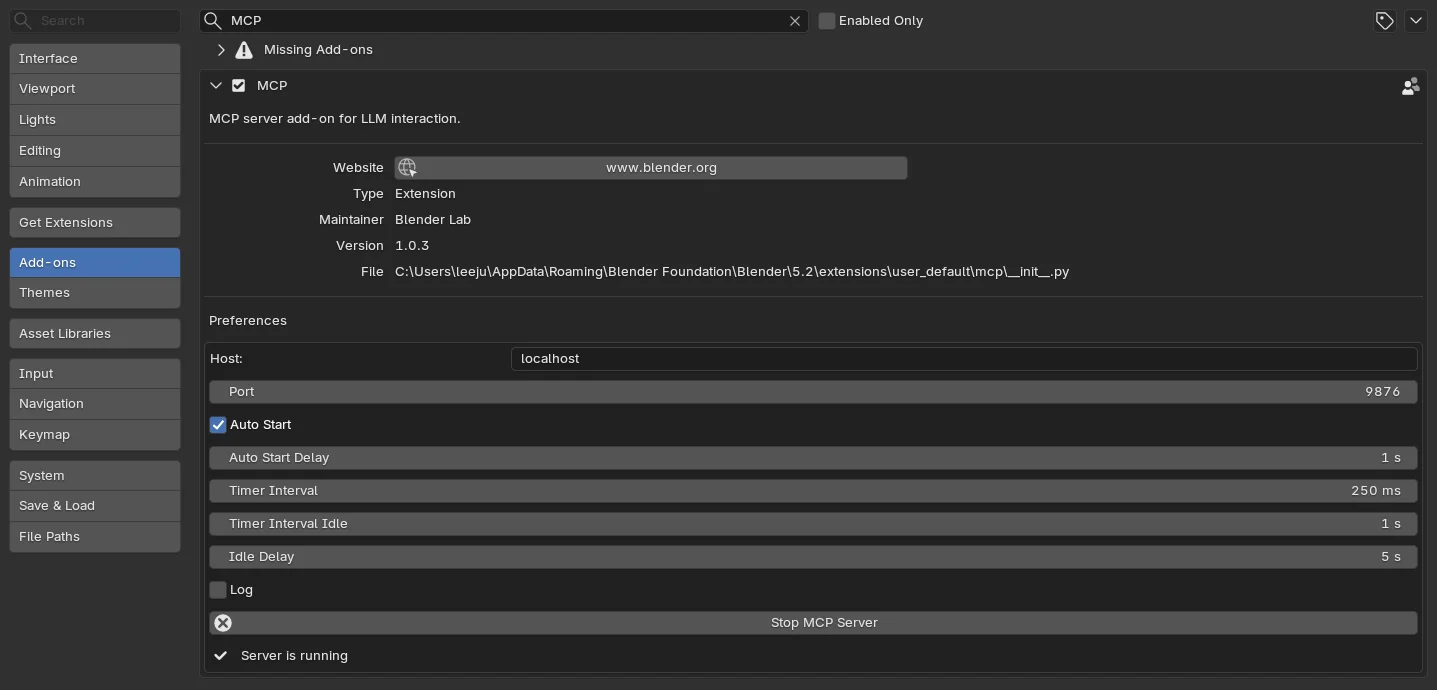 Maintainer Blender Lab, Version 1.0.3, Host localhost and Port 9876, Auto Start on, and Server is running at the very bottom (Blender screenshot)
Follow along (getting the server): The MCP server is a small program that runs outside Blender. It is started with a tool called uv. uv runs a Python program together with the parts it needs, a bit like an assistant cook who fetches the ingredients and sets the dish up for you.
- In PowerShell, install uv with the Windows command from uv's official installation guide.
powershell -ExecutionPolicy ByPass -c "irm https://astral.sh/uv/install.ps1 | iex"
- Open a new PowerShell window and type
uv --version. If one line with a version number appears, it is installed. - In the same window, download the official repository.
cd C:\
git clone https://projects.blender.org/lab/blender_mcp.git
C:\blender_mcp\mcp in the downloaded folder is where the server lives.
Step 4: register Blender in mcp.json
Starting state: Continue from step 3, with Server is running confirmed and the server downloaded.
Kimi Code keeps its list of MCP servers in an mcp.json file. There are two places for it.
| Scope | Location | Use |
|---|---|---|
| Whole user | .kimi-code\mcp.json in your user folder | Shared by all projects |
| One project | .kimi-code\mcp.json in the work folder | Used only in that folder. If a name is the same, this one wins |
Follow along:
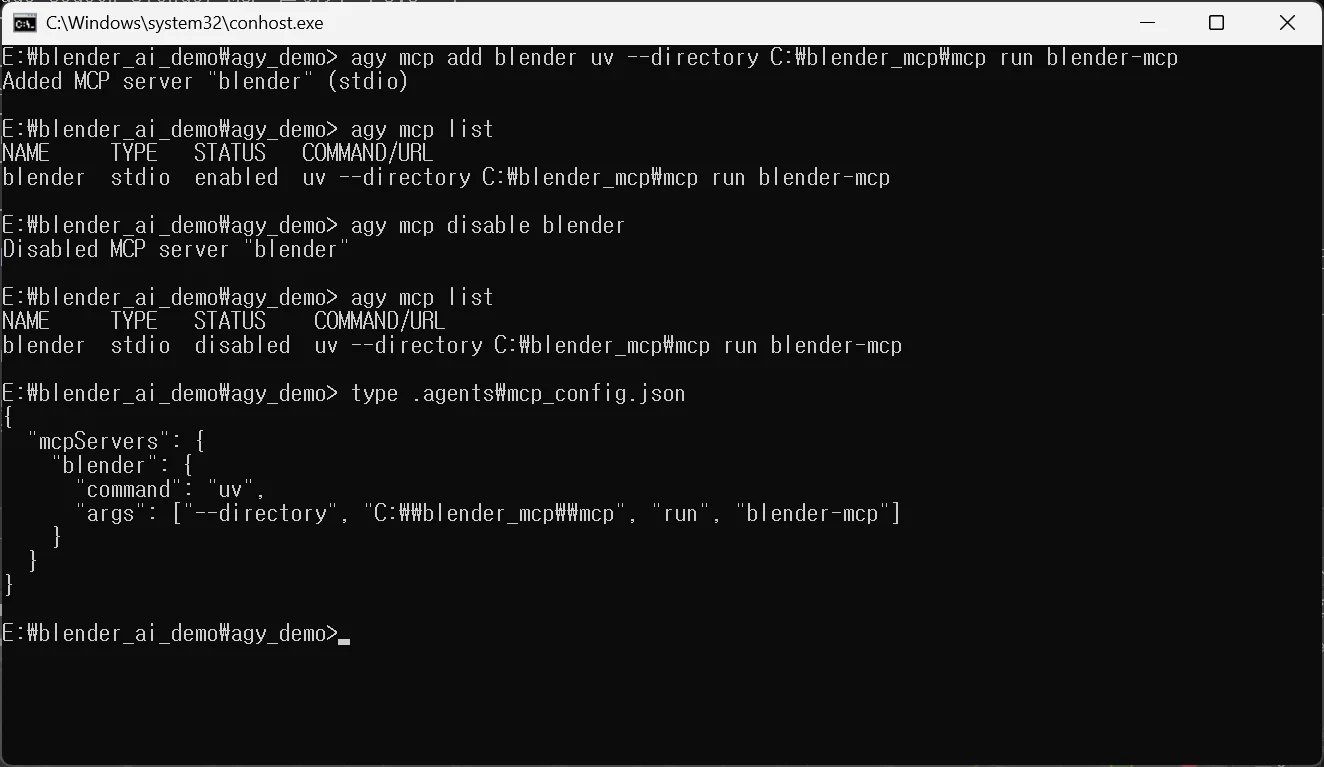
- Open
.kimi-code\mcp.jsonin your user folder with Notepad. If it does not exist, create it. - Put in the content below and save.
{
  "mcpServers": {
    "blender": {
      "command": "uv",
      "args": ["--directory", "C:\\blender_mcp\\mcp", "run", "blender-mcp"],
      "startupTimeoutMs": 60000
    }
  }
}
- Run
kimiagain and type/mcpto check thatblenderis connected.
- When there is a
command, Kimi Code treats this server as one it starts inside the same computer (stdio). - In JSON, write each backslash twice (
\\). With just one, the file cannot be read. startupTimeoutMsis how long to wait (in milliseconds) for the server to start. The default is 30000 (30 seconds). On the first run, uv may take a long time downloading the parts it needs, so it is raised to 60 seconds here.
If you do not want to edit the file by hand, type /mcp-config in the chat screen. You can add, change, and remove servers through a conversation. If you edit mcp.json during a chat, the change does not reach chats that are already open. It applies from the next new chat.
Be careful with mcp.json in project folders. The official documentation warns that servers listed in a project folder's .kimi-code\mcp.json run commands on your computer when a chat starts. If someone else gave you the folder, open this file first and read what it runs.
Step 5: choose a permission mode
Kimi Code has three modes that decide when the AI asks you before doing something.
| Mode | How to enter it | What it does |
|---|---|---|
| Always Ask | The default | Reading happens on its own. Editing files and running commands are asked one by one |
| Ask When Needed | /yolo | Ordinary tool calls run without asking. Sensitive files and risky commands are asked |
| Never Ask | /auto | Handles every approval itself and asks nothing |
The official documentation says MCP tool calls are approved automatically in Ask When Needed mode, and recommends using it only when you fully trust the connected MCP servers. Blender Lab also warns that this MCP server runs AI-generated code in Blender without any safeguards.
So when you first connect Blender, start with the default, Always Ask. When an approval window appears, choose with the arrow keys and press Enter, or refuse with Esc. There is also an option to keep allowing the same kind of call for the rest of the chat. Once you are used to how it works, and only when you work on copies of files, you can think about other modes.
Step 6: add Blender skills
A skill is a folder that bundles an instruction file called SKILL.md with the scripts next to it. Picture a cookbook that comes with both the recipes and the measuring tools. When the AI gets a task, it reads the instructions of the matching skill, then runs the scripts inside to check the result.
These are the folders where Kimi Code looks for skills.
| Scope | Folder |
|---|---|
| Whole user | .kimi-code\skills\ or .agents\skills\ in your user folder |
| One project | .kimi-code\skills\ or .agents\skills\ in the project's top folder |
Here, "the project's top folder" is the nearest folder with a .git folder, found by going up from the work folder. .git is a hidden folder that only appears in folders managed with git. If you work in a folder that does not use git, the project location is not defined, so the skills may not be read. At first, putting them in the whole-user location (.agents\skills\ in your user folder) is the least confusing.
Inside the skills folder, give each skill its own subfolder, and put SKILL.md inside it. If skills you downloaded for another tool are in a folder like .claude\skills\, you need to move them to the folders above, the ones the Kimi Code documentation names, before they are read.
Example: Blender Agent Skills
One of the public Blender skill sets is Blender Agent Skills (MIT license). It has 22 skills, covering modeling, UV, materials, rigging, rendering, export, and checks, and the repository says they were built for Blender 5.2 and later. According to this repository's description, .agents\skills is a location that several agents read in common.
Follow along:
- Download the repository:
git clone https://github.com/EL4CTEO/blender-skills - From the
skillsfolder you downloaded, pick only the skill folders you need and copy them to.agents\skills\in your user folder. To use them only in a project managed with git, copy them to.agents\skills\in that project's top folder. At first, two are enough:blender-core(the starting point) andblender-asset-qa(checks). - Before copying, skim the scripts inside the skills once. Check whether there is code that goes online or deletes files, and what options it starts Blender with.
- Run
kimiagain and call a skill by putting its name at the very start of the input box, as in/skill:blender-asset-qa. You can write the task after the name, with one space. The official example also puts one space after the name, as in/skill:git-commits fix concurrency issue in login endpoint.
If you run the repository's install script as it is, by default it installs everything into the whole-user folders (.claude\skills, .agents\skills). To use them in only one project, copying just what you need by hand, as above, is easier to keep tidy.
Step 7: build, check, and fix
Starting state: Start after finishing steps 4 and 6, with an empty scene open in Blender as a copy file.
The most common accident when you hand a 3D model to an AI is a part that has come off the body and floats in the air. It looks attached from one side of the screen, but from another angle it floats. So always include a step that checks with numbers after building.
Follow along: Hand over the task in three parts, for example like this.
- "Make a simple airplane blockout with a cylinder body, wings, and a tail plate. Give the parts English names."
/skill:blender-asset-qa Check the parts you just made, and show the errors and warnings in a table.(Start this line at the very beginning of the input box, with one space after the skill name.)- "Fix only the errors and check again. Ask me whether to fix the warnings."
A blockout is a rough model that only sets size and placement with simple shapes such as boxes and cylinders. It is like the cardboard model made before a building is built.
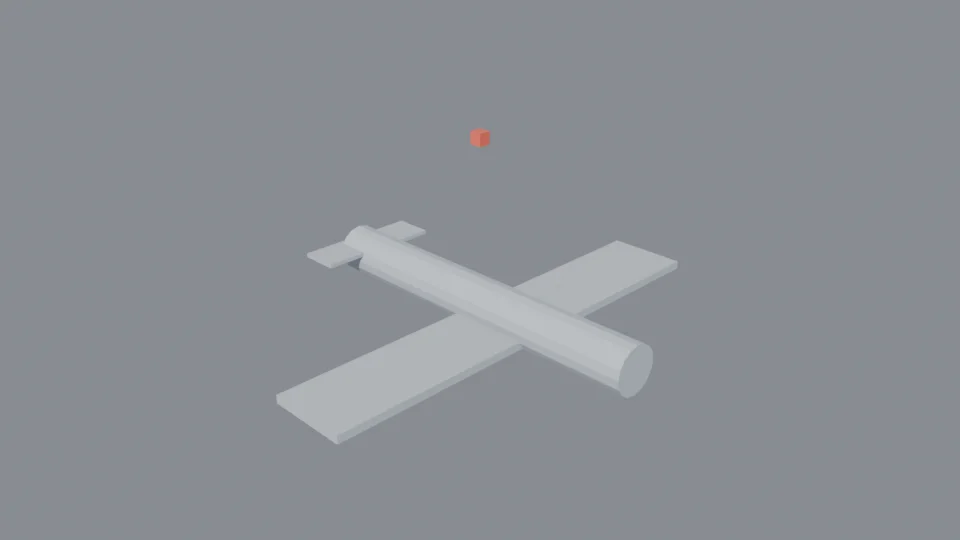
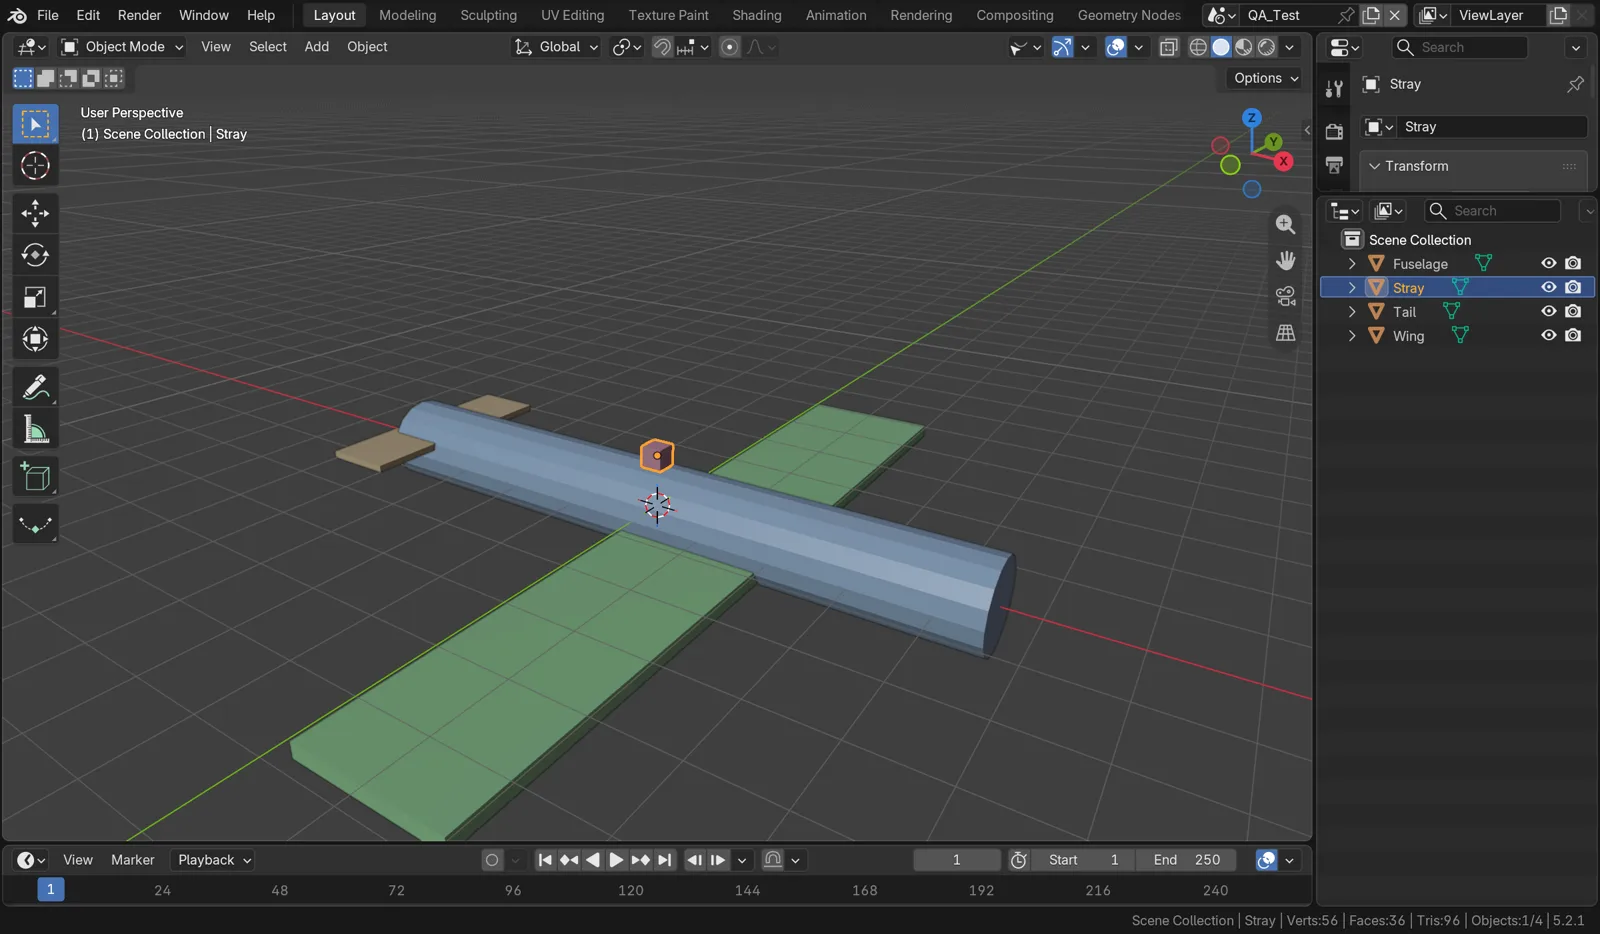
The two pictures below show what the check script catches. These pictures were not made through Kimi Code. They were taken after running the check script from the skill directly in Blender. A small box (Stray) was floated above the body on purpose before checking.
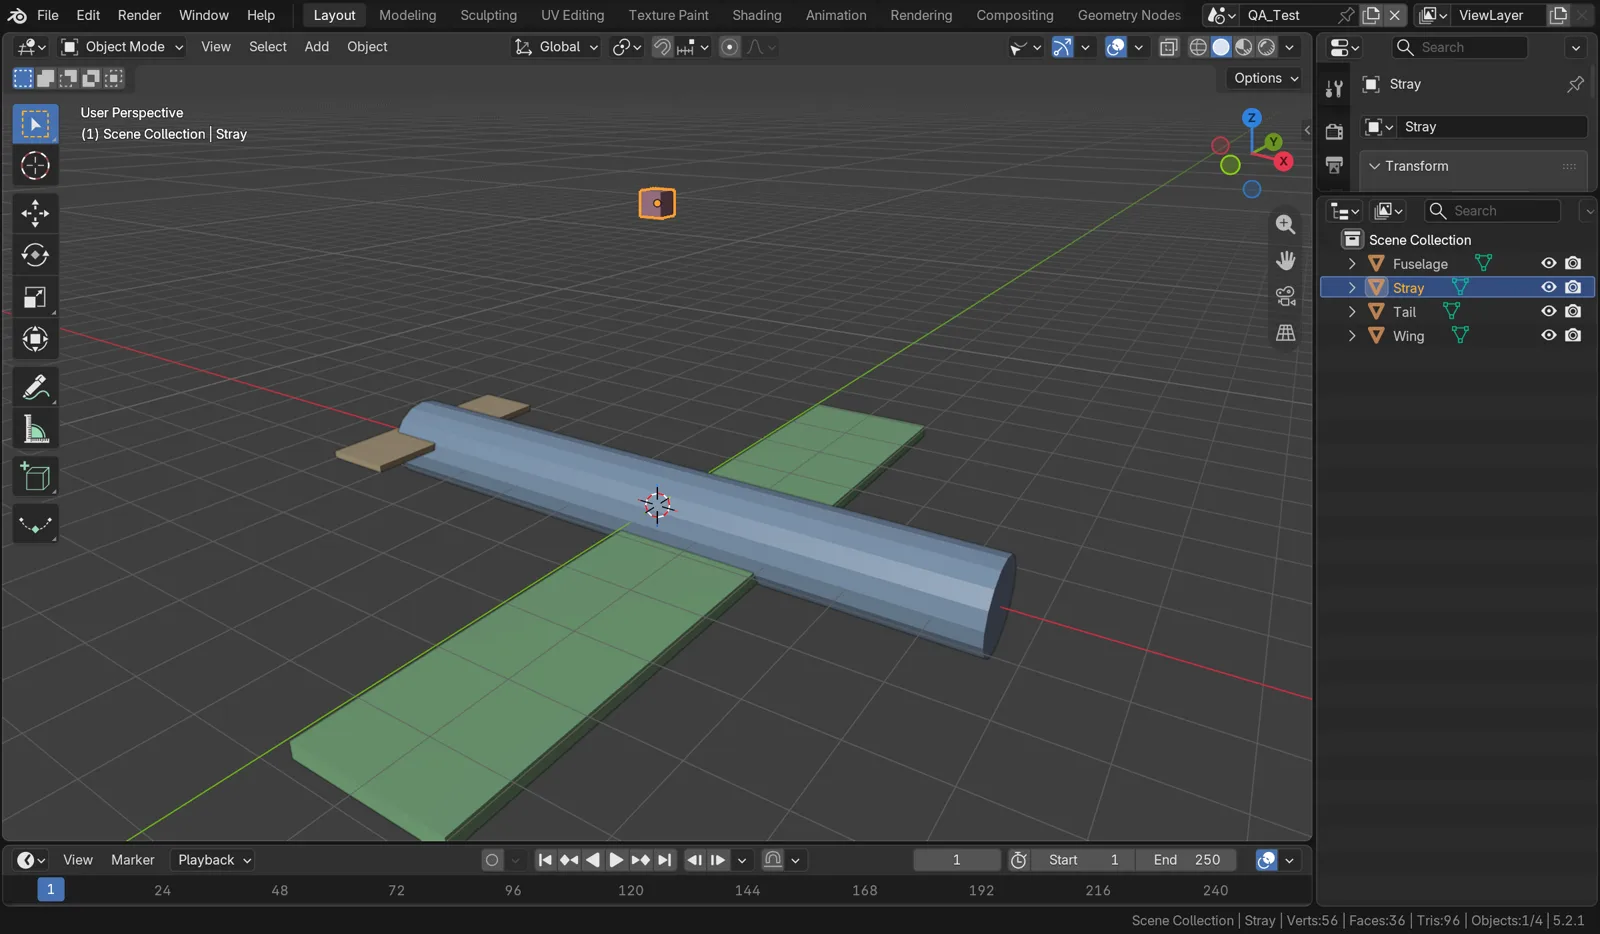 Before the check. The small box Stray floats in the air above the body. The picture is Solid view with a different color for each object (Blender screenshot)
In this state, the check script answered that it did not pass (pass: false) and gave one line of error.
floating/detached part in Stray (8 verts at [0.0, 0.0, 4.0])
It means "the part called Stray has come off and is floating, with 8 points at a height of 4.0 m." There were also seven lines of warnings: parts with no material, wings and tail whose Scale values were not applied, and the bottom of the model not sitting at height 0. At the blockout stage you do not need to fix these warnings right away, so a person was left to decide whether to fix them.
 After the fix. Stray was lowered to touch the top of the body, and the check run again gave 0 errors, pass: true (Blender screenshot)
Follow along: When you get the check result, look at it in this order.
- See whether
errorsis empty. If there is even one, ask "Fix only the errors and check again." - Read
warningsline by line, decide whether to fix each now or later, and tell the AI. - Even if the numbers pass, turn the model around in the 3D Viewport and look from several angles. The check script cannot catch everything, such as odd proportions or parts cutting into each other.
Common mistakes and fixes
| Symptom | Cause | Fix |
|---|---|---|
On Windows, kimi does not work properly from the first run | Git for Windows is missing or installed elsewhere | Install Git for Windows, or put the bash.exe path in KIMI_SHELL_PATH |
blender is not in /mcp | The chat was opened before editing mcp.json | Close the chat and run kimi again |
blender still is not there after editing mcp.json and restarting | A JSON syntax error (a single backslash, a missing comma) | Change \ in the path to \\, and check the brackets and commas again |
| blender shows a connection failure | Blender is closed or the add-on server stopped | Start Blender and check Server is running under MCP in Preferences |
Blender skills are not in the /skill: list | The skills are in a folder Kimi Code does not read, or in the project location of a folder without .git | Move them to .agents\skills\ in your user folder and run it again |
| The scene changed without asking | Ask When Needed or Never Ask mode | Type /permission to open the list of permission modes, and choose Always Ask there. Then reopen the file you saved at an earlier step |
In one line
Git for Windows first, one line of install script, /login, one Blender paragraph in mcp.json, skills in .agents\skills\, and Always Ask at first. Check the model you built by reading the numbers from the check script, then look once more on screen.
Read next
- Installing the official Blender MCP
- Connecting the official Blender MCP to Claude Code
- Working in Blender with Codex and GPT-6 Astra
- Connecting Blender and AI: 3D work through MCP and scripts
- What is MCP? A USB-C-like standard for plugging tools into AI
- Claude, ChatGPT, Gemini, and US and Chinese AI services compared: price, privacy, and how to choose
References
- Kimi Code CLI documentation (getting started, MCP, permission modes, skills, changelog): https://moonshotai.github.io/kimi-code/
- Kimi API platform, Kimi K3.1 Pro Quickstart: https://platform.kimi.ai/docs/guide/kimi-k3-1-pro-quickstart
- Blender Lab, Blender MCP Server: https://www.blender.org/lab/mcp-server/
- Blender Lab, blender_mcp repository: https://projects.blender.org/lab/blender_mcp
- Blender Agent Skills repository: https://github.com/EL4CTEO/blender-skills
- uv, Installation: https://docs.astral.sh/uv/getting-started/installation/
- Pictures: Blender 5.2 screenshots (official MCP add-on 1.0.3, the check script from Blender Agent Skills 1.1.0)